Instruction Manual
Instruction Manual
39
8.2
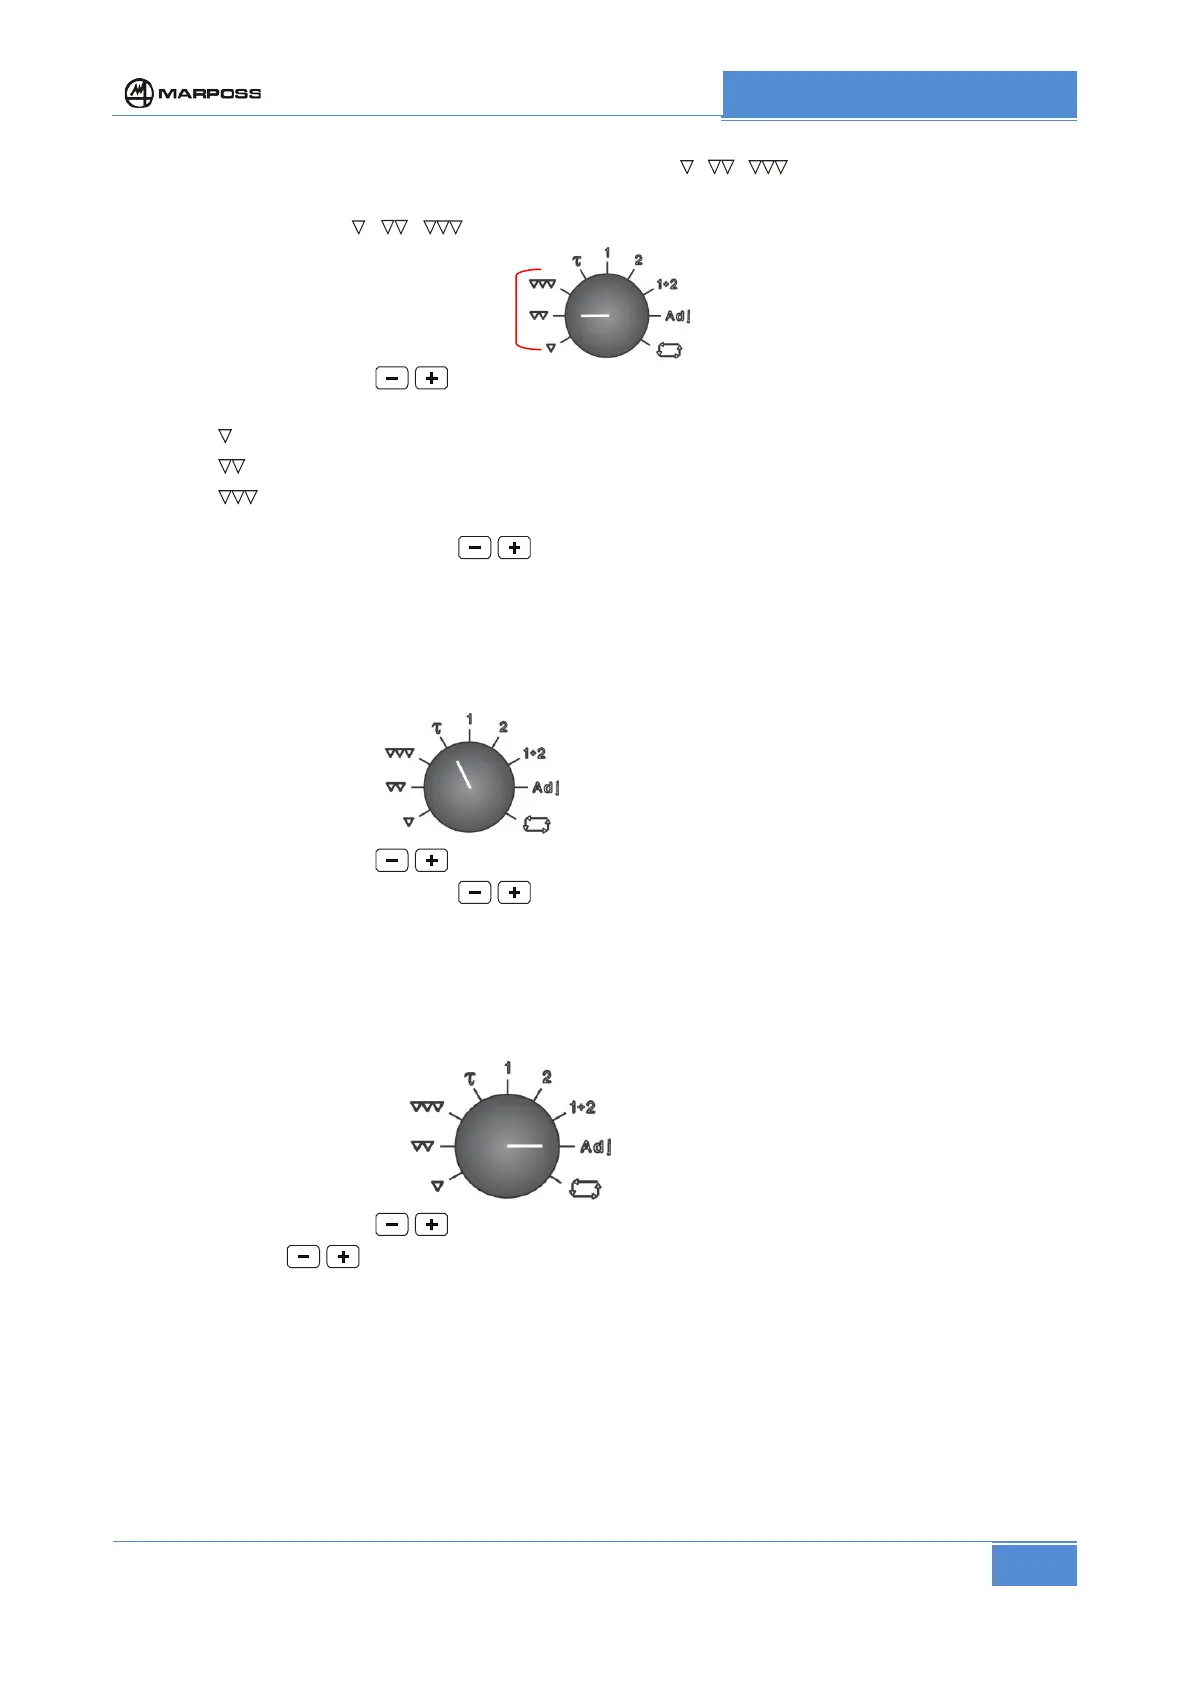
Setting the controls trigger point ( , , )
a) Set selector to position , , corresponding to the control to be set.
b) By means of pushbuttons bring the needle of the readout meter to the desired value
The controls that can be set are:
- position
: 3
rd
control – range 0 to +500 µm - resolution 2 µm (0 to .020” resolution .00010”)
- position
: 2
nd
control – range 0 to +500 µm - resolution 2 µm (0 to .020” resolution .00010”)
- position
: 1
st
control – range 0 to +250 µm - resolution 1 µm (0 to .010” resolution .00005”)
The control relevant to the final dimension (zero control) is pre-set to zero.
Press simultaneously the pushbuttons
to reset the value of selected control.
8.3
Setting the delay time (
)
Setting of delay time between the Start Cycle of machining and the enabling of gauging system (controls
enabling).
The delay time can be set on the readout meter from 0 to 50 seconds (resolution 0.5 seconds).
a) Set selector 5 to position
b) By means of pushbuttons bring the needle of the readout meter to the desired value.
Press simultaneously the pushbuttons
to reset the value of delay time.
8.4
Setting the zero correction value (Adj)
The value of the measurement zero correction can be set on the readout meter within the range +/-100µm
(+/-.004”) or +/-500µm (+/-.020”) based on the configuration of the electronic unit (see 2.1).
a) Set selector 5 to position Adj.
b) By means of pushbuttons bring the needle of the readout meter to the desired value.
Press pushbuttons
simultaneously to reset the correction.