© 2023 Maxeon Solar Technologies, Ltd. All rights reserved. | 549549 Revision A - October 2023
Specications included in this document are subject to change without notice
15
Installation steps:
Note: The power supply needs to be turned off during wiring / installation
1. Wiring
1
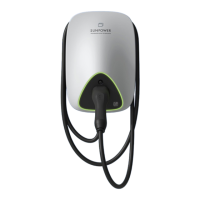
Because the wiring position of this product is on the back, the wiring must be comple-
ted before xing the charging station on the wall. First install the sealing strip, as shown
in Figure 3.
2
Take out the cable inlet rubber plug from the spare parts package, the sealing points of
network cable shall be cut before use if network cable need to be connected, as shown
in Figure 4.
Figure 3 Installing sealing strip Figure 4 Cutting cable inlet rubber plug
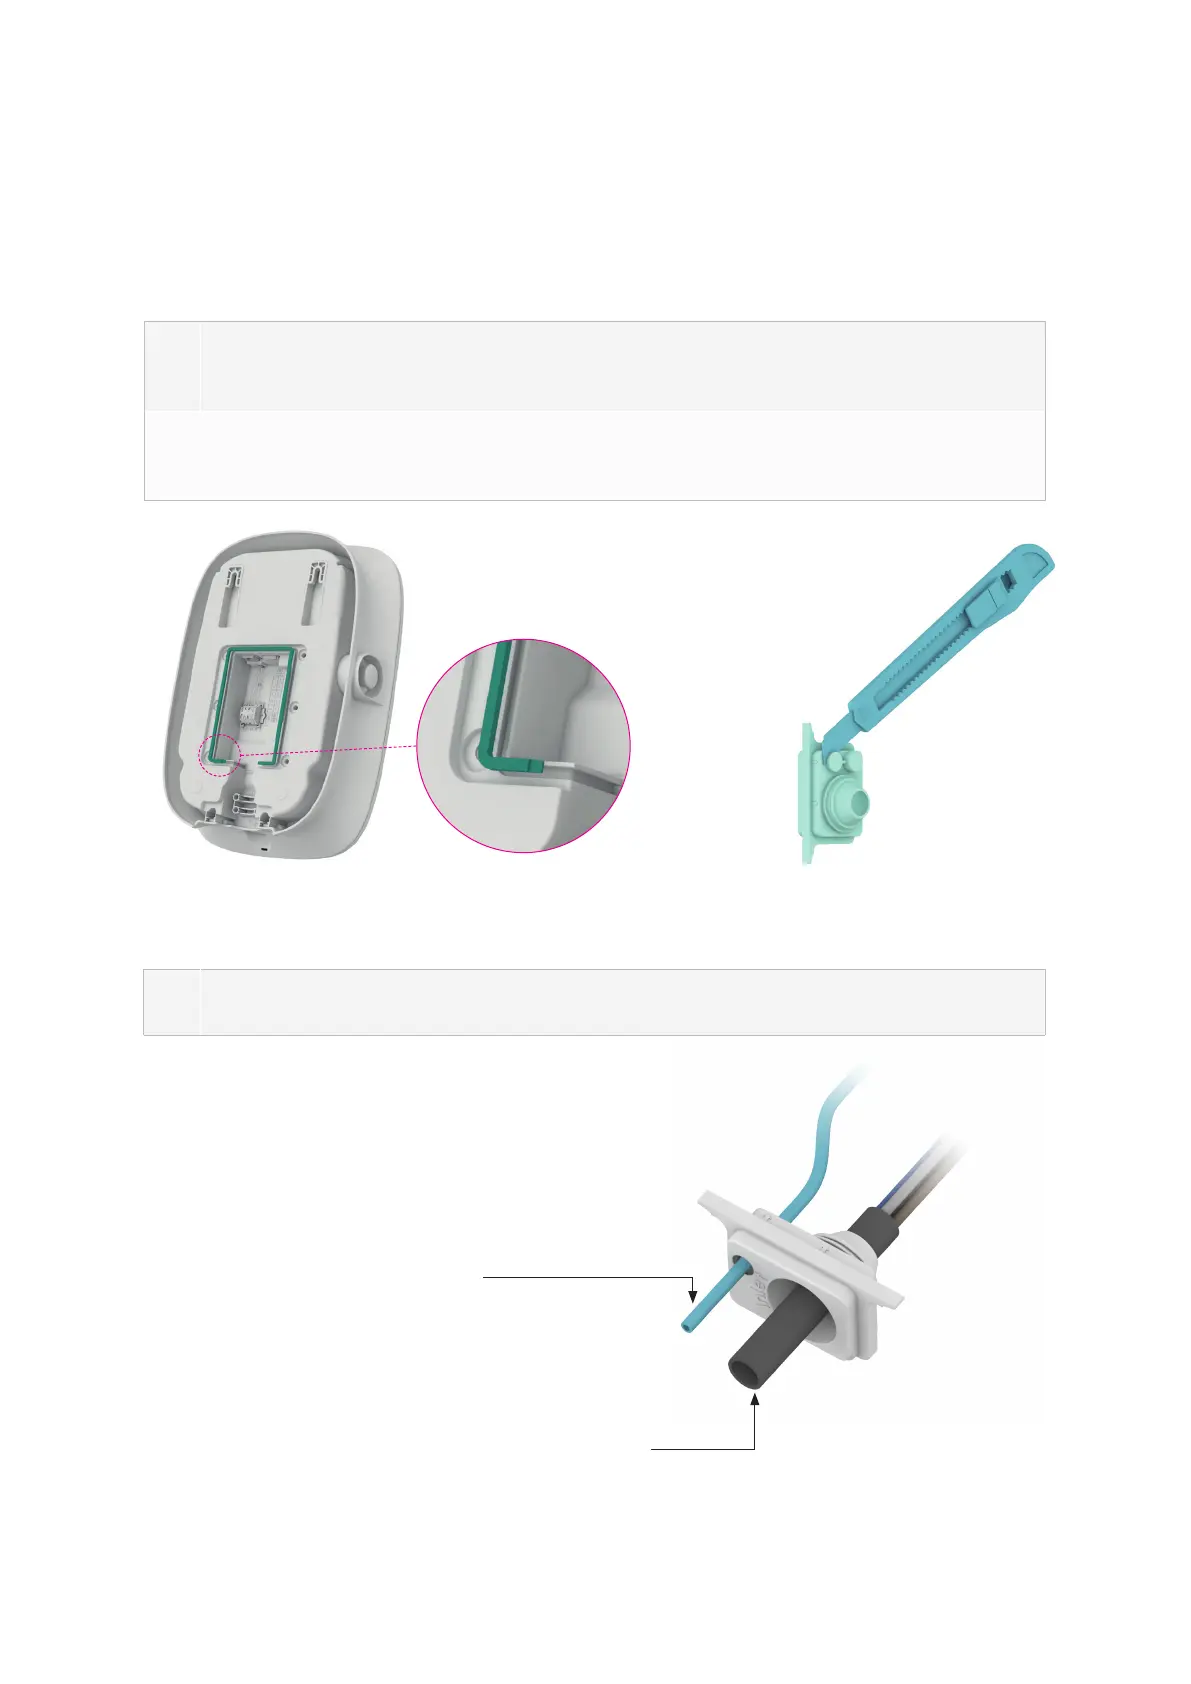
3
Route the power cable through the sealing rubber plug. If network cable needs to be
connected, please route them through it, as shown in Figure 5
Figure 5 Route cable through the cable inlet rubber plug
Network cable CAT5/CAT6
(if Ethernet communication is needed)
Power cable 5x 2.5mm
2
- outer diameter 13 - 18mm
 Loading...