© 2023 Maxeon Solar Technologies, Ltd. All rights reserved. | 549549 Revision A - October 2023
Specications included in this document are subject to change without notice
18
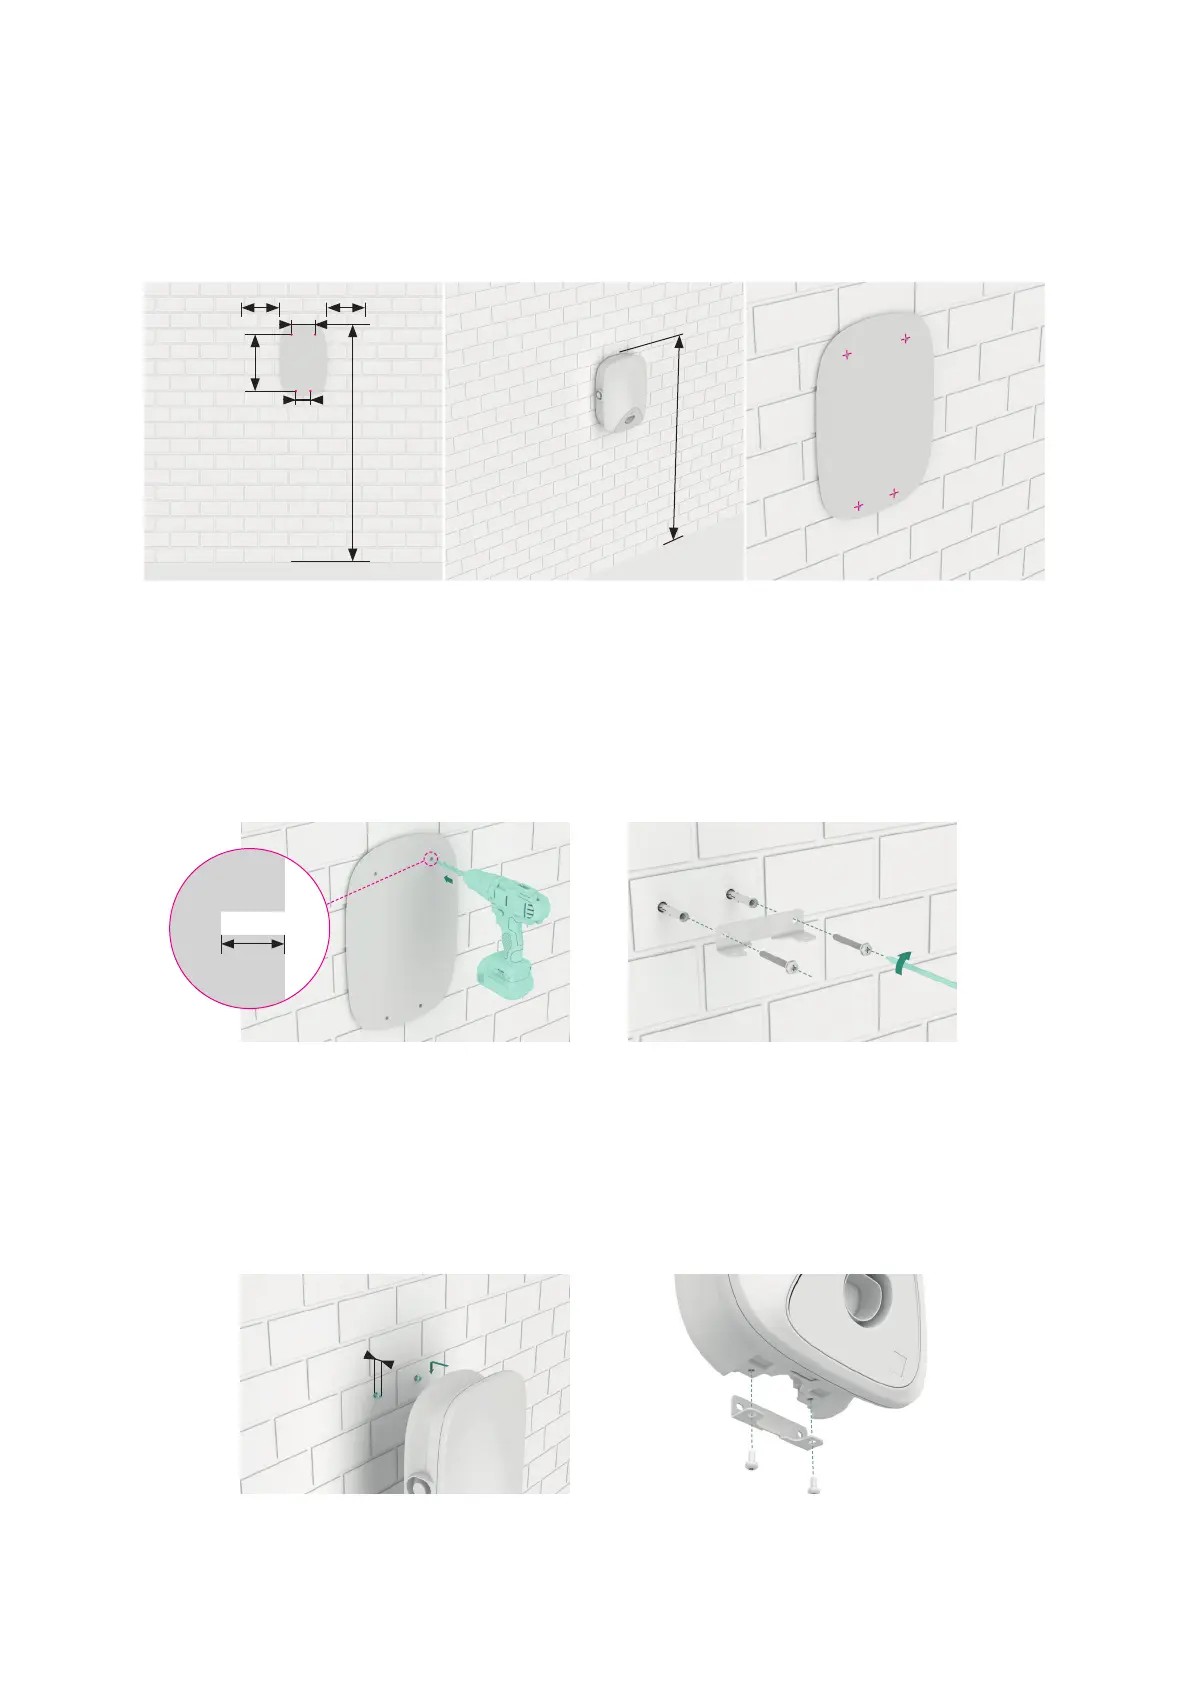
1. Conrm the installation position. A distance of 1-1.3m between the top of charging stati-
on and the ground is recommended. Conrm the levelness of template with a level. Then
mark the drill holes with a pencil, as shown in Figure 13. A maintenance distance or at least
200mm is recommended on each side of the charger, as shown in Figure 13
Figure 13 Marking drill holes
2. Drill holes at the marked position with a Ø8 drill. The effective length of drill is not less than
80mm, and the drilling depth is 60mm, as shown in Figure 14.
3. Insert Ф8*60 plastic expansion tubes into the four mounting holes and x the mounting
bracket to the two mounting holes below and two M6*50 self-tapping screws, as shown in
Figure 15; conrm the levelness with a spirit level ruler after xing the mounting bracket.
Figure 14 Drilling holes on the wall Figure 15 Fixing mounting bracket
4. Install M6*50 self-tapping screws in the two holes on the top. The protruding length of
screw from the wall is 7mm. Then hang the charging station on the two self-tapping screws
through the two concave buckles on the back, as shown in Figure 16.
5. Fix the bottom of charging station on the mounting bracket by using two M6*12 screws, as
shown in Figure 17, Then check the levelness of charging station with a level.
Figure 16 Hanging charging station Figure 17 Fixing bottom of charging station
80
126
303.5
Max 1236mm
from the ground
Max 1.3m
4x 8mm
diameter holes
4x 8mm
diameter
holes
7
Screw head protrudes 7mm
60
PH3
200 200
 Loading...