Section 5 - Maintenance
90-879172181 eng FEBRUARY 2011 Page 107
3. Pump grease into the grease fitting for the slip‑joint until grease is expelled from the pressure relief hole in the cap plug.
a - Grease fitting
b - Cap plug
c - Expelled grease
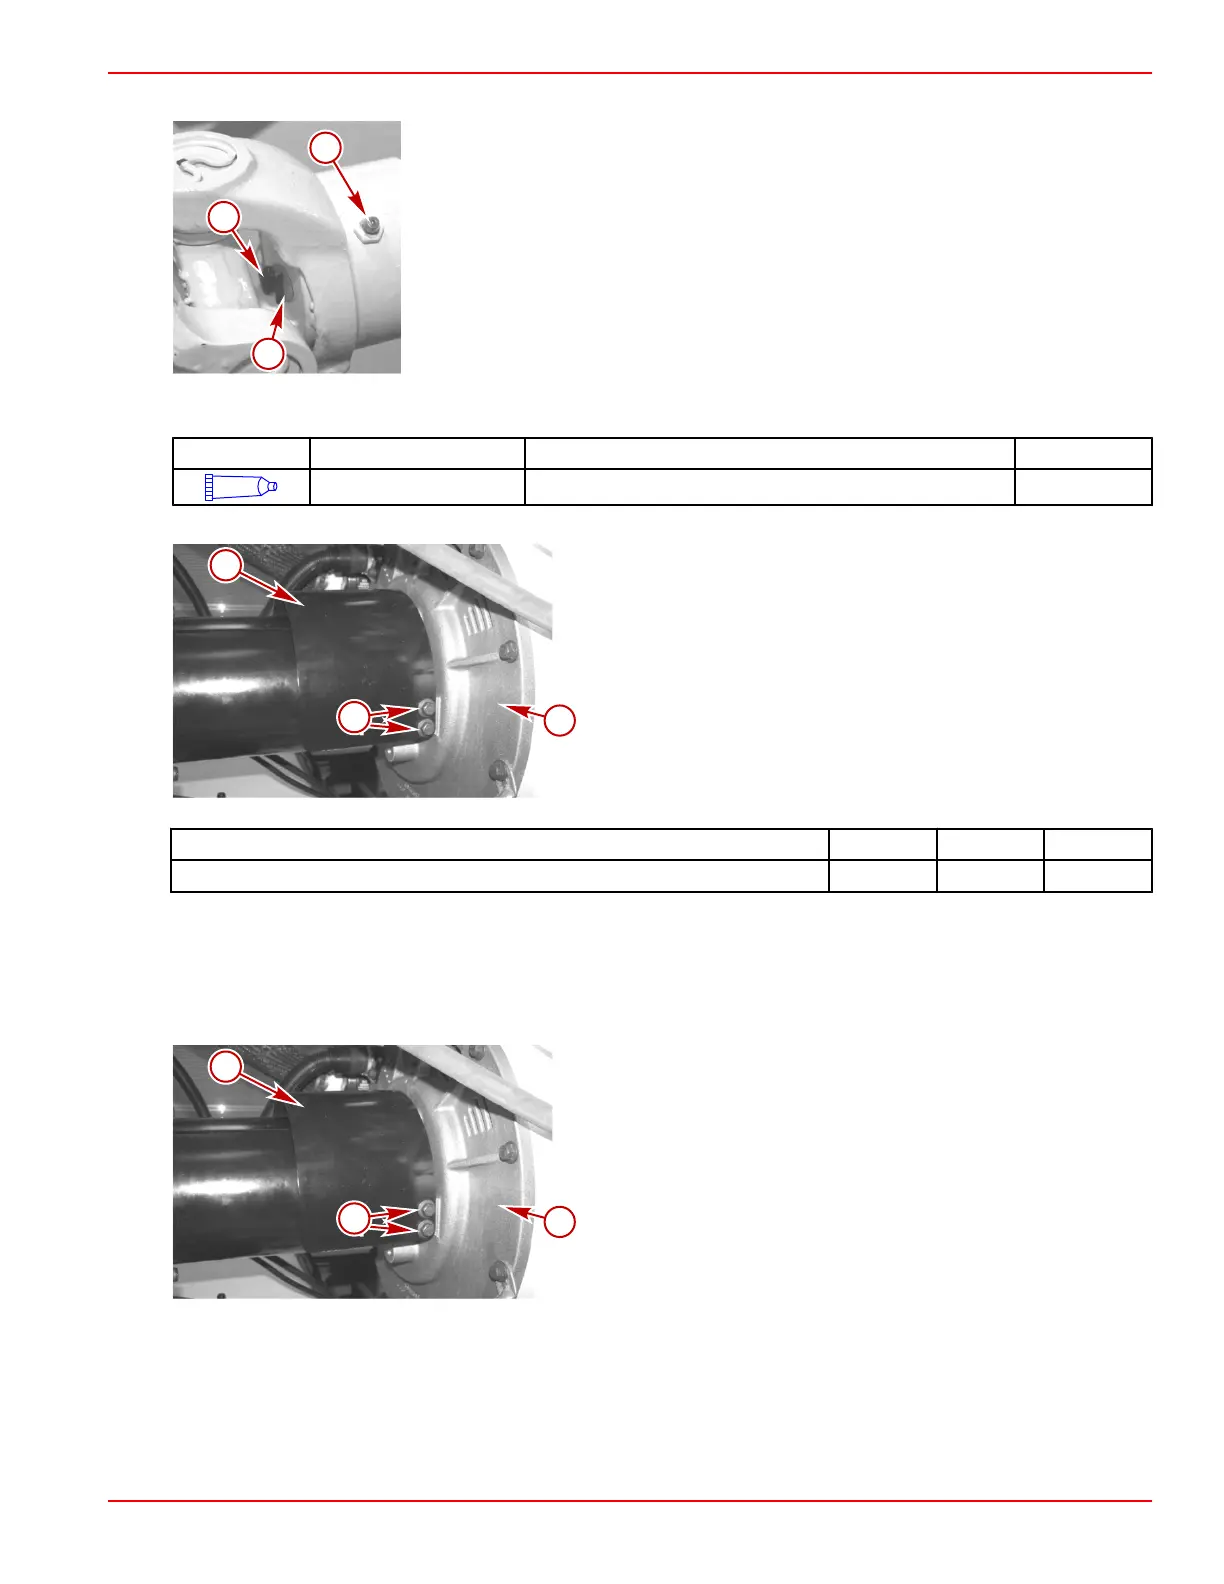
4. Apply adhesive to the threads of the flange‑head screws for the driveshaft shield on the engine end.
Tube Ref No. Description Where Used Part No.
10
Loctite 277 Driveshaft shield retaining screw or nut Obtain Locally
5. Install the driveshaft shield on the engine end using the flange‑head screws as shown. Tighten the screws to specification.
a - Top shield
b - Driveshaft shield to engine screw
c - Engine end
Description Nm lb. in. lb. ft.
Driveshaft shield screw—engine end 36 – 27
Driveshaft U‑Joints
NOTE: In addition to the task and interval for inspecting and lubricating the driveshaft U‑joints every 250 hours or one year
(whichever occurs first) on all models, you must replace the U‑joints every 2000 hours or four years (whichever occurs first) on
QSC models. Contact your Cummins MerCruiser Diesel Repair Facility for information on the nearest driveshaft service location.
1. Remove the driveshaft shield on the engine end.
a - Driveshaft shield
b - Screw (two on each side)
c - Engine end