3 Removal and Disassembly
8
Meritor Maintenance Manual MM-15103 (Issued 07-17)
Figure 3.4
5. Install a cover over the open end of each axle assembly hub
where an axle shaft was removed.
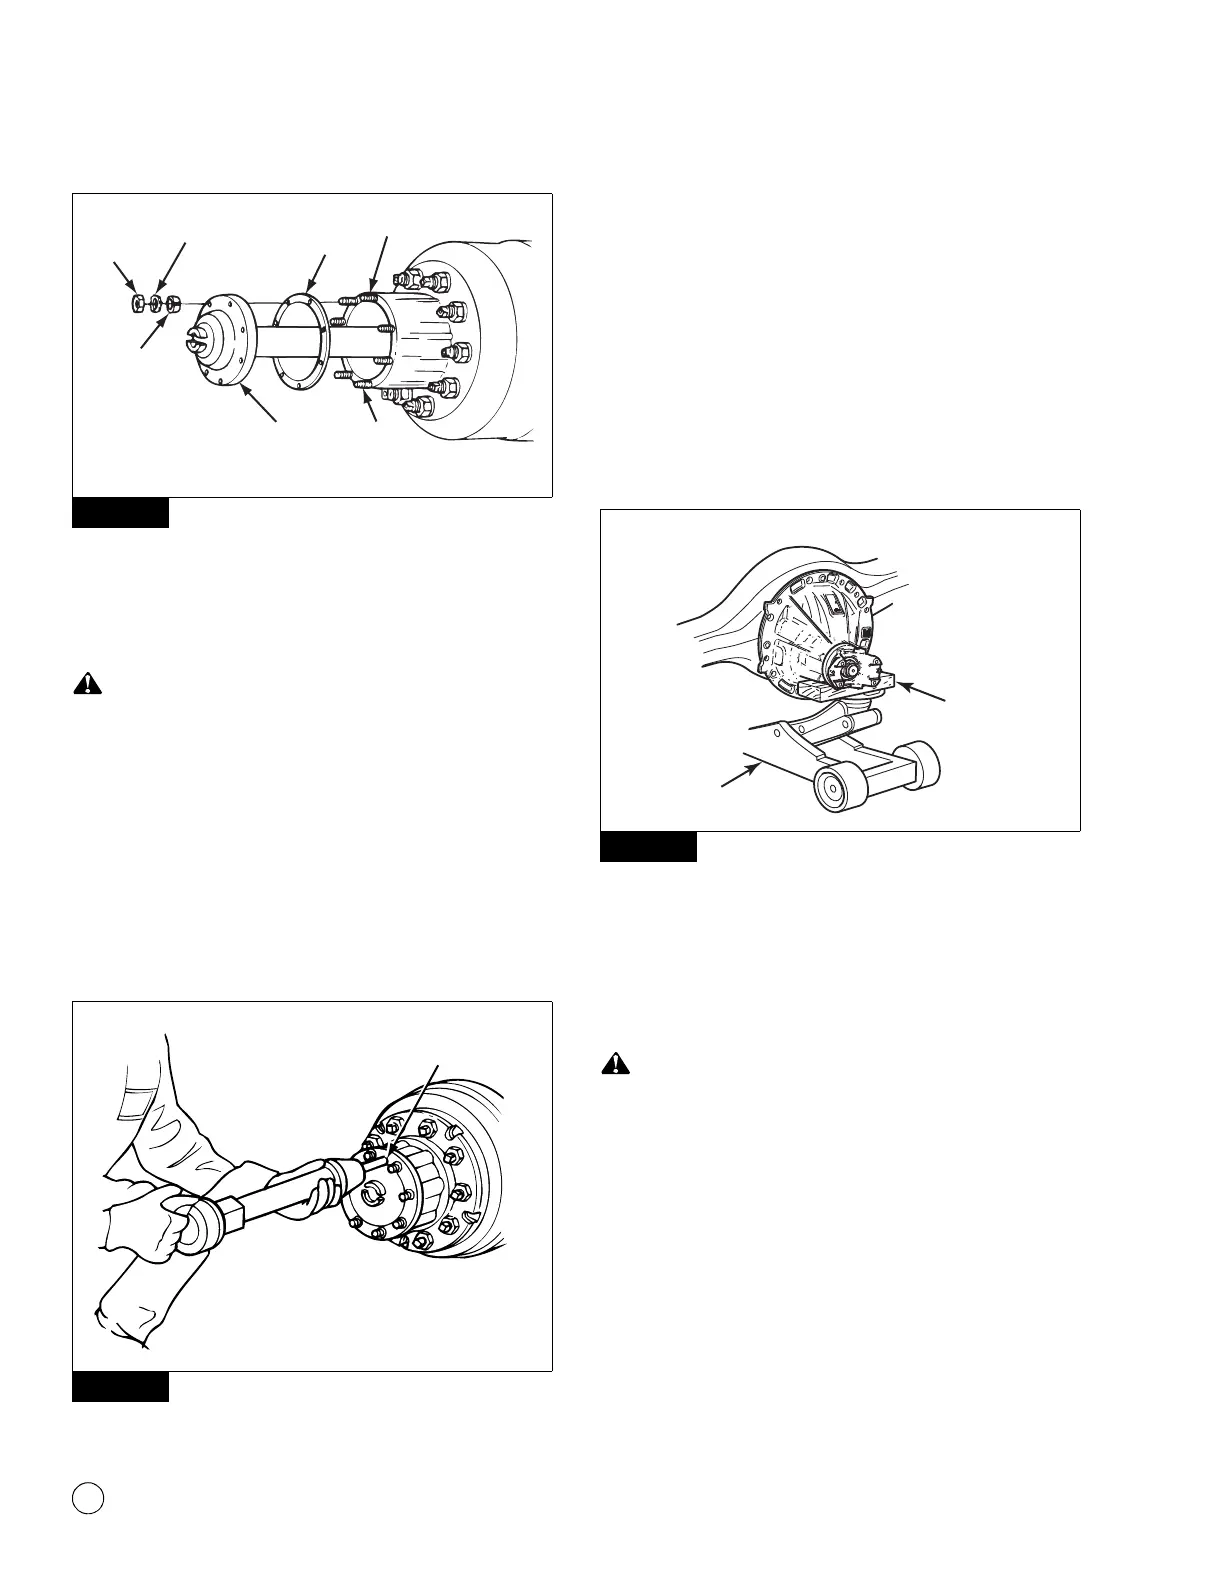
Air Hammer Vibration Method
Do not use a chisel or wedge to loosen the axle shaft and
tapered dowels, which can damage the axle shaft, gasket and
seal, and axle hub.
1. Use a round hammer bit and an air hammer to loosen the
tapered dowels and axle shaft.
2. Place the round hammer bit against the axle shaft between the
hub studs. Operate the air hammer at alternate locations
between the studs to loosen the tapered dowels and axle shaft
from the hub. Figure 3.5.
Figure 3.5
3. Mark each axle shaft to identify it before you remove it from the
axle assembly.
4. Remove the tapered dowels. Separate the axle shaft from the
main axle hub assembly. Figure 3.4.
5. Install a cover over the open end of each axle assembly hub
where an axle shaft was removed.
Differential Carrier from the Axle Housing
1. Place a hydraulic roller jack under the differential carrier to
support the assembly. Figure 3.6.
Figure 3.6
2. Remove all but the top two carrier-to-housing capscrews or
stud nuts and washers.
3. Loosen the top two carrier-to-housing fasteners, but leave
them attached to the assembly. The fasteners will hold the
carrier in the housing.
Use a brass or synthetic mallet for assembly and disassembly
procedures. Do not hit steel parts with a steel hammer. Pieces
of a part can break off. Serious personal injury and damage to
components can result.
4. Loosen the differential carrier in the axle housing. Use a leather
mallet to hit the mounting flange of the carrier at several
points.
5. After the carrier is loosened, remove the top two fasteners.
Figure 3.4
Figure 3.5
1002581d
TAPERED
DOWEL,
IF EQUIPPED
GASKET
STUD
HUBAXLE
SHAFT OR
FLANGE
STUD
NUT
WASHER
ROUND HAMMER BIT
BETWEEN HUB STUDS
1002987a
Figure 3.6
WOOD
BLOCK
ROLLER
JACK
4011956a