4 Prepare Parts for Assembly
20
Meritor Maintenance Manual MM-15103 (Issued 07-17)
Prepare the Differential for
Reassembly
1. Use a wire brush to remove any hardened adhesive material
from the fasteners.
2. Clean the oil and dirt from the outer diameters of the bearing
cups and bearing bores in the carrier and bearing caps. There
is no special cleaning required.
3. Apply axle lubricant to the bearing cones and the inner
diameters of the bearing cups of the main differential. Do not
get oil on the outer diameter of the bearing cup and do not
permit oil to drip on the bearing bores of the carrier.
Prepare the Carrier and Axle Housing
for Installation
1. Remove all debris from inside the housing.
When you clean the silicone from the mounting surfaces, use a
rotary tool with a mild, non-abrasive pad and keep it
perpendicular to the housing and carrier face. Take care to
ensure you do not remove the base housing flange material.
Use care especially at the 6 o’clock position where most leaks
occur and where there is the least amount of housing and
carrier surface area. A leak can result in damage to
components.
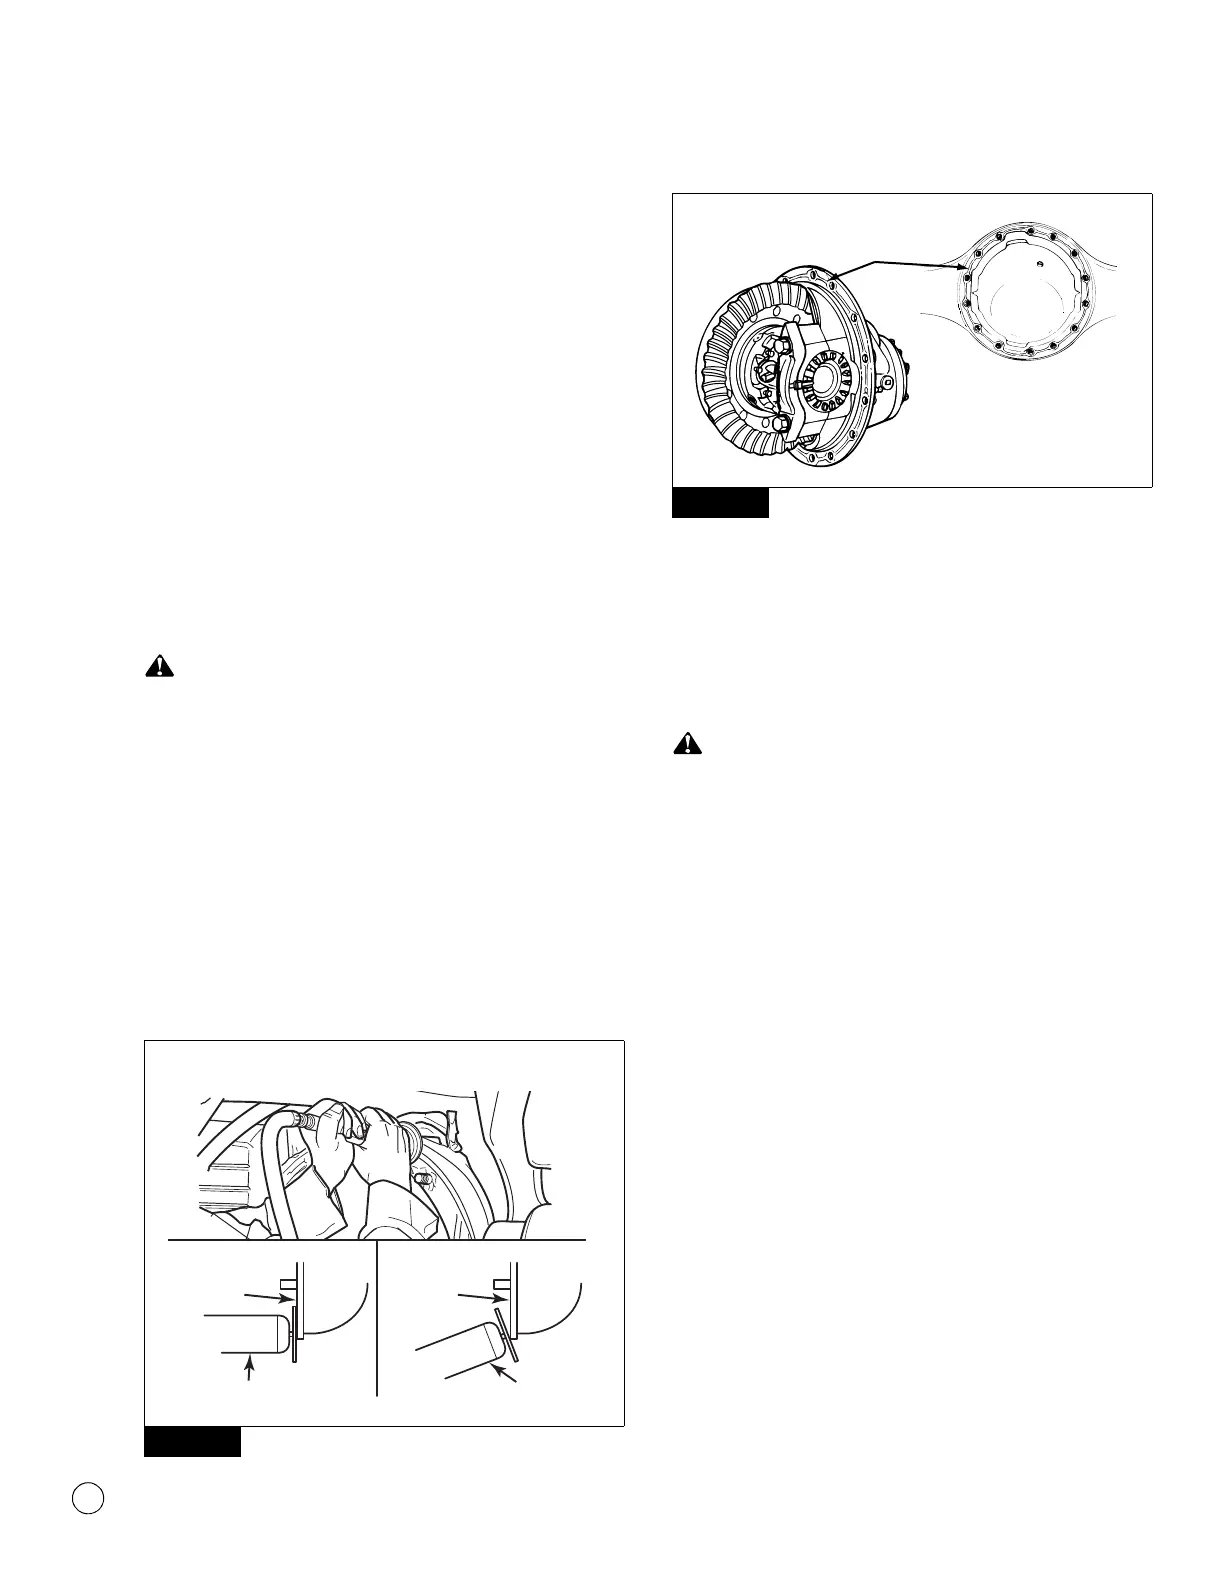
2. Use a rotary tool with a mild, non-abrasive pad to clean all
silicone residue from the housing and carrier faces. Figure 4.9.
Surfaces must be clean, dry and free of contaminants. The
surfaces must not be oily to the touch. Figure 4.10.
Figure 4.9
Figure 4.10
3. Remove metal filings from the magnets inside the housing.
4. Use solvent to clean the inside of the housing.
5. Use Loctite
ODC Free cleaner or brake cleaner to clean the
housing and carrier faces.
6. Dry the housing and carrier faces.
New capscrew kits have blue Dri-Loc
STS threadlocker, an
equivalent to Loctite
242 threadlocker, applied to the
capscrews. Do not remove the blue Dri-Loc
STS threadlocker
from the capscrews. Damage to components can result.
7. If you reuse the carrier-to-housing capscrews, use a rotary
wire brush to remove any threadlocker material and clean the
capscrew threads. Use a clean cloth to wipe the threads.
8. Use a tap to clean the internal threads in the housing.
Applying Adhesive and Silicone Gasket
Material
NOTE: The following silicone gasket products or equivalent can be
used for Meritor components.
앫 Loctite
Ultra Grey Adhesive/Sealant number 18581
앫 Meritor part number 2297-H-7054 gasket material. To obtain
this gasket material, refer to the Service Notes page on the front
inside cover of this manual.
1. Use a tool with a flat blade, if required, to remove all old gasket
material from surfaces. Figure 4.11.
Figure 4.9
4007816a
Clean the housing face with a rotary tool and a mild,
non-abrasive pad. Keep the tool perpendicular to the surface.
CORRECT
HOUSING
FACE
ROTARY TOOL
INCORRECT
HOUSING
FACE
ROTARY
TOOL
Figure 4.10
1003027a
Remove old
sealant material.
HOUSING AND
CARRIER SHOWN