4 Prepare Parts for Assembly
17
Meritor Maintenance Manual MM-15103 (Issued 07-17)
Bearings
Use soft, clean paper or cloth rags to dry bearings immediately
after cleaning. Do not use compressed air, which can damage
the bearings when they are rotated and dried.
Use soft, clean paper or cloth rags to dry bearings immediately after
cleaning. Do not use compressed air.
Corrosion Protection
Prevent Corrosion on Cleaned Parts
1. Apply axle lubricant to cleaned and dried parts that are not
damaged and are to be assembled.
2. To store parts, apply a special material that prevents corrosion
to all surfaces. Wrap cleaned parts in a special paper that will
protect the parts from moisture and prevent corrosion.
Inspection
Inspect Parts
It is very important to inspect all parts carefully and completely
before the axle or carrier is assembled. Check all parts for wear and
replace damaged parts.
1. Inspect the cup, cone, rollers and cage of all tapered roller
bearings in the assembly. If any of the following conditions
exist, replace the bearing.
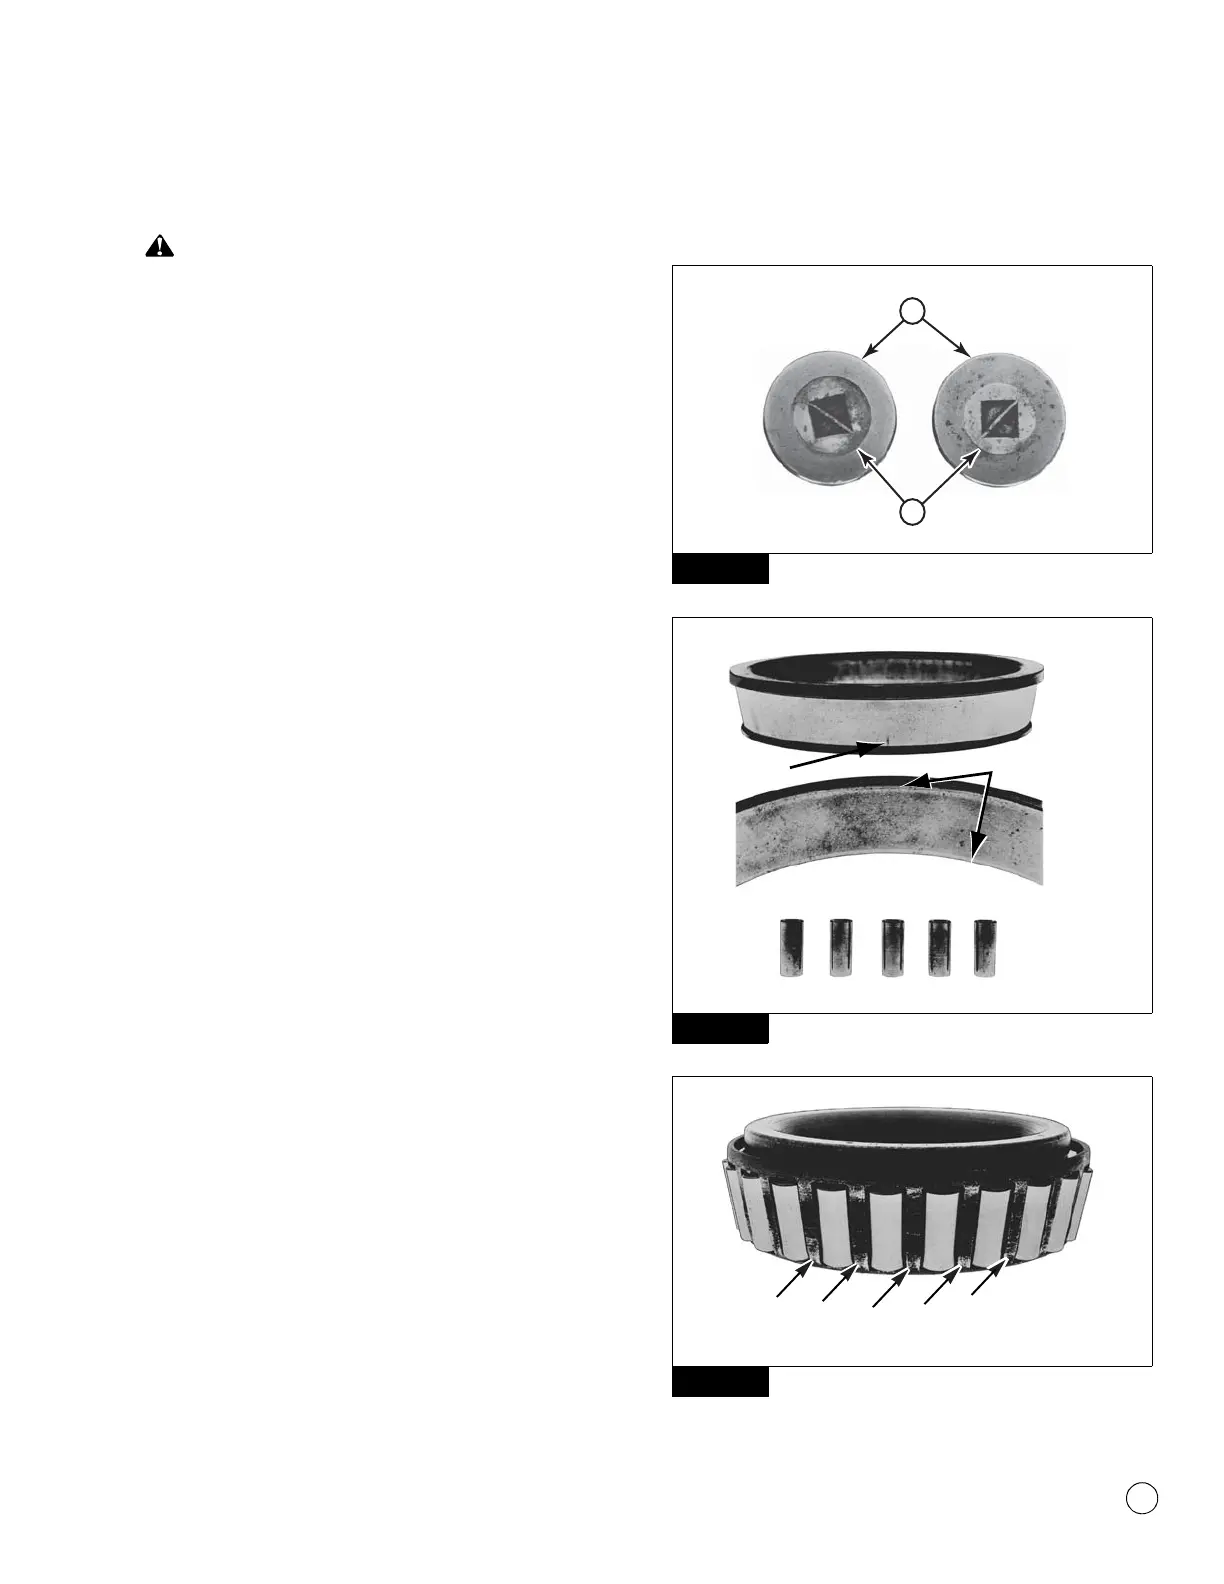
앫 The outer ring of the large-diameter end of the rollers is
worn level with or below the center surface. Figure 4.1.
앫 The radius at the large-diameter end of the rollers is worn
to a sharp edge. Figure 4.1.
앫 There is a visible roller groove in the cup or cone inner race
surfaces. The groove can be seen at the small- or
large-diameter end of both parts. Figure 4.2.
앫 There are deep cracks or breaks in the cup, cone inner race
or roller surfaces. Figure 4.2.
앫 There are bright wear marks on the outer surface of the
roller cage. Figure 4.3.
앫 There is damage on the rollers and on the surfaces of the
cup and cone inner race that touch the rollers. Figure 4.4.
앫 There is damage on the cup and cone inner race surfaces
that touch the rollers. Figure 4.5.
Figure 4.1
Figure 4.2
Figure 4.3
Figure 4.1
Figure 4.2
Figure 4.3
1
2
1003017c