5 Assembly and Installation
45
Meritor Maintenance Manual MM-15103 (Issued 07-17)
If a yoke is removed after it has been partially or fully installed,
the unitized pinion seal will be damaged. Remove and discard
the original unitized pinion seal and replace it with a new one.
If a yoke has been installed into the unitized pinion seal and
then removed, the inner sleeve of the seal will be damaged.
Install a new seal.
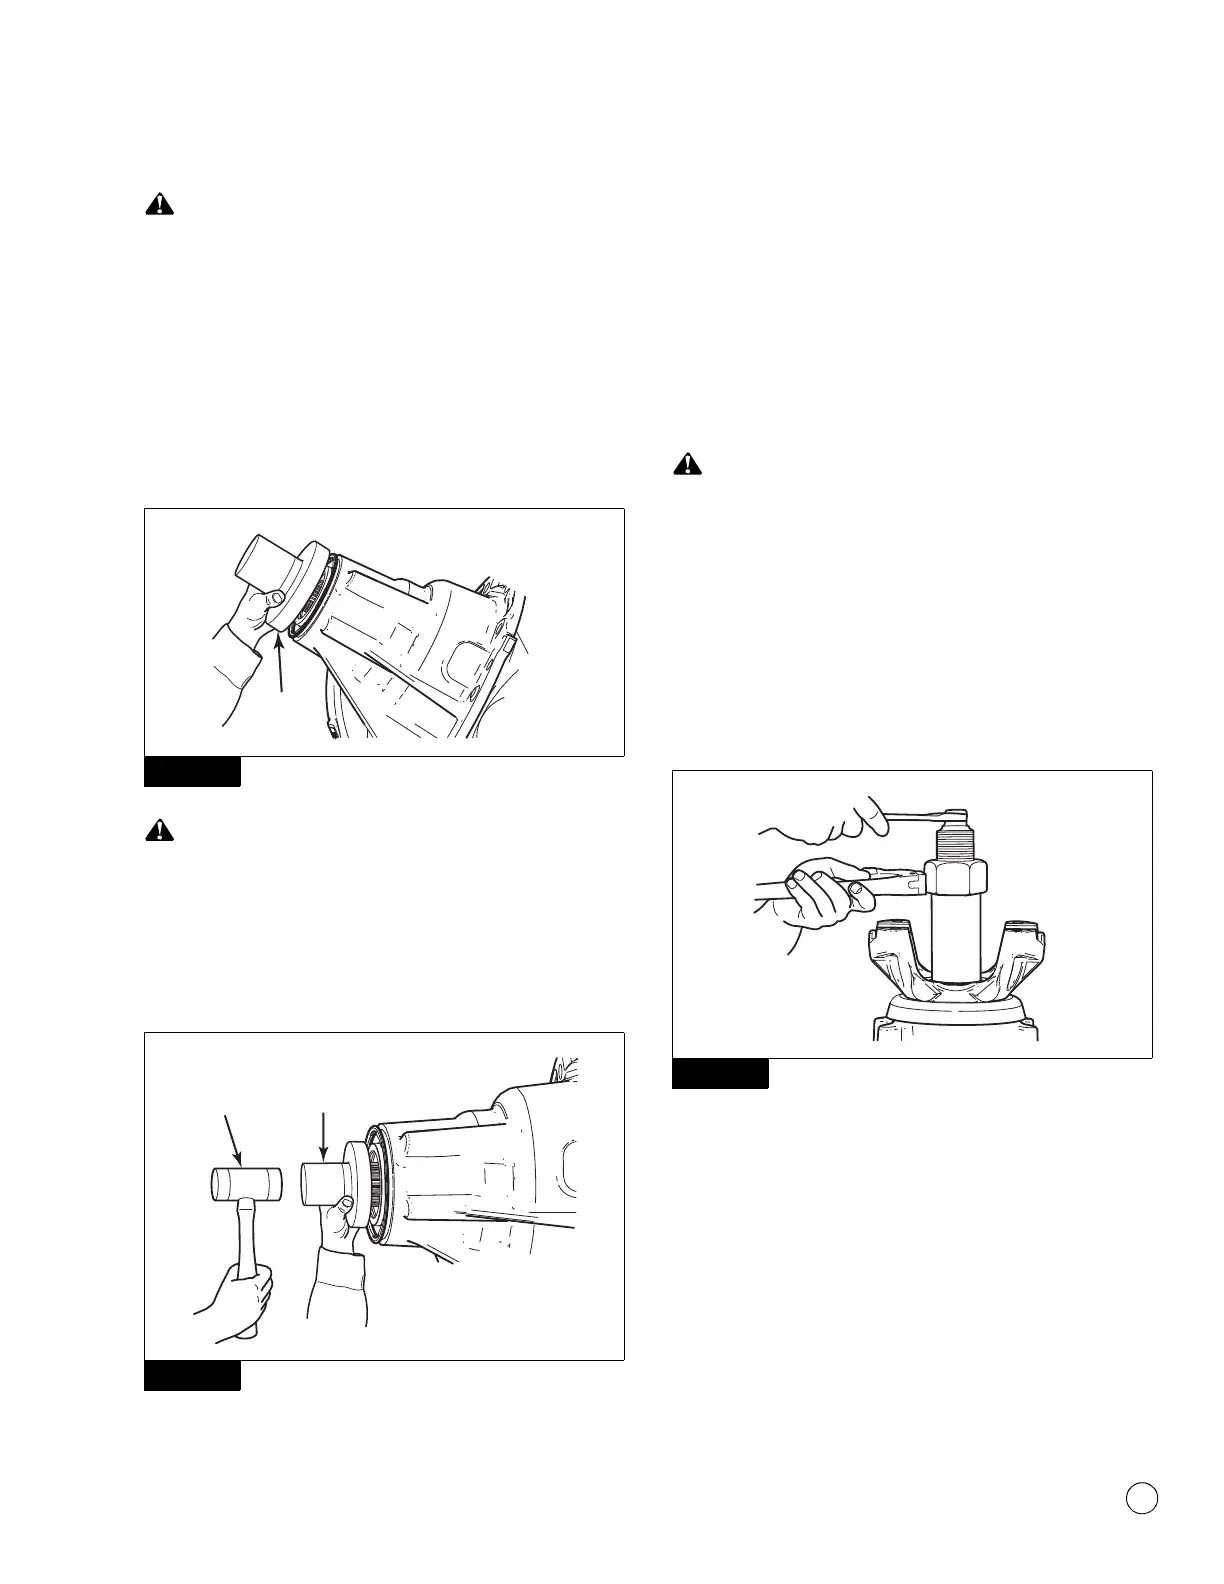
5. Place the seal, part number A1-1205Z2730, and seal driver,
tool number 2730T1, in position on the carrier. Figure 5.68.
Figure 5.68
Use a rubber mallet to install the seal. Do not use a steel, brass
or plastic hammer. Using a steel, brass or plastic hammer can
damage the seal and driver tool.
6. Use a rubber mallet to drive the seal into or against the carrier.
The seal must fully seat into or against the carrier. Figure 5.69.
Figure 5.69
7. Visually inspect the seal to verify that it is seated correctly.
8. Use a feeler gauge to check the seal gap. The seal is correctly
installed if the gap is less than 0.010-inch (0.25 mm) around
the circumference of the seal flange. If necessary, continue to
drive the seal in until the correct gap is obtained.
9. Apply clean axle lubricant around the end of the yoke or flange.
10. Align the yoke or flange splines with the shaft splines. Slide the
yoke or flange over the shaft splines.
Use a press and a sleeve or yoke installation tool to install the
yoke or flange. Do not use a hammer or mallet. Using a
hammer or mallet can damage the bearings, yoke or flange.
11. Use a press and a sleeve or special yoke/flange driver tool,
Meritor part number MST-YT114, SPX Kent-Moore part
number J 48718, to install the yoke or flange. Do not use the
nut to draw on the yoke or flange. The yoke or flange must be
seated against the outer bearing. If a press and sleeve are
used, verify that the drive pinion is well supported. Figure 5.70.
Figure 5.70
12. Install the washer and nut onto the drive pinion.
13. Fasten a yoke or flange bar to the input yoke or flange. The bar
will hold the drive pinion in position when the nut is tightened.
Figure 5.71.
Figure 5.68
Figure 5.69
4012315a
SEAL
DRIVER
The seal must be fully
seated in or against
the carrier.
SEAL
DRIVER
RUBBER
MALLET
4012316a
Figure 5.70
4012317a