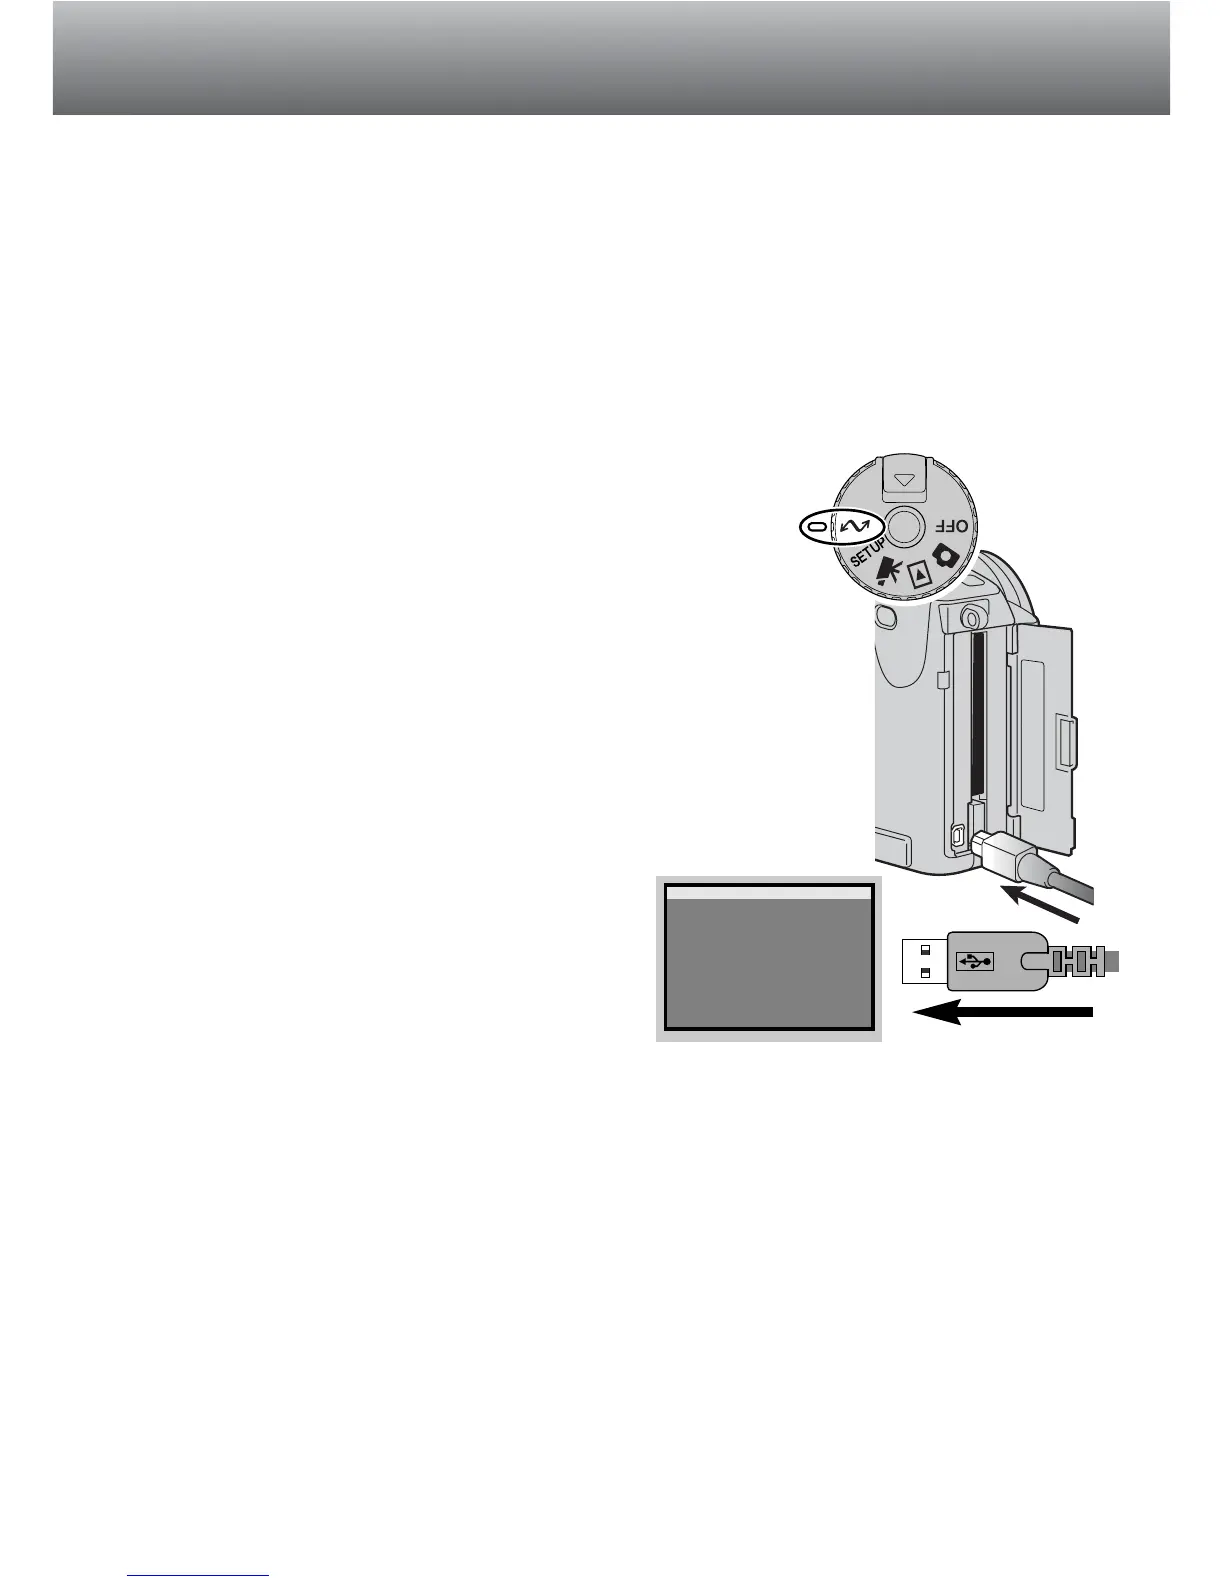
Set the mode dial to the data-transfer position.
• The data-transfer menu will be displayed.
CONNECTING THE CAMERA TO A COMPUTER
124
DATA-TRANSFER MODE
Start up the computer.
• The computer must be turned on before connecting the camera.
Insert the CompactFlash card into the camera.
• Confirm that the correct card is in the camera. To change
the CompactFlash card while the camera is connected to a
computer, see page 134.
Attach the other end of the USB cable to the computer’s USB
port.
• Make sure the plug is firmly attached.
• The camera should be connected directly to the computer’s USB
port. Attaching the camera to a USB hub may prevent the camera
from operating properly.
A fresh set of batteries should be used when the camera is connected to a computer.
The use of the AC adaptor (sold separately) is recommended over the use of batteries.
For users with Windows 98 and Mac OS 8.6 read the respective sections on how to
connect to the operating system before connecting the camera to a computer (Windows
98 - p. 126, OS 8.6 - p. 129).
COMPUTER
1
2
3
4
5
3
4
5
Open the card-slot door. Attach the smaller plug of the USB
cable to the camera.
• Make sure the plug is firmly attached.