en-US
|
14
|
User Manual
|
MD-500
1699503426 | REV A | 05.2021
© Mitchell International
Selecting Vehicle
WARNING: Before performing any diagnostic
functions, refer to the Safety Precautions and
Warnings provided by the vehicle manufacturer.
In addition, follow any warnings and instructions
provided on the tablet.
Connected
Generic OBDII
Repair-Source
10:22
QuickScan
Apps Shortcut
Settings
What’s New
Web Browser Coverage Guide Video Tutorials
Diagnostic Information Wiring Diagrams
i
i
Saved Reports
Main Menu
Diagnostics
5 6
7
8
9
10
11
12
3
4
1
2
1. Diagnostics button
Enter vehicle diagnostics session.
2. Turbo Scan button
Shortcut to run all ECU scan.
3. Mitchell Connect button
Direct access to Mitchell Connect website.
4. Diagnostic Information button
Provides diagnostic, repair, and reset information for the
selected vehicle.
5. Generic OBDII button
Access Global OBDII emission related ECU information.
6. Saved Reports button
Access saved vehicle scan reports and data stream
recordings.
7. Web Browser button
Full internet access. Default navigation to
www.mitchell.com/diagnostics web page.
8. Coverage Guide button
Access vehicle coverage button.
9. Video Tutorials button
Access video tutorial files on scan tool use.
10. Explore More button
Access new offerings from Mitchell.
11. Settings button
Access tool settings, printer setup, subscription
information, softwar updates and more.
12. Apps Shortcut button
Access other available Android applications.
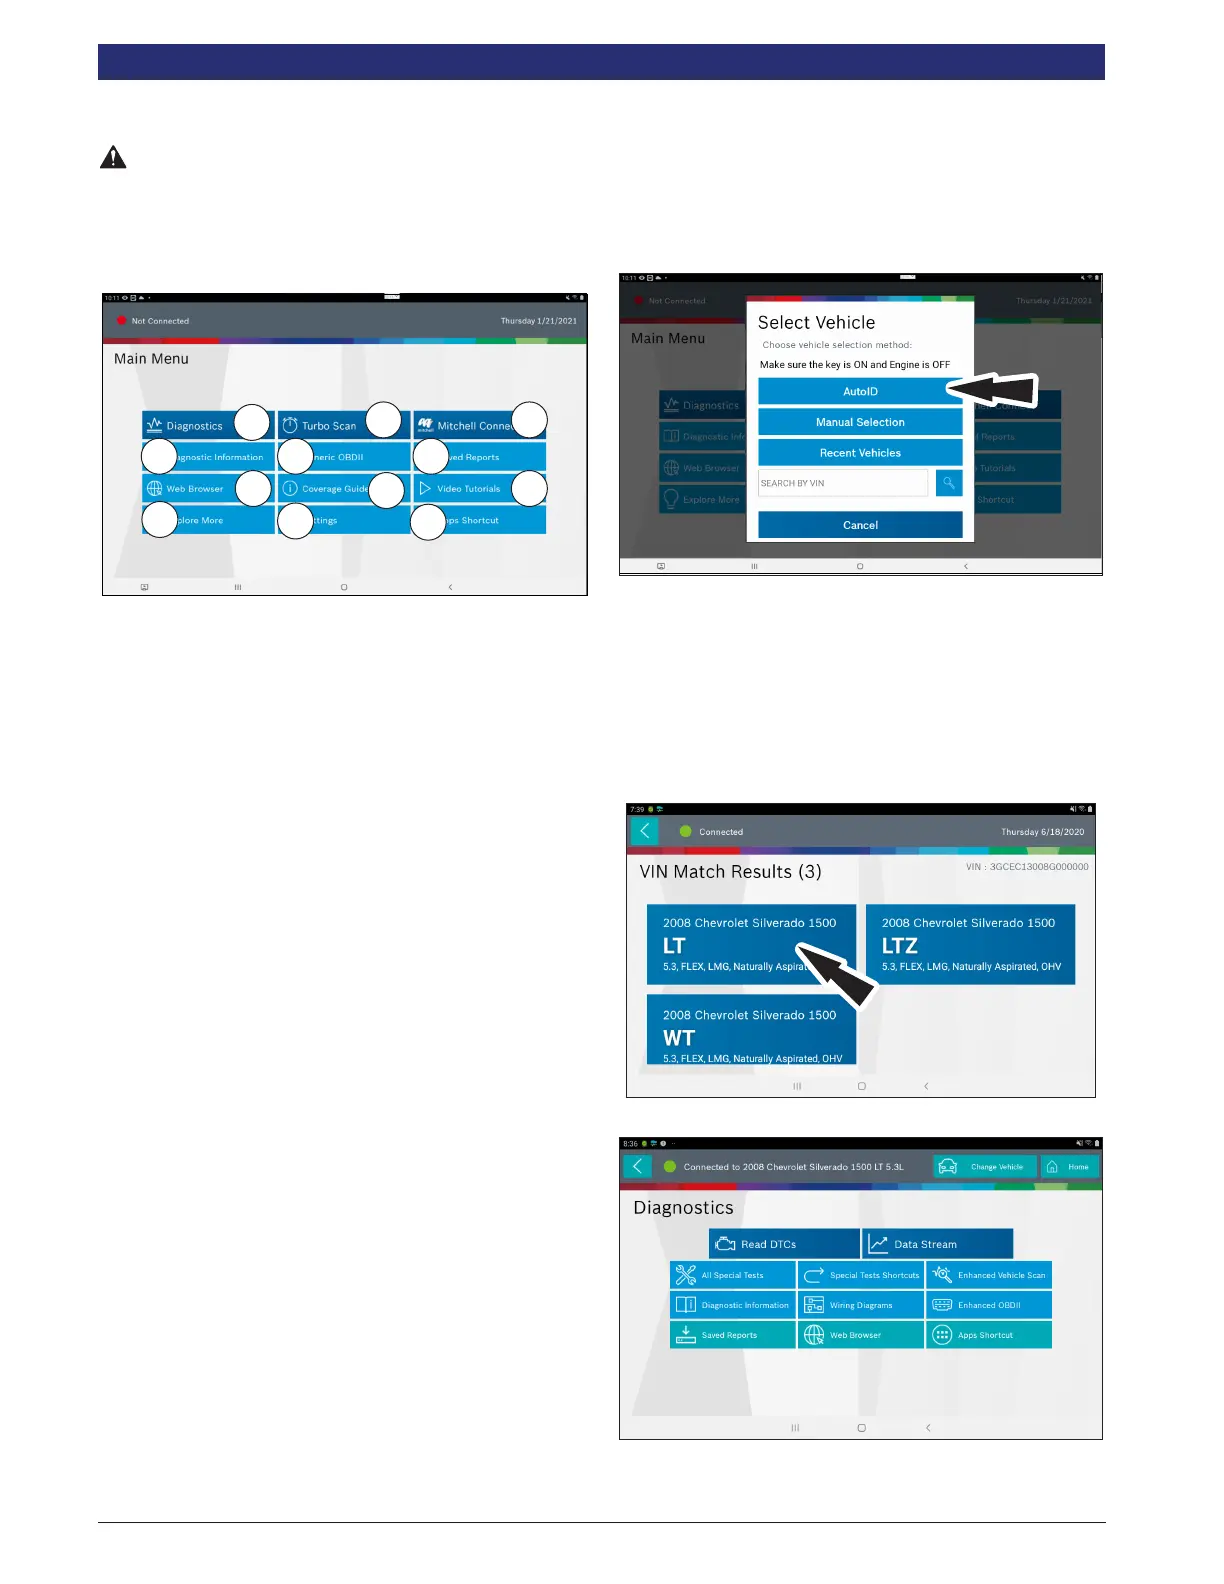
AutoID
AutoID uses the vehicle’s Mode 9 VIN information, when
available.
Most vehicles from 2004 and newer support AutoID, but some
other older vehicles may support Mode 9 too.
AutoID Operation:
1. Tablet must be on and paired with the VCI which is
connected to the vehicle.
Connected
Generic OBDII
Repair-Source
10:22
QuickScan
Apps Shortcut
Settings
What’s New
Web Browser Coverage Guide Video Tutorials
Diagnostic Information Wiring Diagrams
i
i
Saved Reports
Main Menu
Diagnostics
2. Select Diagnostics and then select AutoID.
3. Once selected the tablet will begin communicating with
the vehicle.
4. The vehicle must have the key on, engine o (KOEO).
5. Once the VIN is retrieved it is compared to the vehicle
database.
6. If a match is found the vehicle selection information will
be displayed on the screen.
7. Wait for AutoID to nish.
8. Select the desired vehicle from the list.
9. At this point vehicle entry will disappear and the user will
be able to begin using diagnostic functions on the vehicle.