Moneris® Go Plus: Using Your Terminal 53
Receipt settings
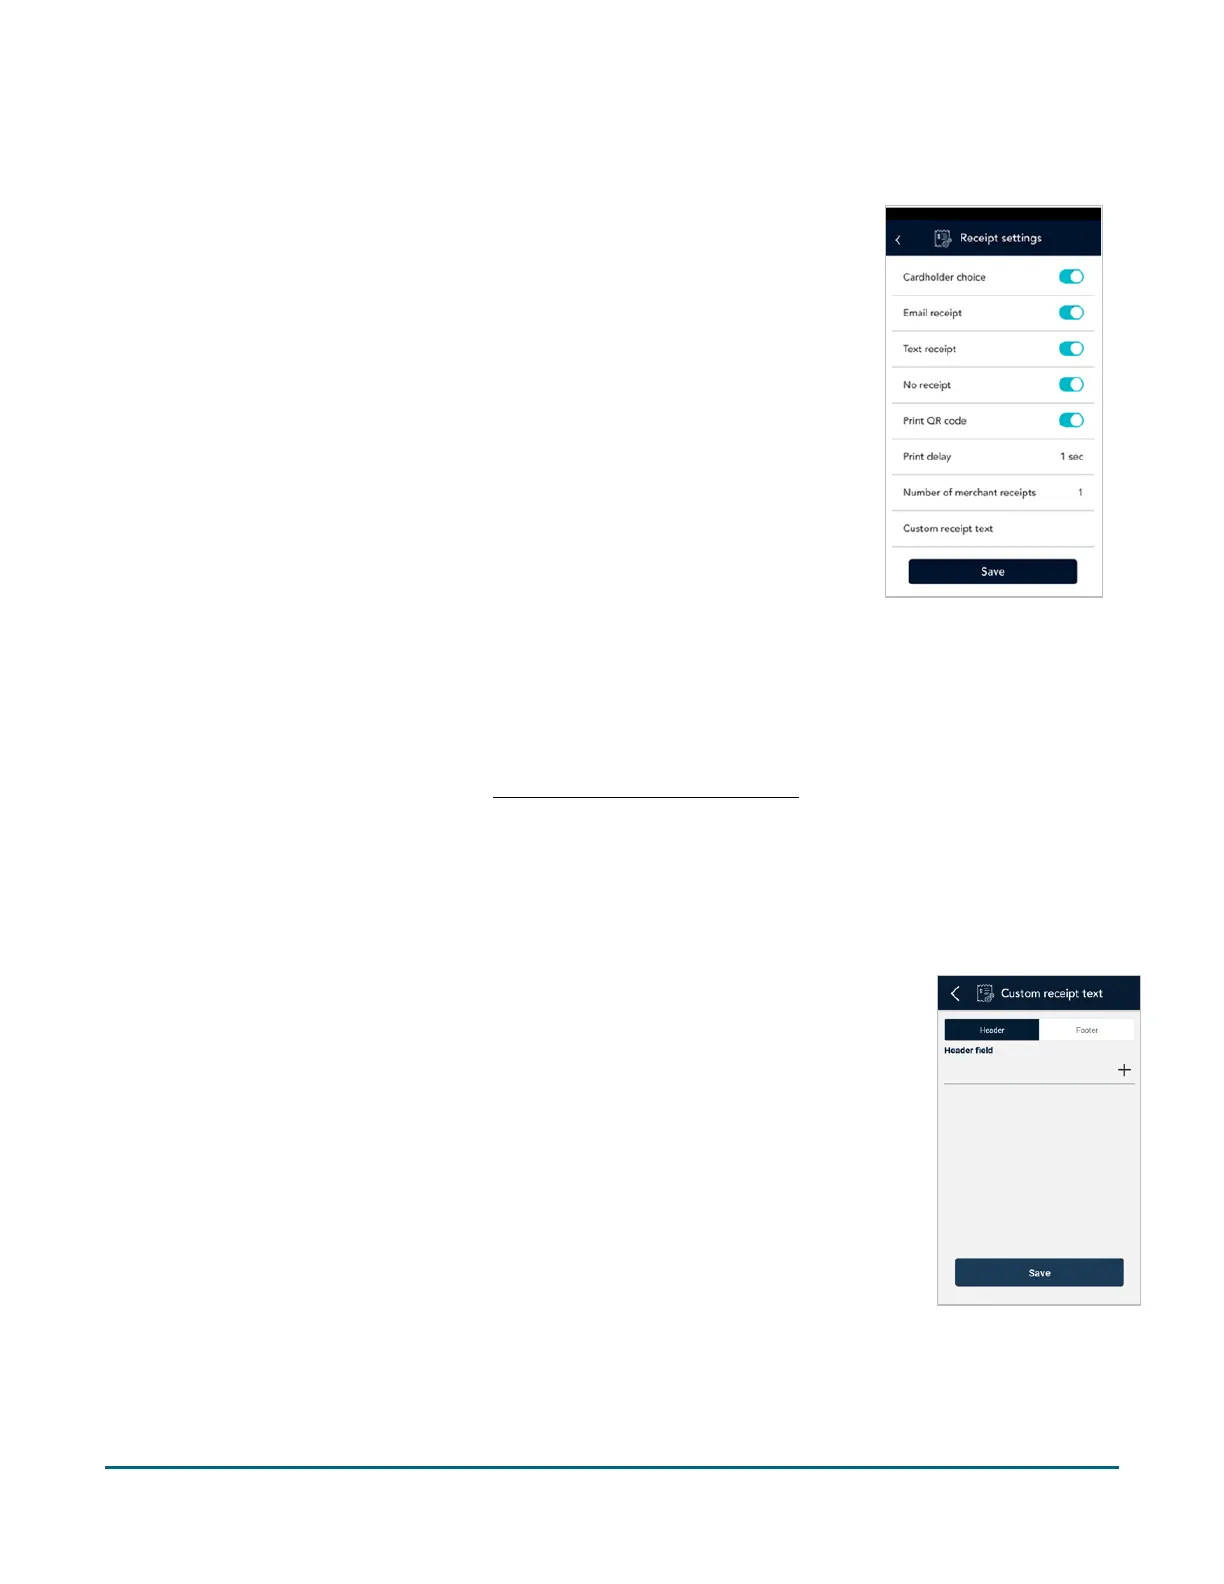
Working with headers and footers
You can add up to 6 lines in the header or footer of customer receipts. Each line can include up to 30 characters.
Add a header or
footer
1. On the “Custom receipt text” screen, tap Header or Footer.
2. Tap the empty field and use the on-screen keyboard to type the
text of the header or footer.
3. Tap the plus ( + ) sign beside the field to add the header or footer
to your receipt. The header or footer now appears below the
empty field.
4. To add another header or footer, follow the same steps.
Delete a header
Tap the minus ( – ) sign beside the field.
Edit a header or
footer
Tap the field you wish to edit.
Note: You can drag a header or footer field to change its order on the
receipt.
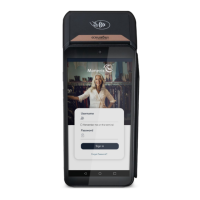
1. On the Settings menu, tap Receipts. The Receipt settings screen appears.
2. Receipt formats: To give your customers a choice of receipt formats, tap the
toggle next to Cardholder choice.
a. The options for receipt formats appear: Email, Text, and No receipt.
b. Enable or disable each format by tapping the toggle next to it.
Note: If you disable Cardholder choice, the terminal will print a customer
receipt automatically.
3. Print QR code. By default, the application prints a QR code on each receipt. To
disable printing QR codes, tap the toggle.
4. Print delay. This setting determines the delay (in seconds) between printing
the customer receipt and printing the merchant receipt. The default value is
zero seconds.
a. To change the setting, tap the Print Delay field and choose a new value.
5. Number of merchant receipts. By default, the terminal will not print a
merchant receipt. If you want a receipt for each transaction, tap the field and
select a new value (1 or 2 receipts).
6. Custom receipt text >. To add header or footer text to your customer receipts,
tap Custom receipt text then refer to Working with headers and footers
below.
7. When you are finished with the receipt settings, tap Save.