– 51 –
The lock motor has approximate resistance value of
1.79K .
Caution: It is possible to incorrectly reconnect
the switch wiring to the lock assembly. When
reconnecting the wiring, make sure it is properly
connected to the lock assembly before turning the
power back on.
If the lock motor fails during a self-clean cycle,
there is suffi cient space between the oven door and
control panel to remove the 2 Phillips-head screws
holding the lock motor assembly. Carefully opening
the door will pull the lock motor assembly out far
enough to service.
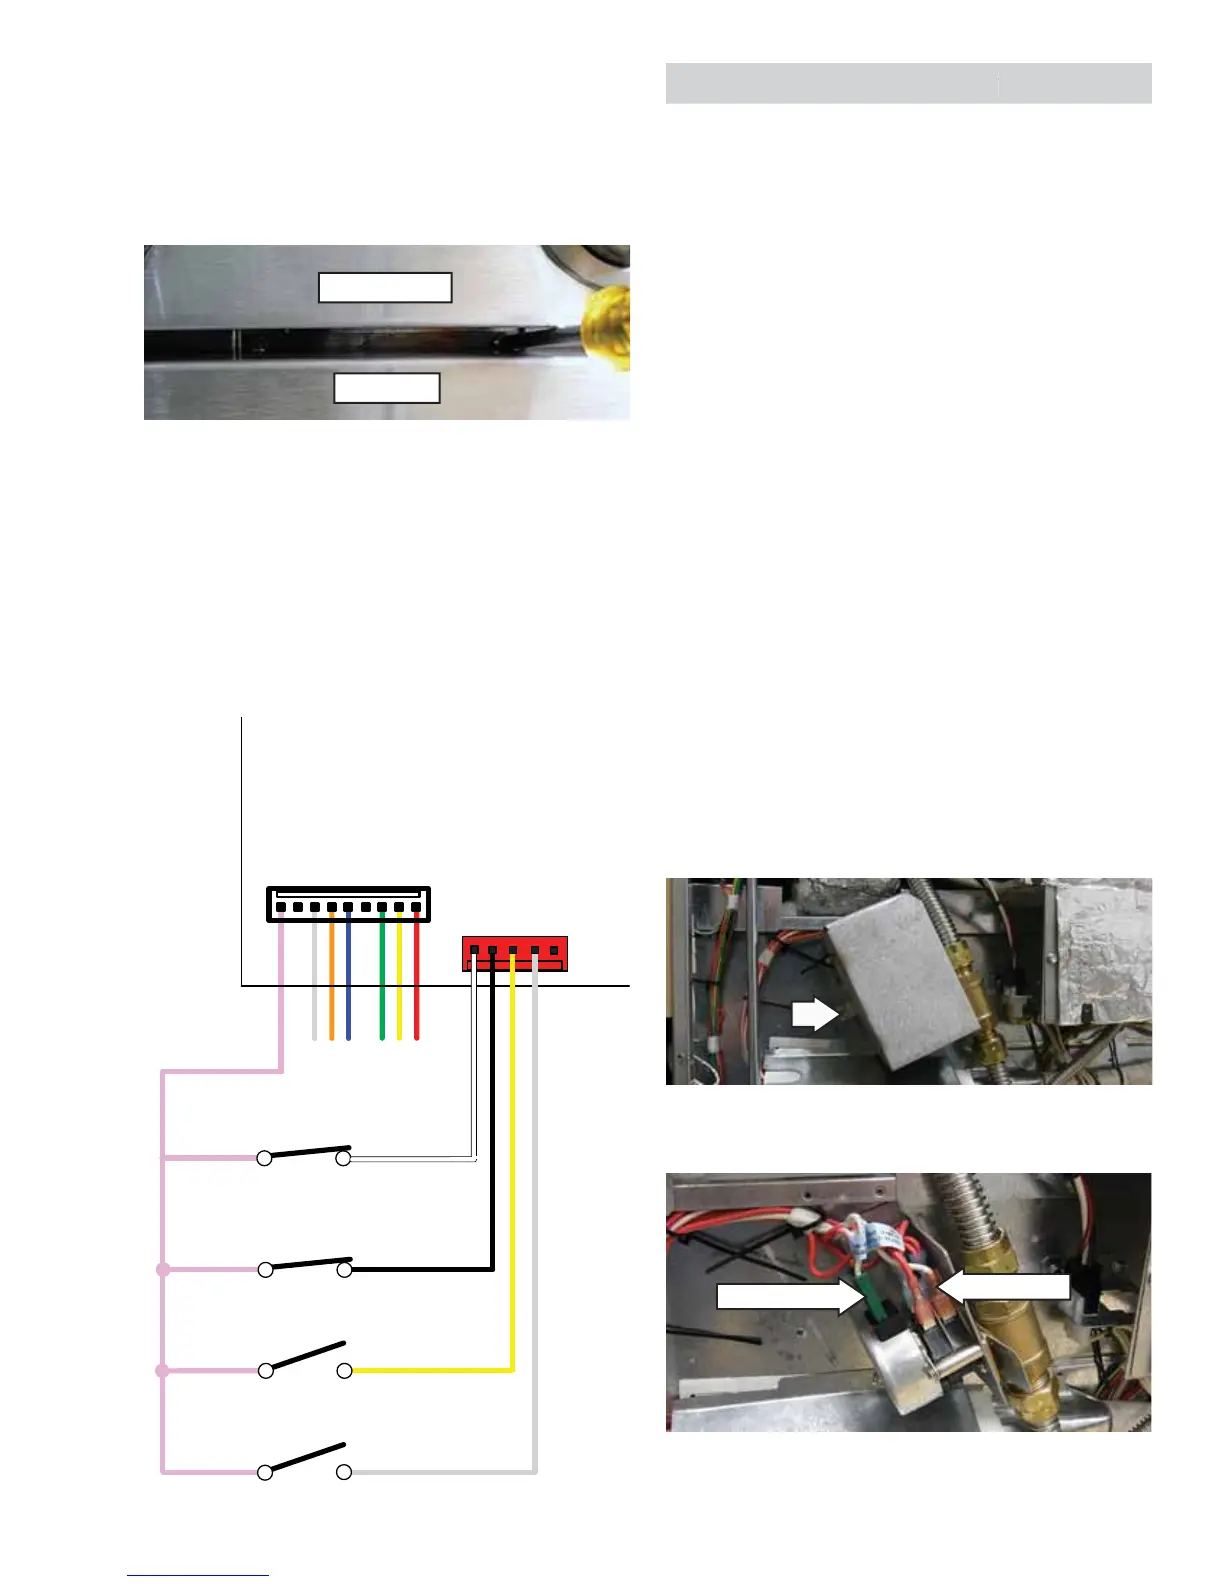
Oven Door
Control Panel
Lock Motor Circuit
J16
J17
1
W
B
Y
S
PS
O
N
G
Y
R
9
1
5
RELAY BOARD
P
B
Y
S
DOOR STATUS
DOOR LOCK
DOOR UNLOCK
REED SWITCH
2. Disconnect wires and connectors from lockout
motor and switches.
Lockout Valve Motor Assembly
The motorized gas lockout valve assembly is located
on the back of the range. The assembly consists of
a lock motor, cam and switch assembly, gas valve,
and mounting plate.
Motorized Cooktop Lockout Valve Operation:
The lock motor is energized when the control is set
for Clean, and Clean Time is selected. The K10 relay
contact will close and complete the circuit that
supplies the voltage to the lock motor.
Note: To enable proper operation of the gas lockout
valve, ensure that all the gas surface burners are in
the OFF position. This enables power to be delivered
when the gas lockout valve closes.
CAM – The cam on the motor operates the lock
switches, which tell the control if the gas valve is
open or closed, locked, and ready for the Clean
operation.
Note: When the gas valve is either being locked or
unlocked, both the lock and unlock switches will be
in the open position.
To remove the lockout valve motor:
1. Remove 1/4-in. hex-head screw and lockout
valve cover from range.
ockout Valve Motor Assembly
Disconnect
Disconnect
(Continued next page)