– 58 –
Oven Temperature Sensor
The oven temperature sensor has a resistance of:
• 1091 at room temperature
• 1654 at 350°F
• 2634 at 865°F (Clean temperature)
The oven temperature sensor has a resistance
change rate of 2 per °F.
Note: For test locations see
Oven Sensor and Door
Switch Test.
To remove the oven temperature sensor:
1. Disconnect power.
2. Remove oven racks. (See
Oven Racks.)
3. Remove the two 1/4-in. hex-head screws that
attach the sensor to the oven liner.
4. Remove the back panel. (See
Back Panel.)
5. Disconnect the sensor wiring harness.
Note: Remove the wire harness ties as required.
(Continued next page)
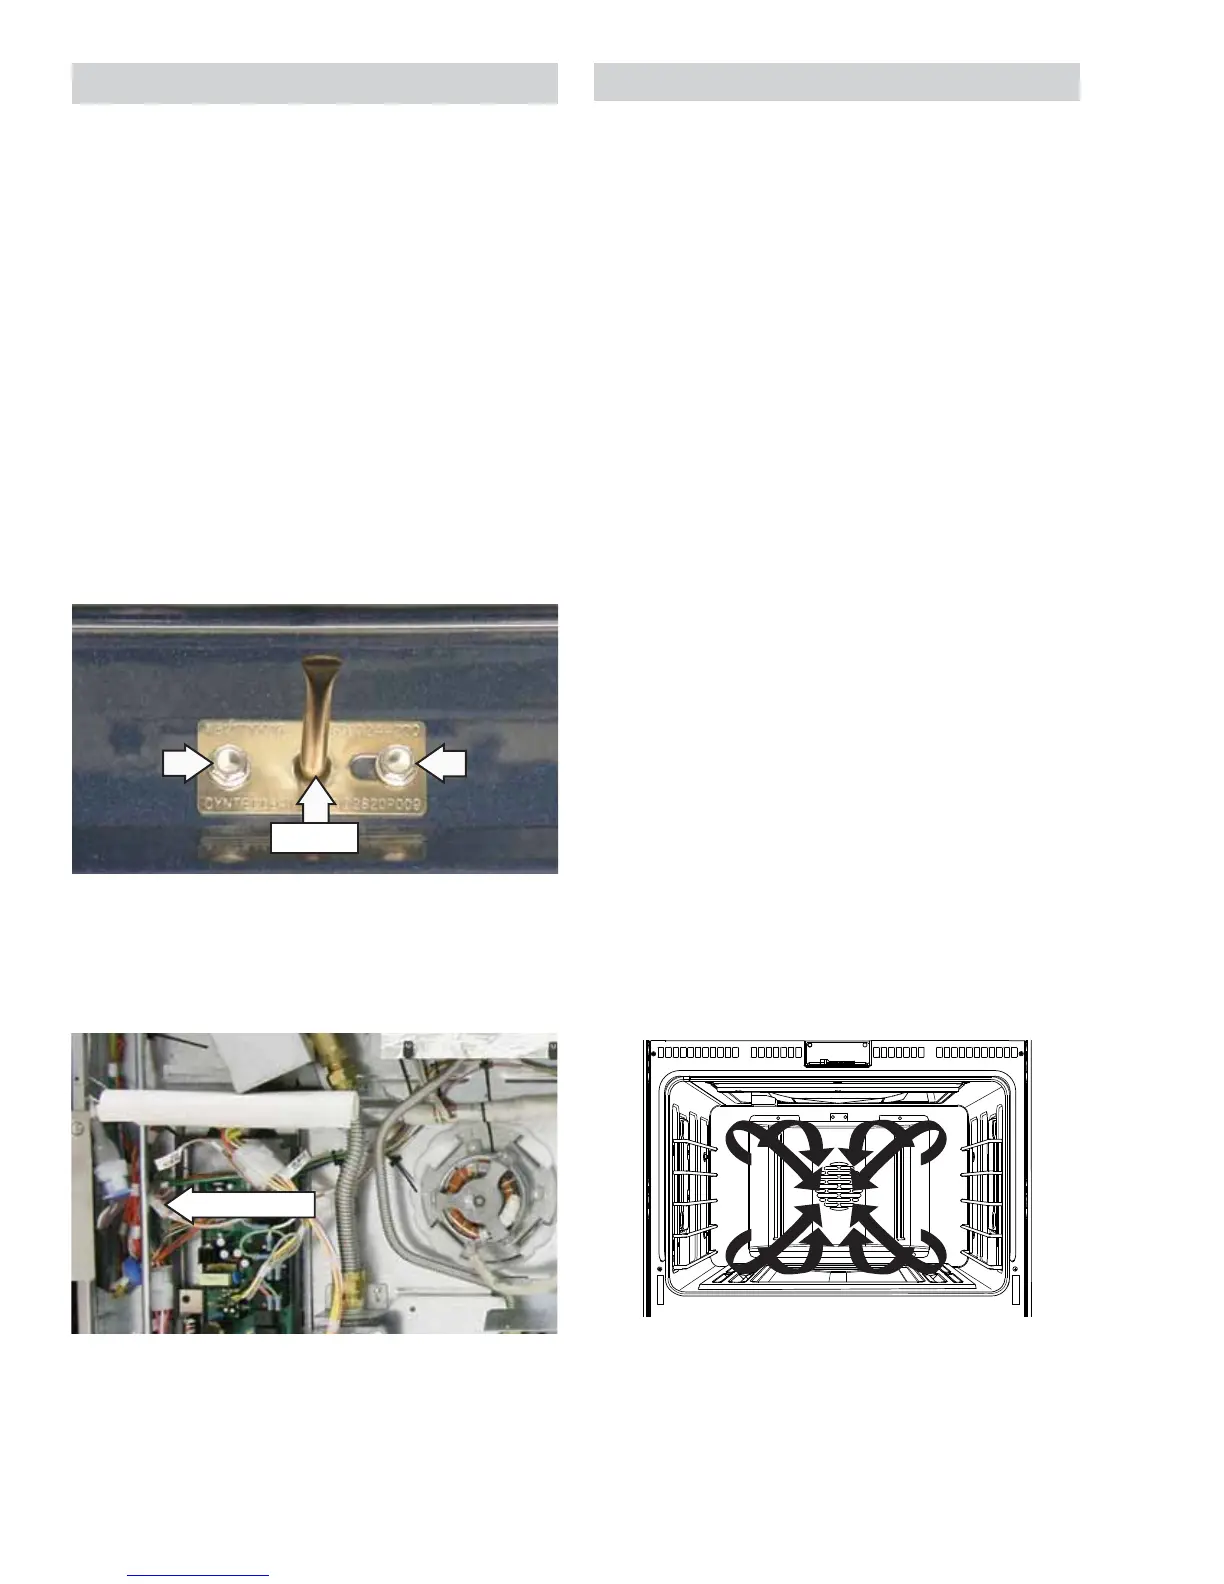
Sensor
Disconnect
6. Carefully pull the sensor and sensor wiring
harness from the oven liner.
Note: When reinstalling the sensor, use a small fl at-
blade screwdriver to push and guide the sensor wire
harness into the oven liner.
Convection Fan Assembly
The convection fan assembly is located on the
back wall of the oven cavity and consists of the fan
guard, blade, insulation, and motor. The fan motor
utilizes a capacitor that can be accessed behind
the back panel. (See Component Locator Views.) The
convection fan assembly can be removed from
inside the oven.
The convection fan operates during the following
modes:
• Preheat*
• Convection Bake
• Convection Roast
• Self-Clean
When the oven temperature control calls for heat
and the gas fl ame ignites, the convection fan
motor is disabled and the fan ceases to run. The
convection fan will be off when any oven burner is
on. The direction of the convection fan will alternate
each time the fan turns on.
Note: The convection fan shuts off when the door is
opened and/or when a burner is on.
Preheat - the fan starts after a temperature of 200°F
is reached and when there is no fl ame.
Convection bake and convection roast - fan
directional cycles will not start until preheat has
completed.
Convection roast - fan rotates when there is no
fl ame.
Convection Airfl ow
* 12-in. oven when temperature is over 200 °F.