E2600 Controller-Drive Tray Installation Guide 73
8. Remove the bezel from the front of the drive tray.
WARNING (W09) Risk of bodily injury –
Three persons are required to safely lift the component.
9. With the help of at least two other persons, slide the rear of the drive tray onto the mounting rails. The drive
tray is correctly aligned when the mounting holes on the front flanges of the drive tray align with the mounting
holes on the front of the mounting rails.
WARNING (W15) Risk of bodily injury – An empty tray weighs approximately 56.7 kg (125 lb). Three persons
are required to safely move an empty tray. If the tray is populated with components, a mechanized lift is required to
safely move the tray.
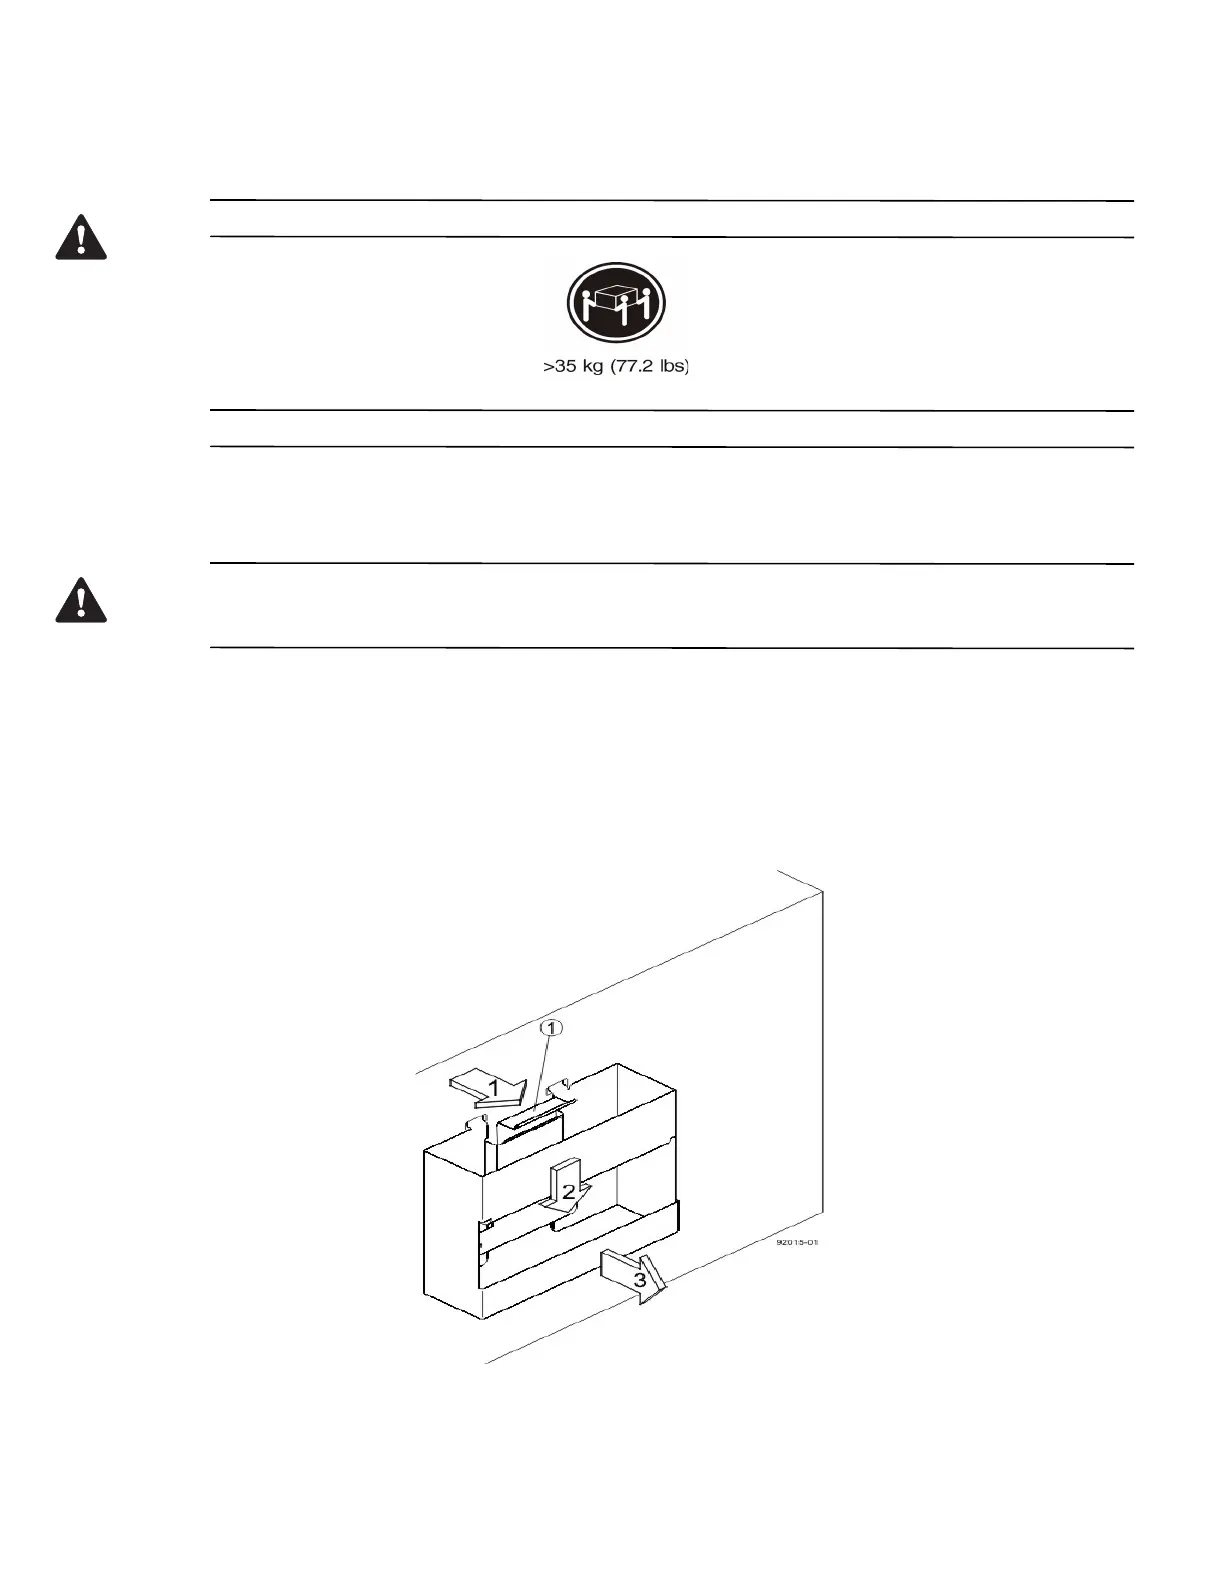
10. After the controller-drive tray is correctly aligned, remove the enclosure lift handles as shown in the figure
"Removing an Enclosure Lift Handle from the Drive Tray":
a. Use your thumb to unlatch and remove the rear enclosure lift handles (two to a side).
b. Use the front enclosure lift handles to slide the drive tray all the way into the cabinet.
c. After the drive tray is securely in the cabinet, use your thumb to unlatch and remove the front
enclosure lift handles (two to a side).
Figure 66 Removing an Enclosure Lift Handle from the Drive Tray
1. Pull the thumb latch away from the drive tray to detach the hook.
2. Shift the handle down to release the other four hooks.
3. Move the handle away from the drive tray.