34 E2600 Controller-Drive Tray Installation Guide
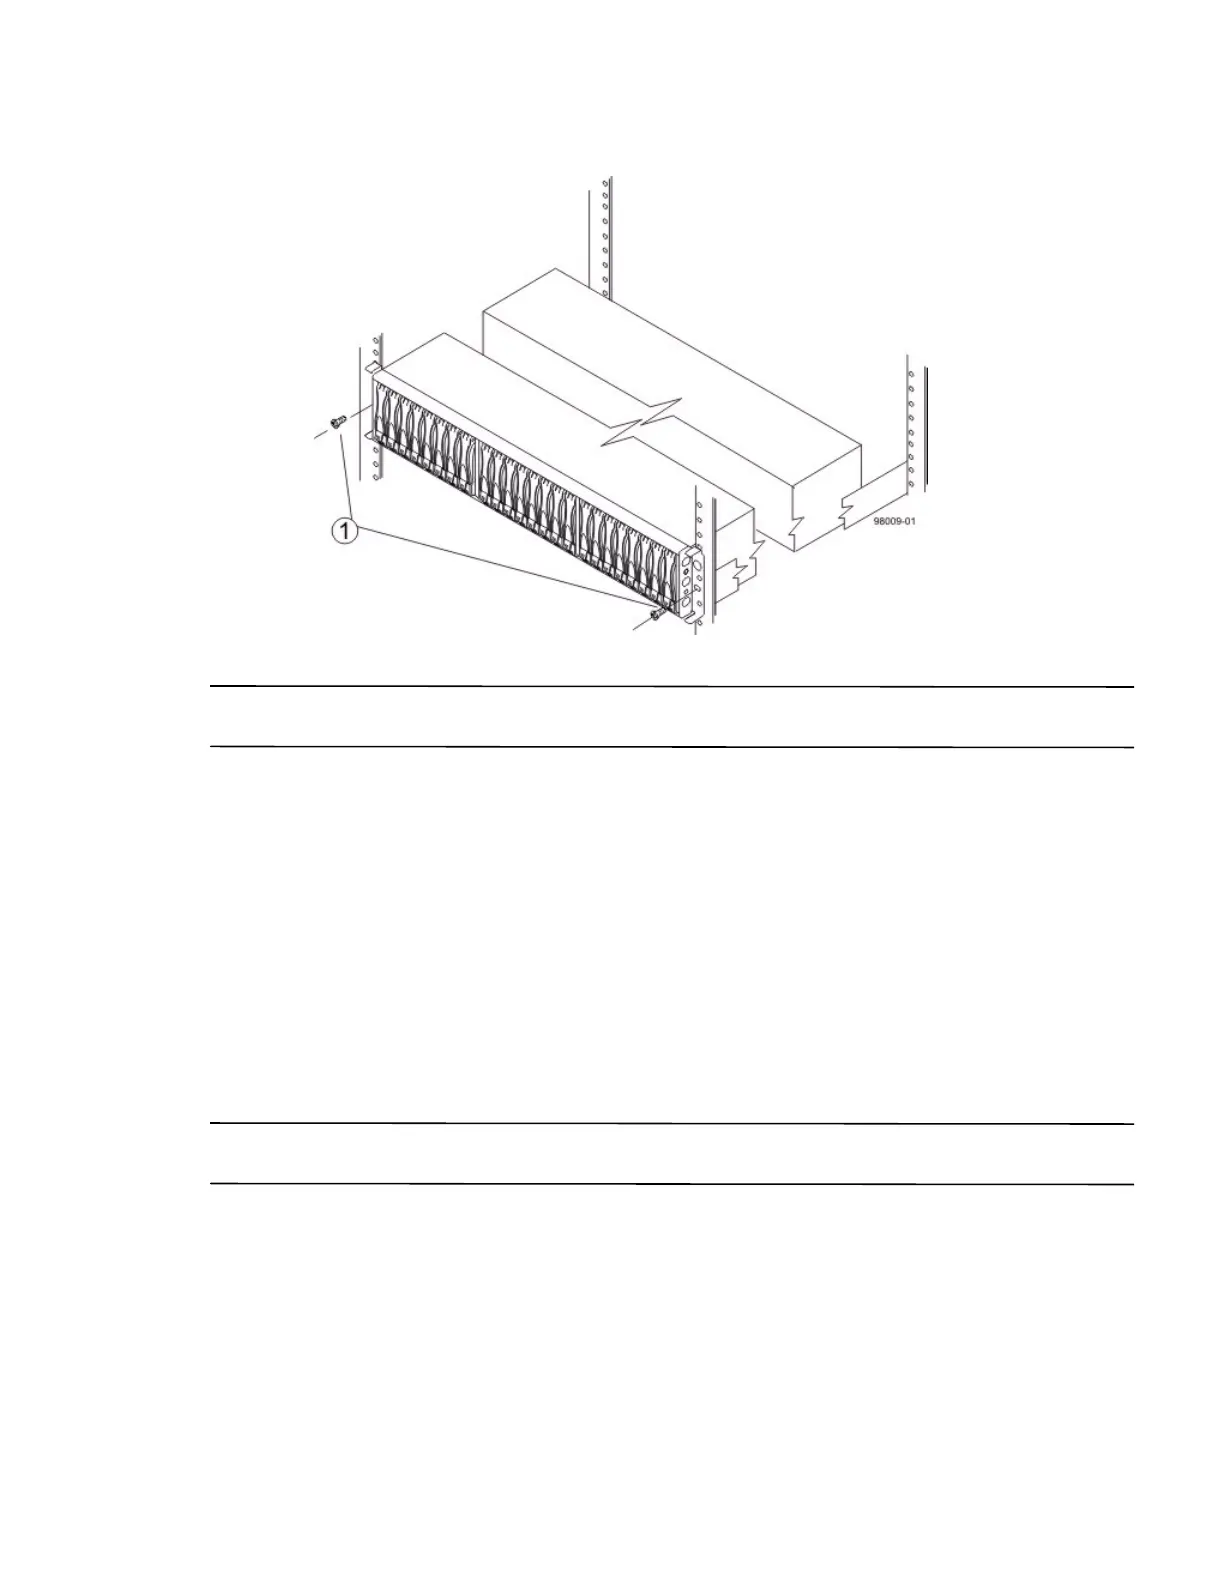
Figure 27 Securing the E2600 Controller-Drive Tray with 24 Drives to the Cabinet
1. Screws
NOTE The rear of the controller-drive tray contains two controllers. The top of the controller-drive tray is the side
with the labels.
5. Secure the screws in the top mounting holes and the bottom mounting holes on each side of the controller-drive
tray.
6. Secure the rear of the of the controller-drive tray to the cabinet by using two screws to attach the flanges on
each side at the rear of the controller-drive tray to the mounting rails.
7. Install the bezel on the front of the controller-drive tray.
8. Install the drive trays. Refer to Connecting the E2600 Controller-Drive Tray to the Drive Trays on page 81.
Procedure – Installing the E2660 Controller-Drive Tray
You can install the high-density, 6-Gb SAS SBB 2.0-compliant E2660 controller-drive tray into an
Industry-standard cabinet, provided it has a depth of 100 cm (40 in.).
A minimum depth of 76 cm (30 in.) between the front EIA support rails and the rear EIA support rails is required.
NOTE If you are mounting the E2660 controller-drive tray in a cabinet with square holes, use the eight shoulder
washers in the rail kit to align the screws in the holes (see step 4 on page 36 through step 7 on page 38).