ENGLISH – 23
7.11.3.3 PROCEDURE C - Memorising a transmitter by
means of another transmitter already memorised
(memorisation far from the control unit)
This procedure can be used to memorise a new transmitter by
means of a second transmitter, already memorised in the same
control unit. In this way, the new transmitter can receive the same
settings as those of the memorised transmitter. The user does not
have to intervene directly on the control unit’s
i
button,
as the procedure is simply carried out within the control unit’s ra-
dius of reception.
To perform this procedure:
1. on the transmitter to be memorised: press and hold the
button to be memorised for at least 8 seconds
2. release the transmitter button
3. on the transmitter already memorised: press and slowly
release 3 times the memorised button to be copied
4. on the transmitter to be memorised: press and slowly
release once the same button pressed at step 1
5. release the transmitter button.
l
The “LR” LED can also emit the following signals: 1
fast ash, if the transmitter is already memorised, 6
ashes, if the transmitter’s radio encoding system
is not compatible with that of the control unit’s re-
ceiver, or 8 ashes, if the memory is full.
7.11.3.4 PROCEDURE D - Deleting ALL memorised
transmitters
To perform this procedure:
1. on the control unit: press and hold the
i
button
2. after roughly 4 seconds, the “LR” LED will light up steady
(continue holding down the
i
button
3. after roughly 4 seconds, the “LR” LED will turn off (continue
holding down the
i
button
4. when the “LR“ LED starts ashing, count 2 ashes and pre-
pare to release the button precisely during the 3rd ash that
follows
5. during the deletion process, the “LR” LED will ash rapidly
6. the “LR” LED will emit 5 long ashes to signal that the dele-
tion has been completed correctly.
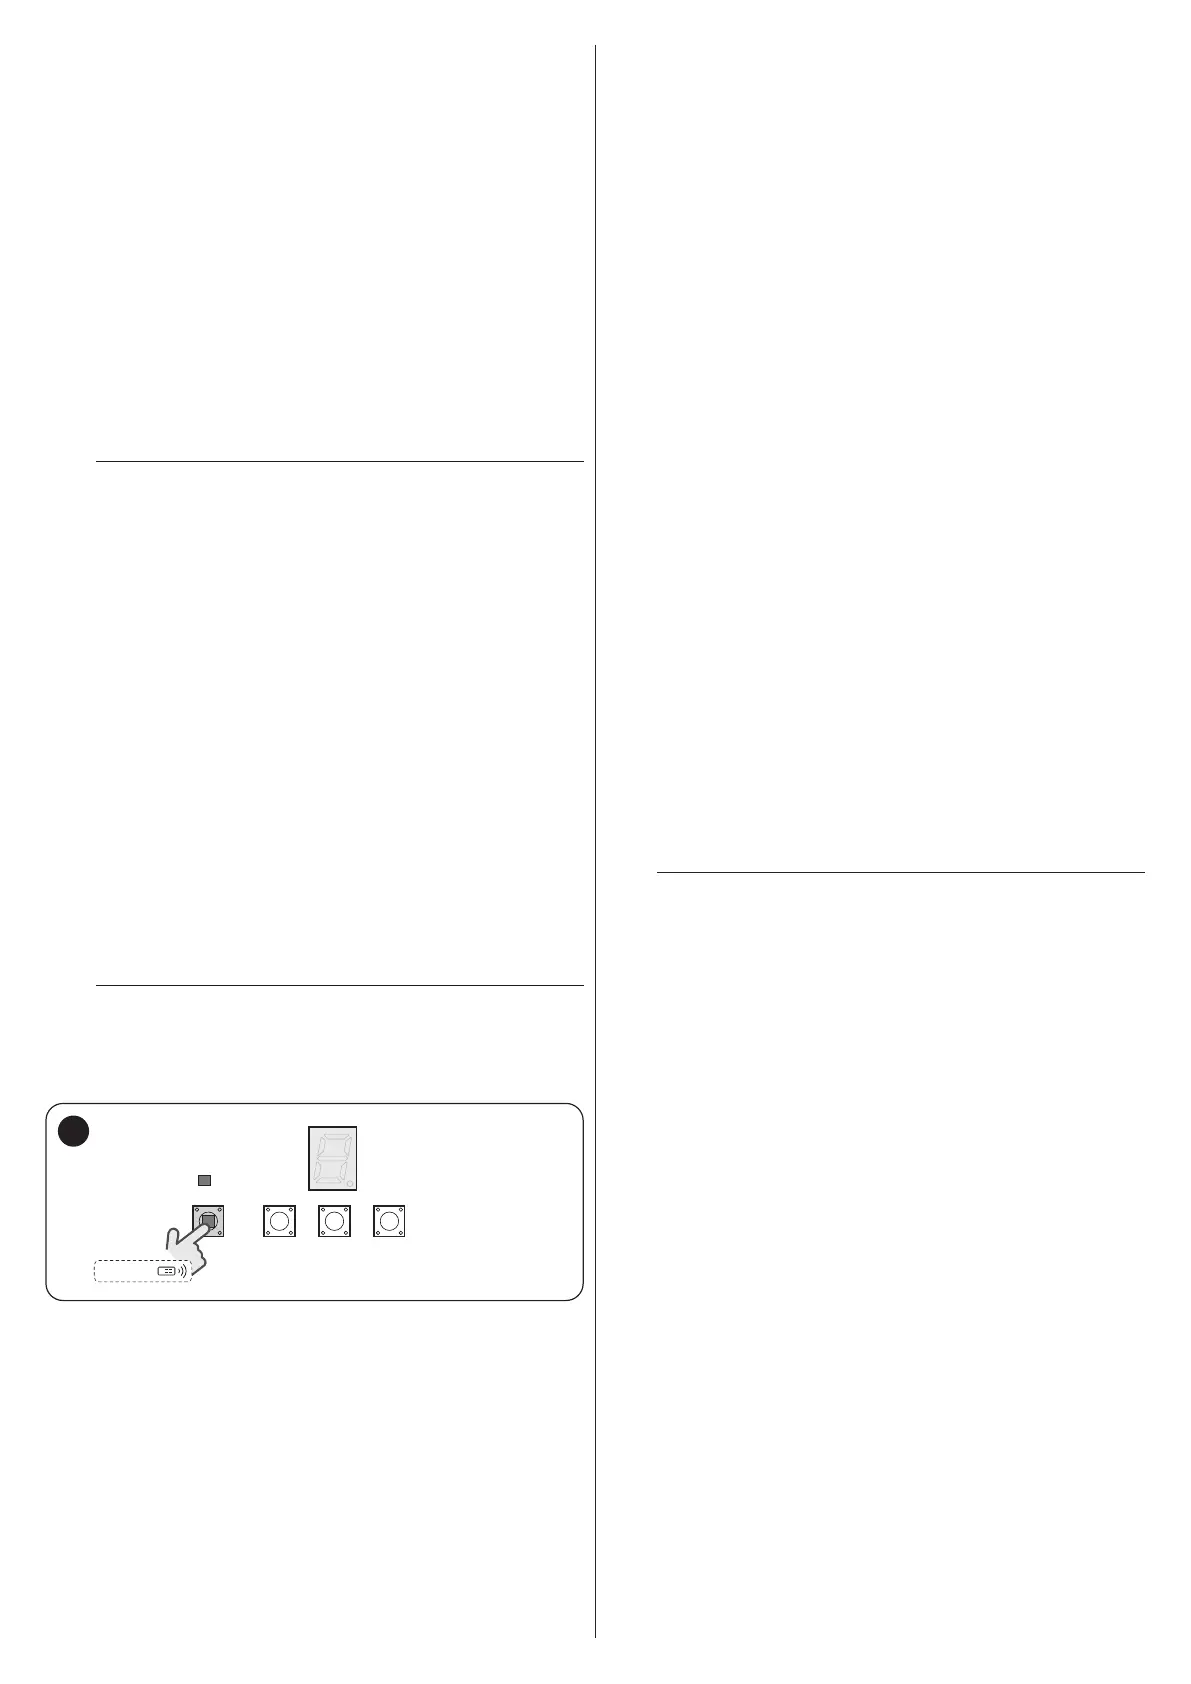
7.12 LOCKING AND UNLOCKING THE MEMORY
a
WARNING! - This procedure locks the memory, pre-
venting the execution of Procedures A, B, C and D
described in the “Transmitter memorisation and de-
letion procedures” paragraph (page 22)
RADIO
LR
LED
RADIO
49
Procedure for locking/unlocking the memory:
1. disconnect the control unit from the power supply
2. press and hold the
i
button
3. power the control unit again (by pressing down the
i
button)
4. after 5 seconds the “LR” LED will emit 2 slow ashes
5. release the button
i
6. (within 5 seconds) repeatedly press the
i
button
to select one of the following options:
– disabling of the memory lock function = LED off
– enabling of the memory lock function = LED on
7. ve seconds after last pressing the button, the “LR” LED will
emit 2 slow ashes to signal the end of the procedure.
7.13 SPECIAL FUNCTIONS
7.13.1 “Always open” function
The “Always open” function is a control unit feature that enables the
user to always command an opening manoeuvre when the “Step-
by-Step” command lasts longer than 3 seconds; this is useful,
for example, for connecting a timer contact to the SbS terminal in
order to keep the gate open for a certain time frame.
This property is valid regardless of the “SbS” input programming;
see the “Setting the SbS operation” chapter (page 21).
7.13.2 “Move anyway” function
This function can be used to operate the automation even one or
more some safety devices fail to work properly or are out of order.
The automation can be controlled in “hold-to-run” mode by pro-
ceeding as follows:
1. send a command to operate the door, using a transmitter or
key selector, etc. If everything functions properly, the door
will move normally, otherwise proceed with point 2
2. within 3 seconds, press the control again and hold it down
3. after roughly 2 seconds, the door will complete the request-
ed manoeuvre in “hold-to-run” mode, in other words, it will
continue to move so long as the control is held down.
l
When the safety devices fail to work, the ashing
indicator will ash a few times to signal the type of
problem. To verify the type of anomaly, consult the “
TROUBLESHOOTING GUIDE” chapter (page 24).

 Loading...


