16 – ENGLISH
PROGRAMMING
7
7 PROGRAMMING
There are 4 buttons on the control unit:
f
,
g
,
h
and
i
(“Figure 42”) which can be used to
command and programme the control unit.
Moreover, the control unit has a display with 7 segments that facil-
itates browsing of the menus when modifying the parameters and
functions.
1
2
345
6
78
LR
LS
DISPLAY
LED
RADIO
LED STOP
LK
LED OK
OPEN
STOP/SET
CLOSE
RADIO
42
7.1 USING THE PROGRAMMING BUTTONS
During programming:
f
– scrolls the programming menu forward
– increases by one point the value of the parameter being modied
g
– accesses the conguration of the selected parameter
– conrms the selected value
h
– scrolls the programming menu backwards
– decreases by one point the value of the parameter being mod-
ied
i
– not used
During normal operation:
f
– performs an opening manoeuvre
g
– stops the current manoeuvre
– with the motor stationary, it switches the courtesy light off
– accesses the programming menu if pressed for 5 seconds
h
– performs a closing manoeuvre
i
– allows for memorising or deleting radio remote controls
7.2 PROGRAMMING THE CONTROL UNIT
The programming menu allows for accessing the automation’s
functions and modifying its conguration.
The menu contains 10 items which allow for conguring a parame-
ter or starting a specic procedure. The items scroll cyclically, that
is, after the last item the system returns to the rst item.
m
The programming menu can only be accessed with
the motor stationary.
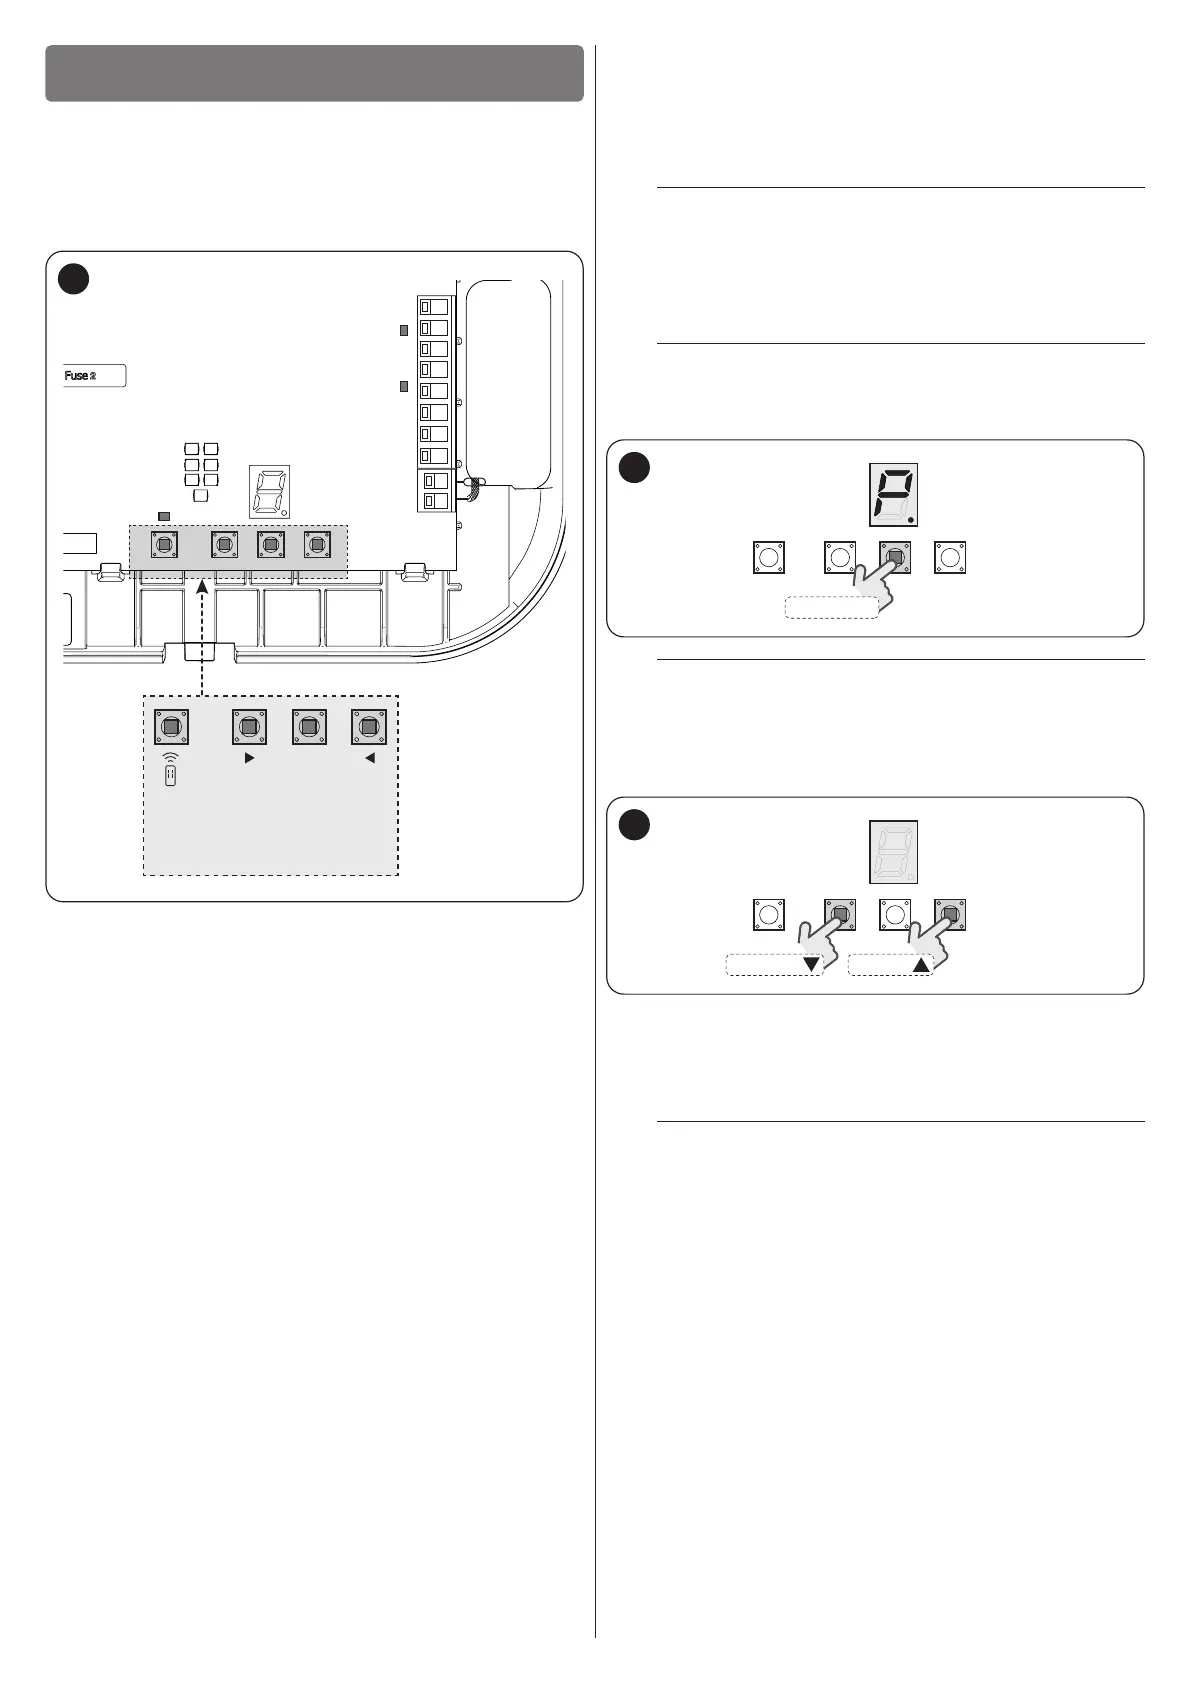
To access the programming functions of a menu:
1. press and hold the
g
button for roughly 5 seconds:
the symbol on the display will ash slowly (“Figure 43“)
l
This symbol will only appear on the rst access and
will no longer be visible after pressing the
f
or
h
button once.
DISPLAY
STOP/SET
43
l
Every menu item is represented by the lit dot to dis-
tinguish it from the respective programming values,
which instead have the dot off.
2. press the
f
or
h
button until you reach the
desired menu (“Figure 44“)
DISPLAY
OPENCLOSE
44
3. press the
g
button to access the parameter: de-
pending on the function performed by the latter, it will be
possible to set a value or start a specic procedure. For
further information, refer to “Table 4” and the subsequent
chapters
m
If the current conguration of a parameter fails to
match any of the pre-dened values (see the de-
tails of each parameter), the symbol shown in “Fig-
ure 45” will be displayed. The
f
or
h
button can be used to modify the value by replacing
it with a known conguration.

 Loading...


