For many of us this isn’t a problem. However, if you are
shooting in-studio for a product shot, I’m sure your client will
want the pictures to be the same color as the product. White
balance lets you control that carefully, when needed.
Here are the screens and steps to select a White balance
setting (see Figure 3-17):
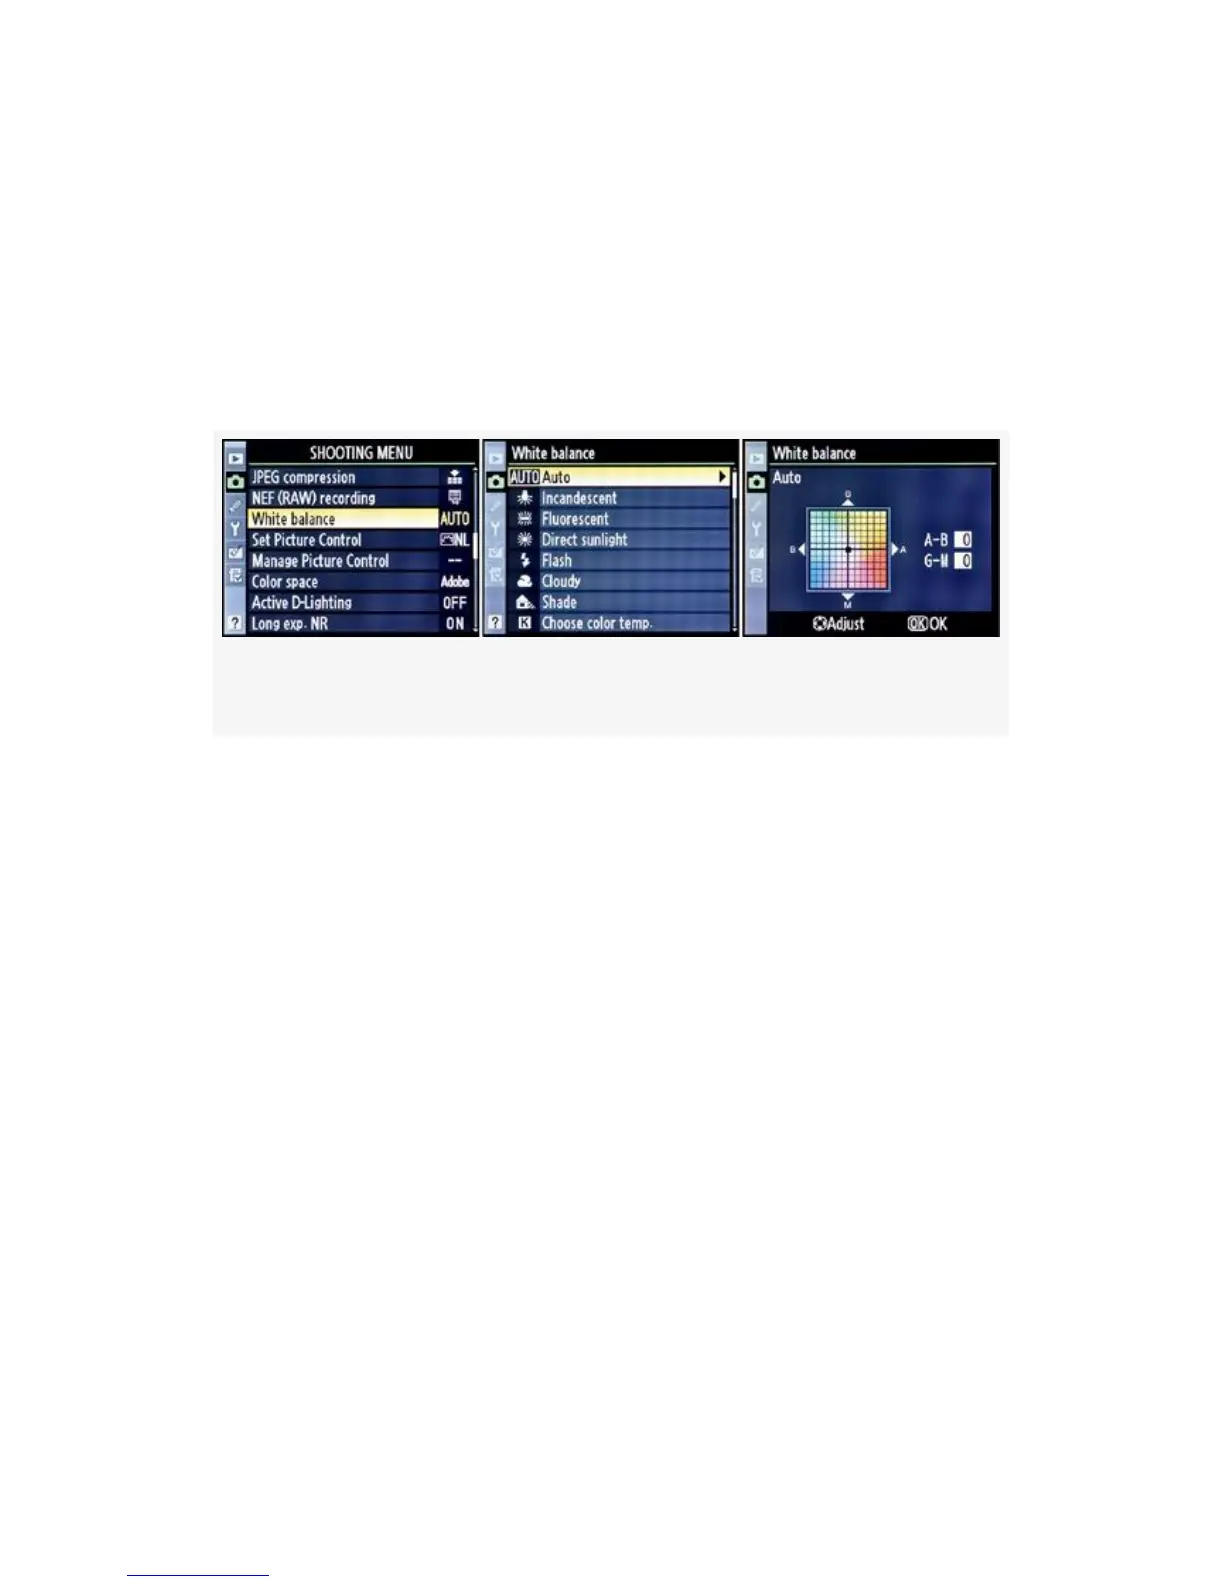
Figure 3-17. White balance screens
1. Select White balance from the Shooting Menu and scroll
to the right.
2. Choose a White balance type, such as Auto or Flash,
from the menu and scroll to the right.
3. As shown in Figure 3-17, image 3, you’ll now arrive at
the White balance fine-tuning screen. At this time, you
can make an adjustment to how you want this White
balance to record color by introducing a color bias
toward green, yellow, blue, or magenta. You do this by
moving the little black square in the middle of the color
box toward the edges of the box in any direction. If you
make a mistake, simply move the little black square back
to the middle of the color box.
4. Once you have finished adjusting (or not) the colors,
press the OK button to save your setting. Most of us will
154