Electrical System 36Service Manual – Focus II / Scrubtec R6 Rider Autoscrubber
Troubleshooting
Battery Testing
A battery problem is usually recognized by the machine operator as a decrease in the machine’s running
time. This condition is usually caused by one or more “dead cells” in the battery system. There are 2 ways to
nd a dead cell:
• Use a hydrometer to check the specic gravity (or “state of charge”) of the uid in each cell. A dead cell is
one that reads 50 points (or more) lower than the other cells.
• Use a volt meter to check the voltage of each battery. Look for a battery with a voltage that is 1 or 2 volts
less than the other batteries. Check under the following conditions:
• With the batteries fully charged,
• With the scrub and drive motors running,
• With the batteries discharged, but still above the voltage cutoff threshold.
If the batteries in the machine are more than 1 year old, it’s usually best to replace the whole set, rather than
replacing one or two batteries. Mixing old and new batteries can result in over-charging problems.
Removal and Installation
Batteries
Caution!
• Useextremecautionwhenworkingwithbatteries.Sulfuricacidinbatteriescancausesevere
injuryifallowedtocontacttheskinoreyes.
• Explosivehydrogengasisventedfromthebatteriesthroughopeningsinthebatterycaps.Donot
smokewhileservicingthebatteries.
• Removealljewelry.Wearsafetyglasses,rubberglovesandarubberapron
• Donotallowtoolstotouchmorethanonebatteryterminalatatime
• Electricalcomponentsinthismachinecanbeseverelydamagedifthebatteriesarenotinstalled
andconnectedproperly.
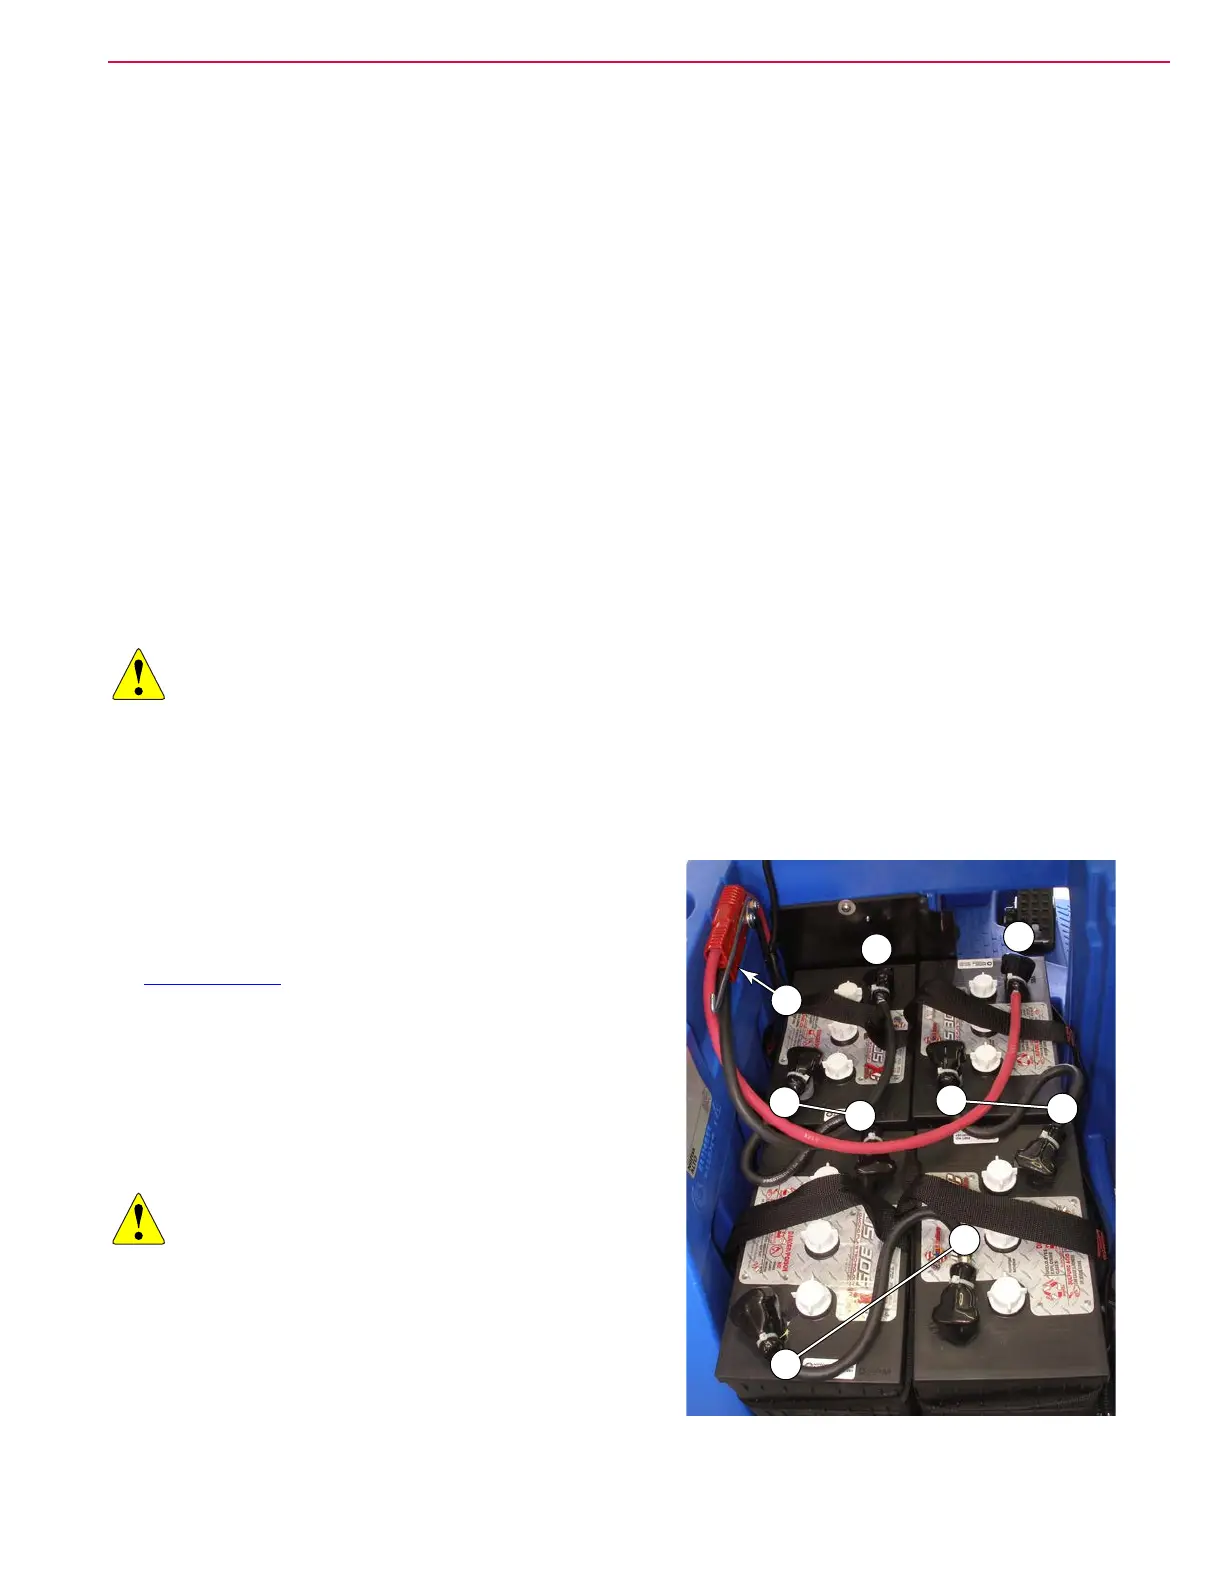
1. Turn the Key Switch to the off position and disconnect
the main battery connector (1).
2. Disconnect the vacuum motor connector and remove the
Recovery Tank described on page 52.
3. Remove the cables from the batteries, and remove the
batteries. Make note of the battery polarity and cable
locations.
4. Install the new batteries into the compartment. Note the
orientation of the batteries shown to the right. Not all of
the batteries are oriented the same way.
Caution!
If you change the type of batteries (Wet VS Gel), you
must change the charging profile used by
the battery charger to be compatible with
the new type of batteries.
5. Put a rubber boot over each end of the battery cables.
6. Connect the battery cables.
• All cables are connected positive-to-negative for a
series connection between all 4 batteries.
−
+
−
+
−
+
−
+
1
 Loading...