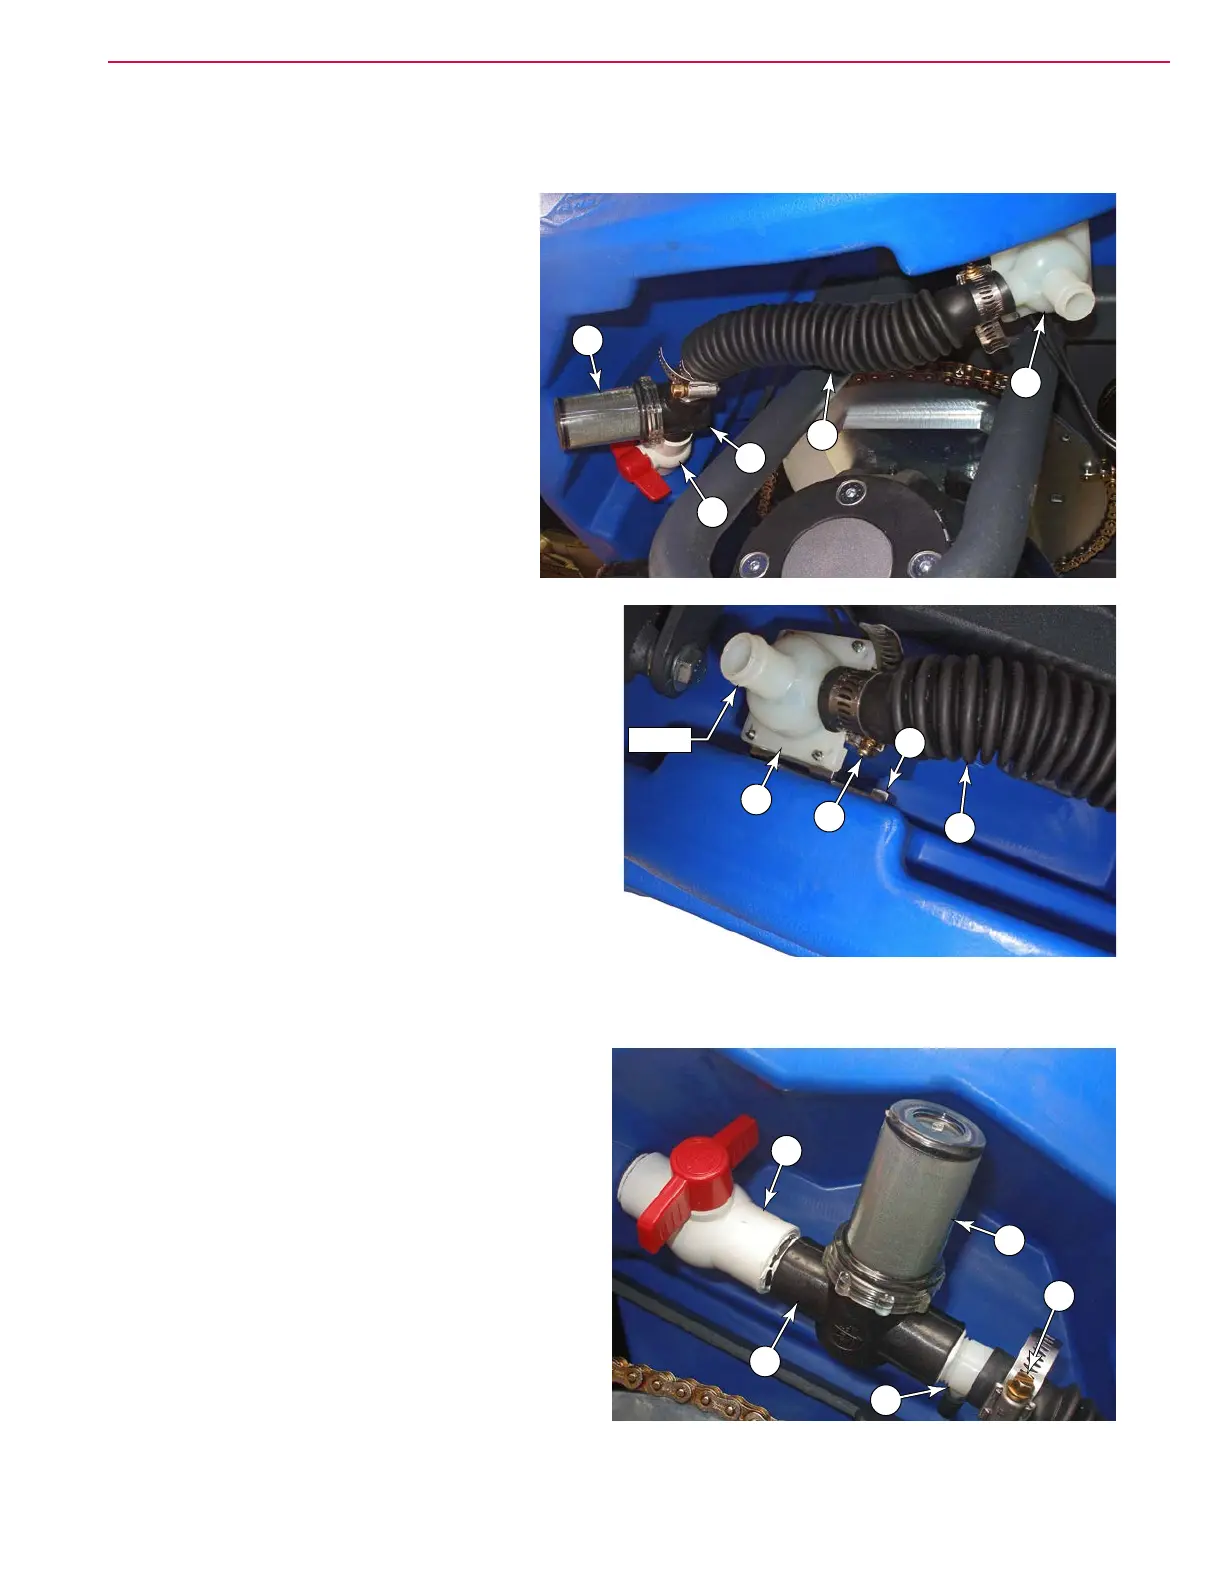
Solution System 69Service Manual – Focus II / Scrubtec R6 Rider Autoscrubber
Removal and Installation
Solution Valve, Filter, and Solenoid
The solution valve, lter, and solenoid are
located under the front left corner of the
machine. Accessing all three components is
similar.
• If the solution valve needs servicing, drain
the solution tank. Otherwise close the
solution valve.
• To replace the solenoid (3), do the
following:
a. Loosen the hose clamp on the outlet hose to
the scrub deck, and remove the outlet hose
(not shown).
b. Loosen the hose clamp (4) on the inlet ex
hose (5), and remove the ex hose.
c. Remove the solenoid mounting screw (6), and
remove the solenoid.
• To replace the lter body (2A) or the outlet valve
(1), do the following:
a. Loosen the hose clamp (7) on the outlet ex
hose (5), and remove the ex hose.
b. Unscrew the lter bowl (2B) from the lter
body (2A), and remove the lter and bowl.
c. If present, remove the detergent injection
line from the tee (8).
d. Unscrew the lter body (2A) from the valve
(1).
e. To unscrew the valve from the solution tank,
turn the valve to the open position so the
handle is in-line with the ttings.
• During reassembly, clean the pipe threads and
reapply thread sealant. Recommended thread
sealant is Permatex 80724 or 80726 plastic pipe
sealant.
1
2A
2B
3
5
5
4
6
Outlet
3
1
2A
2B
8
7
 Loading...