Scrub System: Disc, Cylindrical, & Boost 62Service Manual – Focus II / Scrubtec R6 Rider Autoscrubber
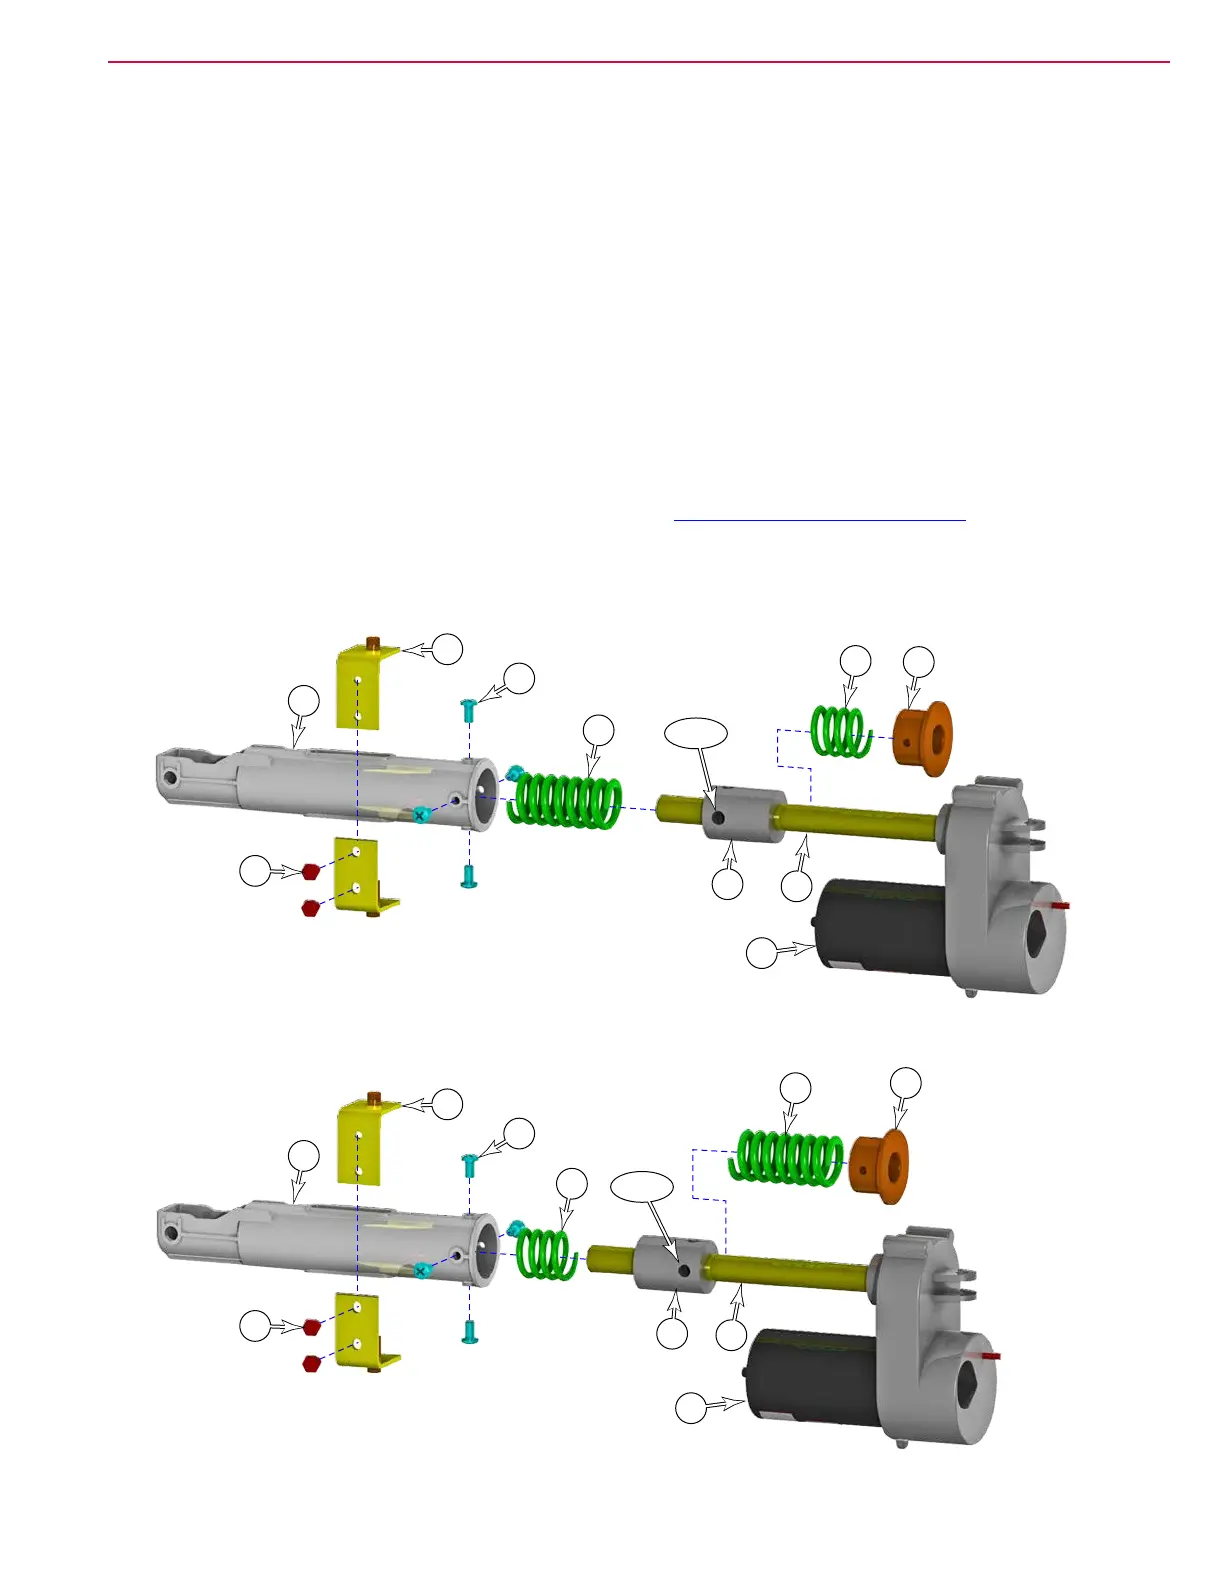
Lead Nut and Spring Orientation
The lead nut and springs need to be oriented as shown in the images below according to the deck type. A
quick inspection can be made by removing the four screws (2L), and sliding the end cap (2F) and upper
spring toward the motor, to determine if the upper spring is long or short. To reverse the lead nut and
springs, complete the following.
1. Remove the two screws (2K), and slide the pin brackets (2J) out of the lead nut.
2. Remove the four screws (2L) that secure the end cap (2F) and slide the spring housing (2C) off the
leadscrew.
3. Unscrew the lead nut, and replace the upper spring with the correct spring: Short spring (2E) for Boost
and Disk decks, and long spring (2D) for cylindrical decks.
4. Reinstall the lead nut: holes away from the motor for Boost and Disk decks, and holes toward the motor
for cylindrical decks.
5. Finish reassembling the actuator, and then complete the Lift Actuator Limit Adjustment described on
page 58.
Boost and Disk Deck Conguration
2F
2C
2D
2E
2G
2J
2L
2K
2H
2M
Holes
Cylindrical Deck Conguration
2F
2C
2D
2E
2G
2J
2L
2K
2H
2M
Holes
 Loading...