Recovery System 53Service Manual – Focus II / Scrubtec R6 Rider Autoscrubber
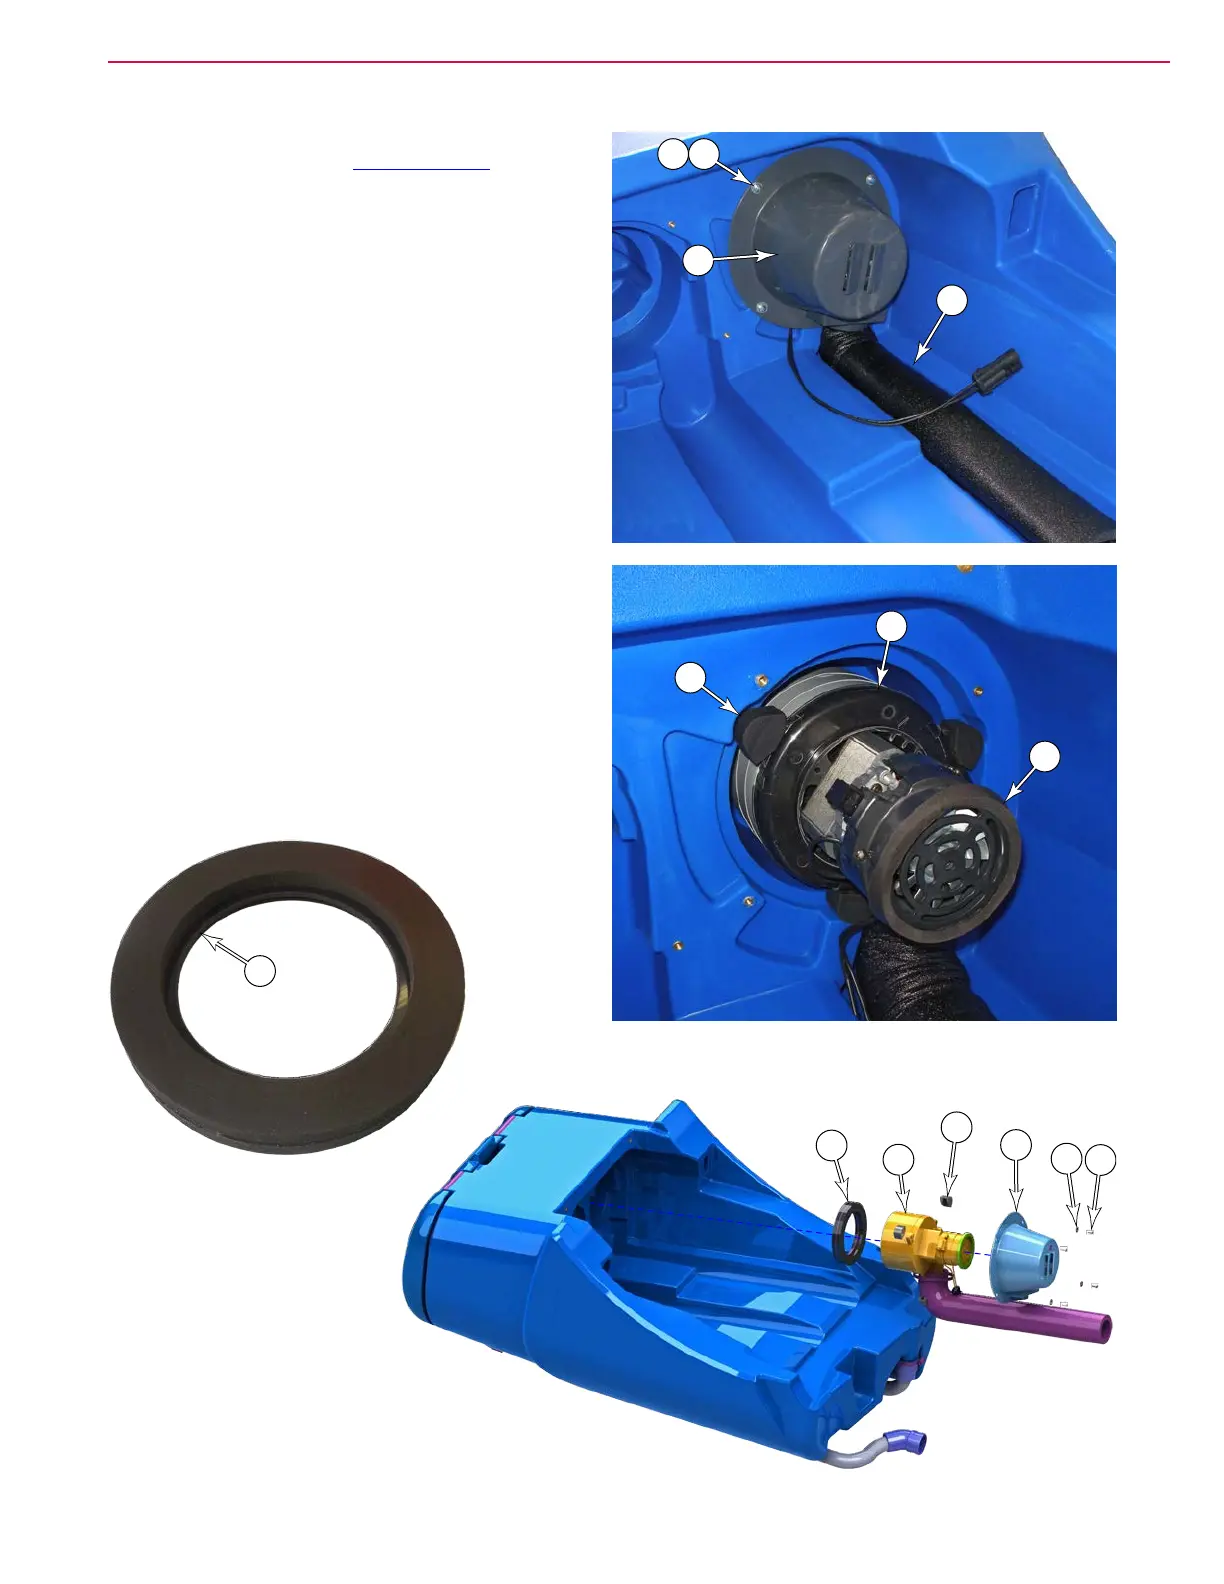
Vacuum Motor
1. Drain and remove the Recovery Tank described on
page 52.
2. Remove the four screws (6A) and washers (6B)
that secure the vacuum motor housing (6C) to the
recovery tank, and remove the housing. Be careful
not to let the motor fall, as the housing is what
holds it in place.
3. Remove the vacuum motor (6) and discharge hose
(6G). Take care not to lose the three vibration
mounts (6D).
4. If necessary, remove the cable tie that secures the
discharge hose to the motor outlet.
5. Inspect the main vacuum gasket (6E) for damage
and compressibility, and replace if necessary.
Leaks in this gasket will reduce recovery system
suction.
6. Inspect the motor ventilation gasket (6F) for
damage and compressibility. This gasket holds the
vacuum motor assembly in position against the
recovery tank.
7. Make service repairs to the vacuum motor as
needed, and re-install by reversing the procedure
steps.
6B
6C
6A
6G
6D
6F
6
6E
6
6A
6B
6C
6D
6E
 Loading...