Using Software
Using Software
36 37
Theme Shop (Paid Content)
Changing Themes
HOME Menu
HOME Menu
You can purchase new themes by selecting CHANGE THEME from the HOME Menu Settings, then selecting THEME SHOP.
Note:
•
Purchased themes will be saved on the SD card as add-on content.
•
You need an internet connection in order to purchase themes.
Note:
•
You cannot rearrange or delete themes that came pre-installed before the system was purchased.
•
Once purchased, themes can be redownloaded for free from the Theme Shop. Please be aware that you might not be able to redownload a theme if
distribution is suspended or discontinued.
•
Themes cannot be redownloaded if you delete your Nintendo eShop account or Nintendo Network ID. For details, refer to the Nintendo eShop electronic
manual.
Changing themes allows you to alter the background, icons, music and sounds of the HOME Menu. You can change themes, as well as check the
Theme Shop, by selecting CHANGE THEME from the HOME Menu Settings.
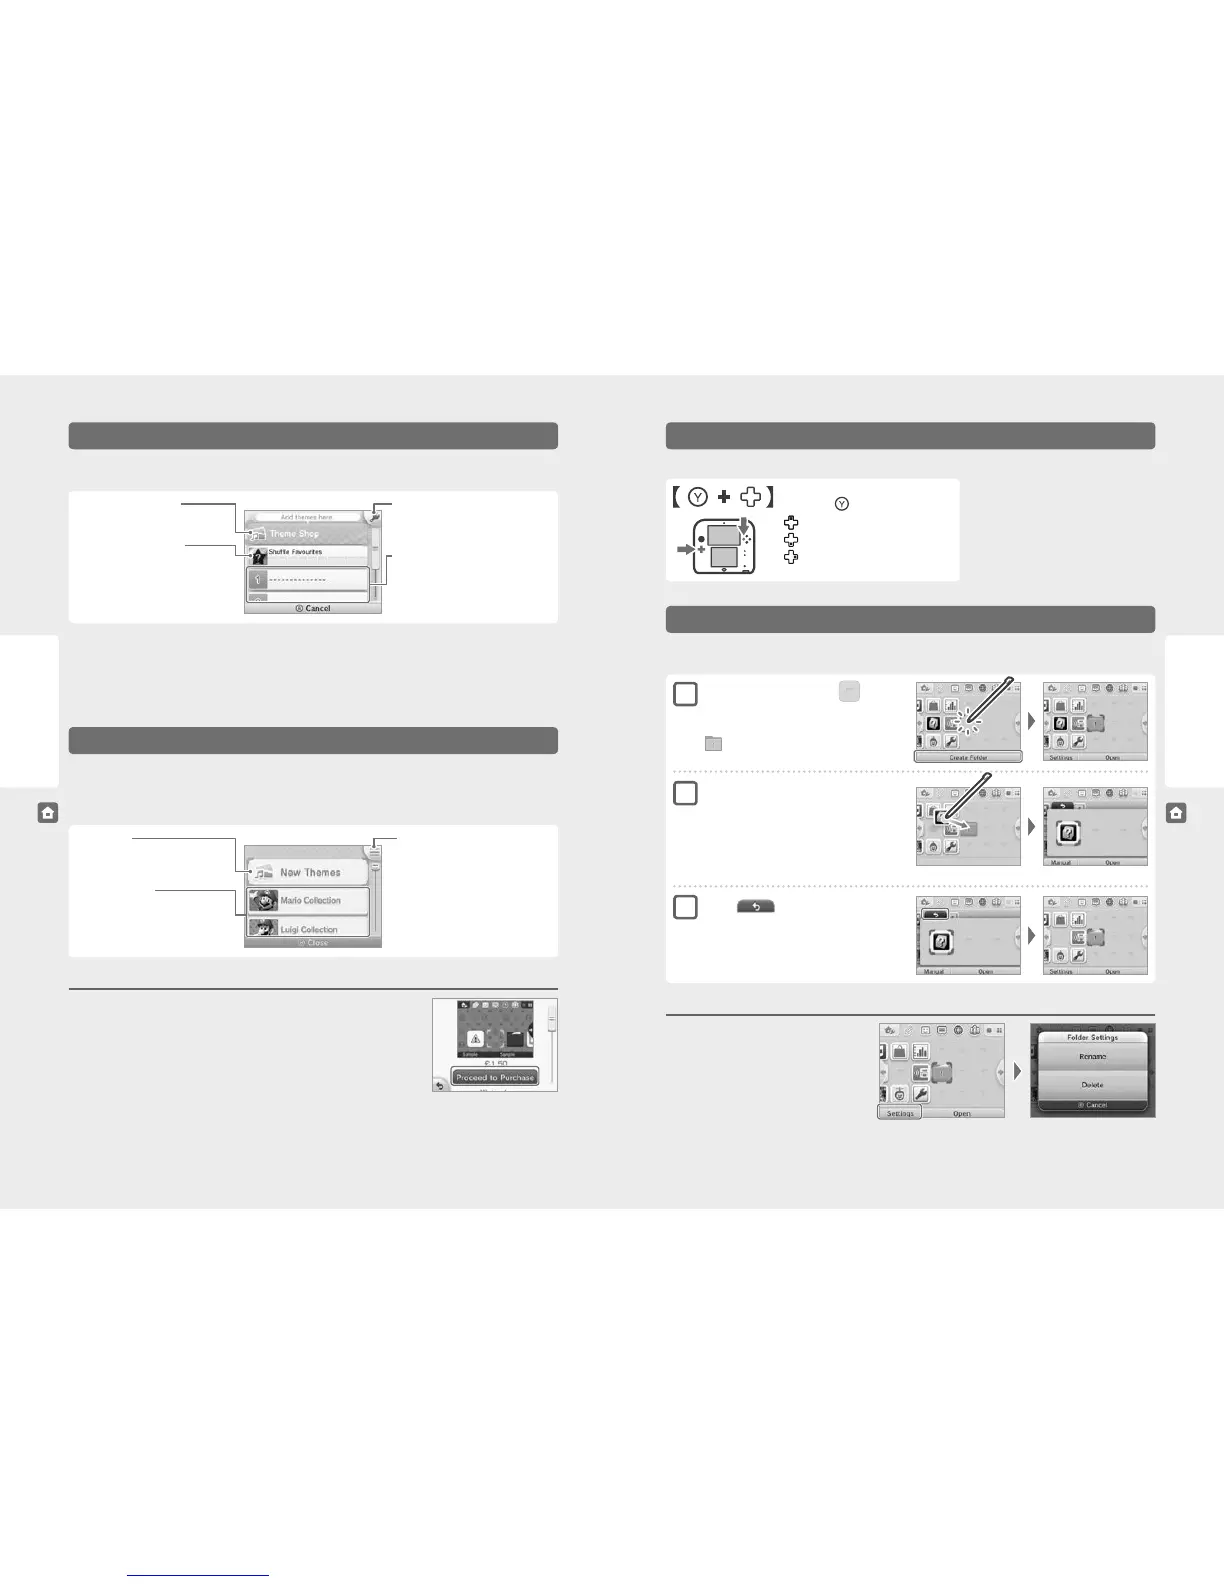
Theme Shop Menu
Enter Download Code
Download a theme by redeeming a download
code.
Notication Settings
You can choose whether or not to receive
Theme Shop notications that will appear on
the HOME Menu.
Rearrange/delete themes
Touch this to alter the display order for purchased
themes, or to select themes you want to delete.
List of themes
Shows a list of the themes currently available
on your system. Touch one to select the theme
you want to use.
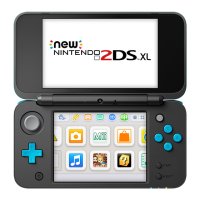
New Themes
Touch this to see a list of new themes.
Theme Shop (See below)
Theme Collections
Here you can nd collections of recommended
themes. Select a collection to view the themes,
and touch a theme to view details about it.
Shue Favourite Themes
Set a list of your favourite themes that the system
will shue through automatically when the
power is turned on, or after putting the system
in Sleep Mode from the HOME Menu.
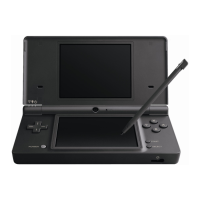
Taking a Screenshot of the HOME Menu
Take a screenshot of the HOME Menu by pressing the following button combinations.
Press and hold , then press the following:
Up: Take a screenshot of the upper screen
Down: Take a screenshot of the Touch Screen
Right: Take a screenshot of both screens
•
You can view screenshots in Nintendo 3DS Camera
(page 32).
•
Use Nintendo 3DS Image Share in the HOME Menu
Settings to post screenshots to social networking
sites (page 35).
Note: It is not possible to take a screenshot of the upper
screen while software is suspended (page 33).
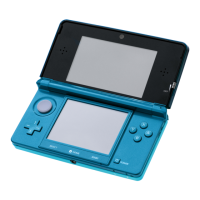
You can create folders on the HOME Menu to organise your software icons. You can create up to a maximum of 60 separate folders, and each
folder can hold up to 60 software icons.
Touch to close the folder
When you want to open the folder again, simply select it
and touch OPEN.
Move software icons into the new folder
•
To move an icon, touch and hold the stylus over the icon
until it detaches. Drag it above the folder icon, and the folder
will open. Finally, drag the icon to wherever you would like
to place it within the folder, and release the stylus.
•
If you would like to move an icon back out of a folder,
simply drag it in the same way out of the folder area.
Creating Folders on the HOME Menu
1
2
3
Folder Settings
Select a folder icon and then touch SETTINGS to change the
folder’s name or delete it entirely.
•
When you change a folder’s name, the rst letter of the
folder’s name will be displayed on the folder’s icon on
the HOME Menu.
Note: You cannot delete a folder if there is even one software
icon inside it.
On the HOME Menu, touch
(an empty slot)
Touch CREATE FOLDER
(a folder icon) will appear in the empty space.
Purchasing Themes
Touch PROCEED TO PURCHASE on the theme details screen, then follow the on-screen instructions.
Note: The download process will begin after purchase. After the download is complete, you can select the new
theme by touching CHANGE THEME on the HOME Menu Settings screen.