Removing, Installing, and Replacing NICs
IP390 Security Platform Installation Guide 51
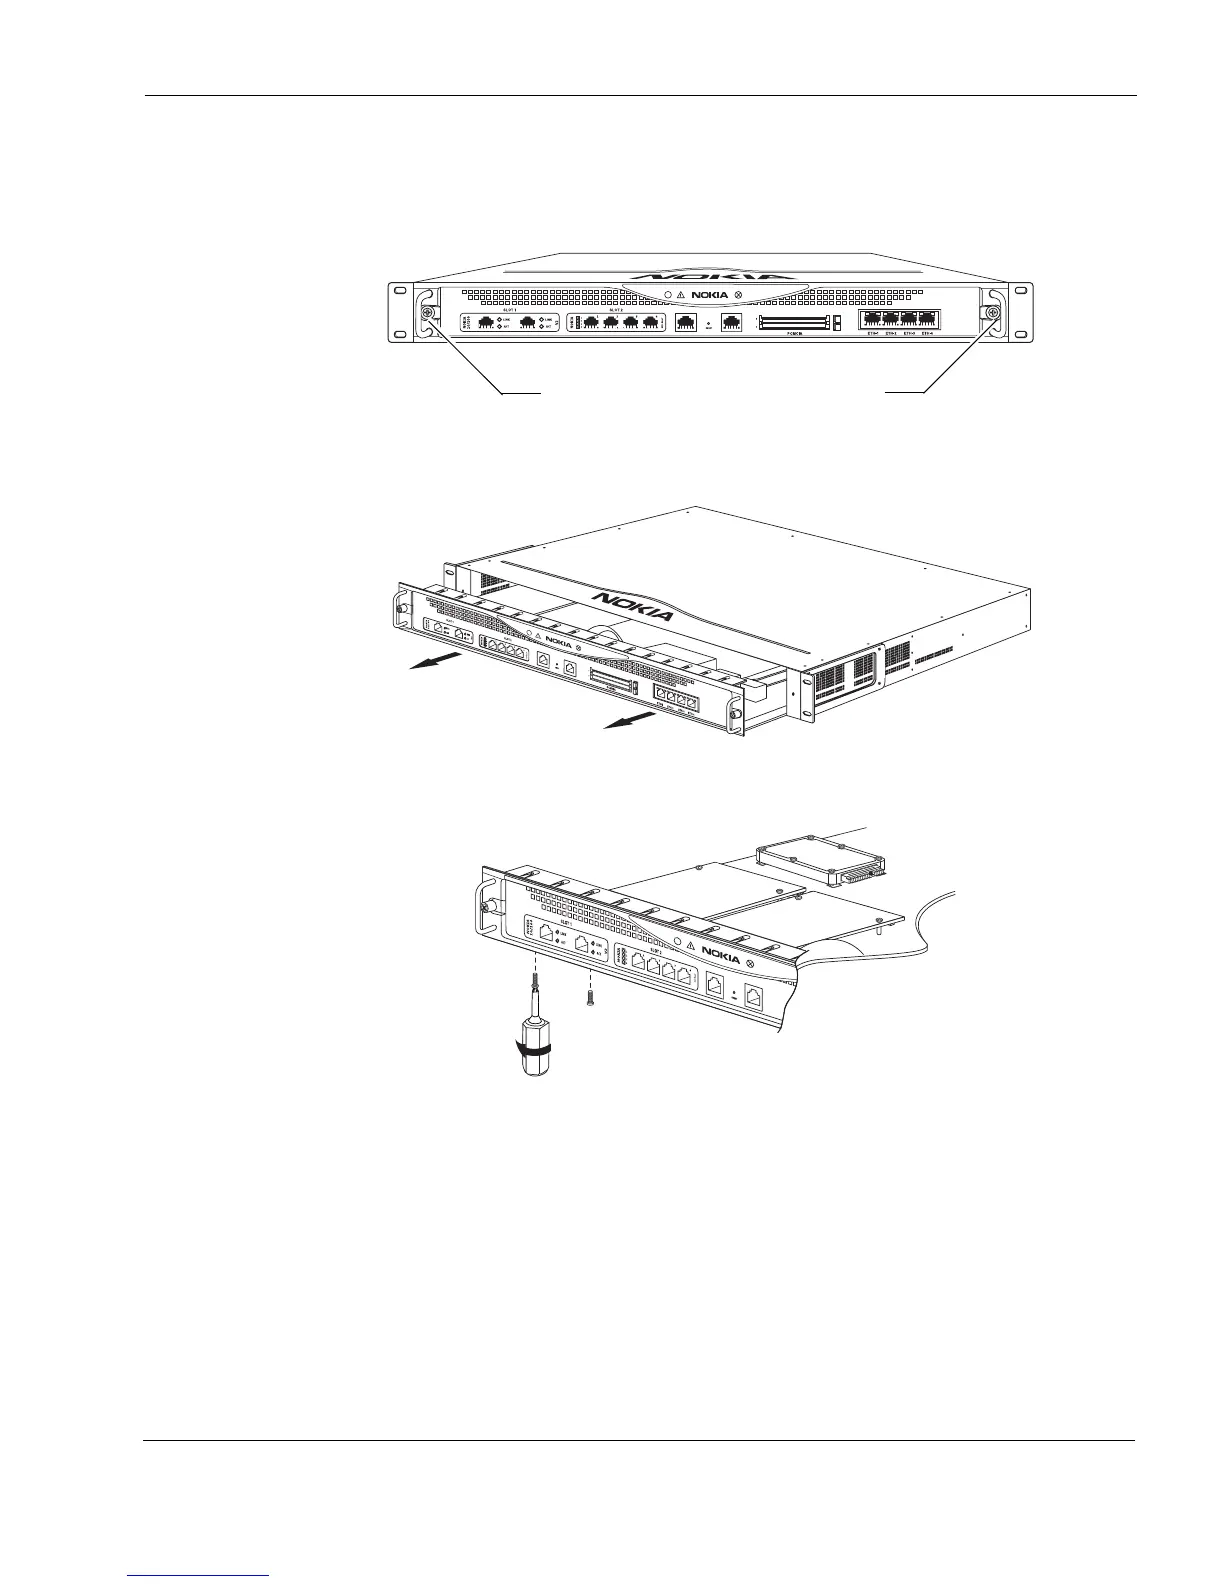
2. Use your fingers or a screwdriver to loosen the retaining screws that hold the chassis tray
assembly.
3. Gently pull the chassis tray assembly forward to expose the NIC connectors. Remove the
tray completely to avoid damaging components.
4. From underneath the chassis tray assembly, remove the bezel retaining screws.
If you are installing a NIC in an unoccupied slot, remove the blank bezel that occupies the
space in the appliance front panel, retain it for future use, and proceed to step 7.
00525
IP390
Chassis tray assembly retaining screws
00537
IP390
00529