5 Installing and Replacing Network Interface Cards
52 IP390 Security Platform Installation Guide
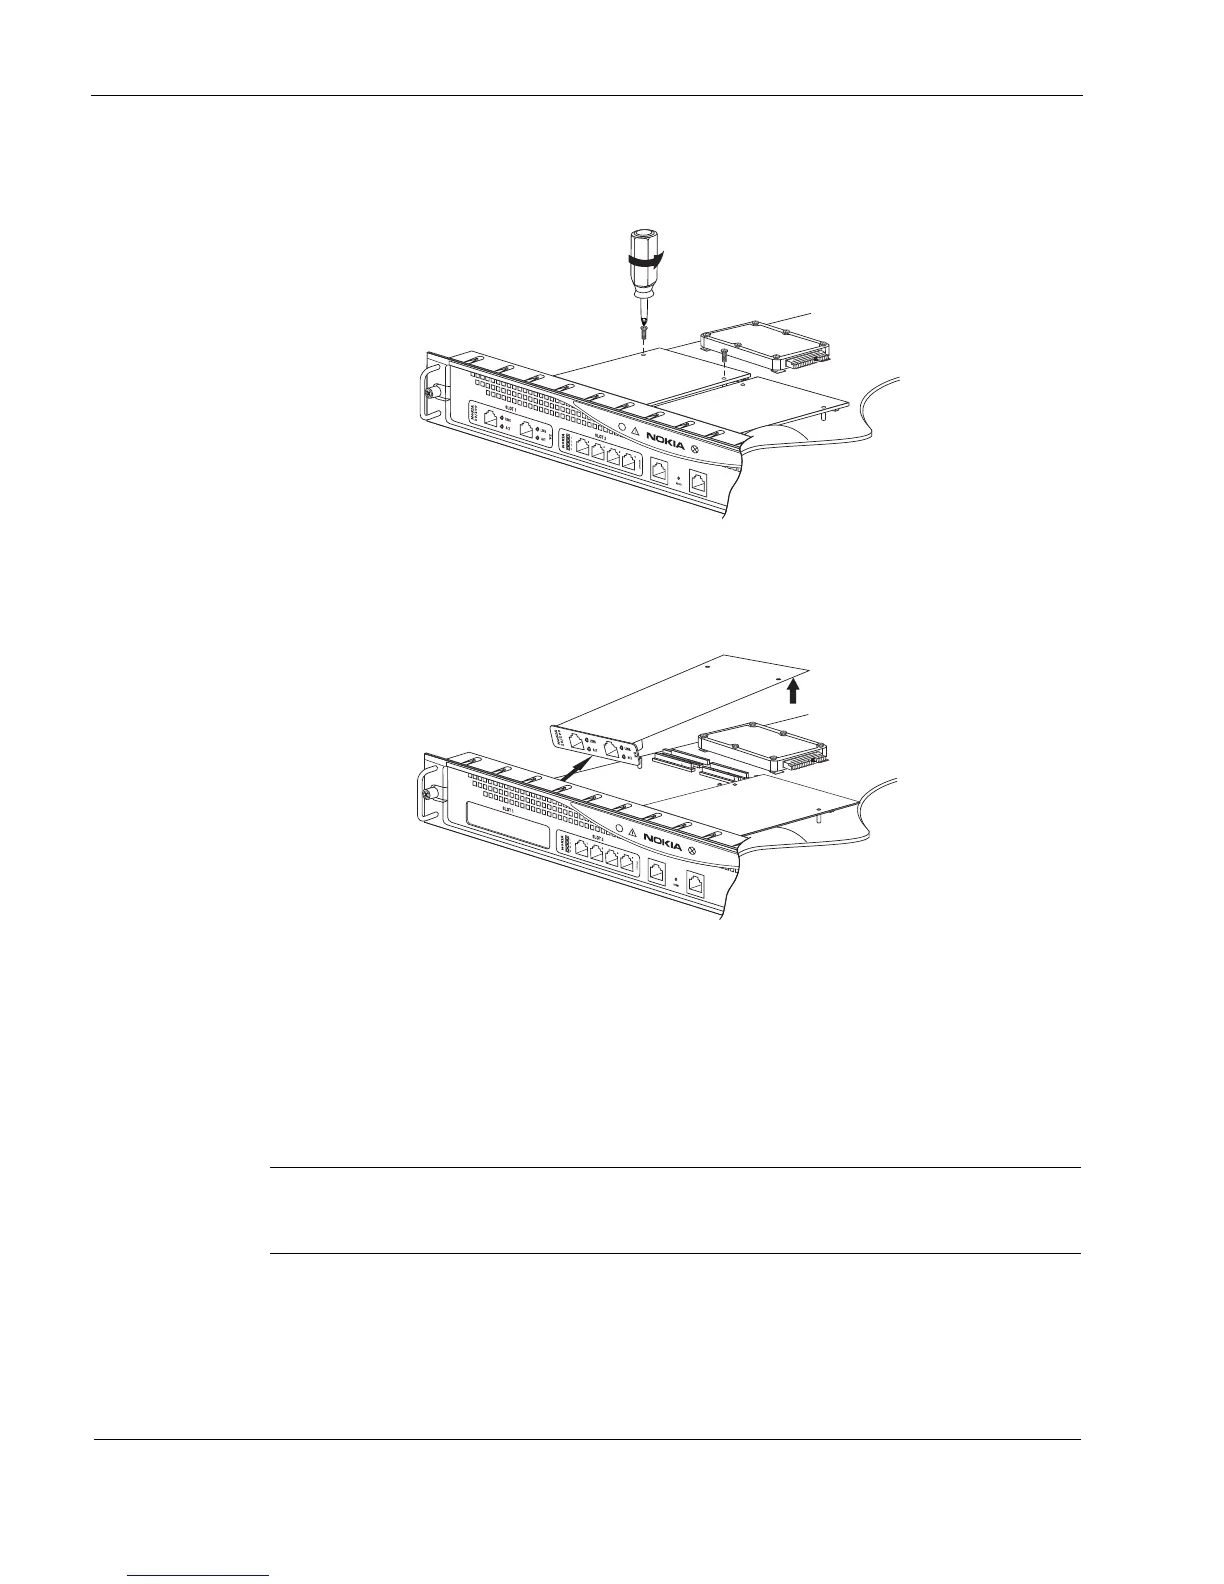
5. From above the chassis tray assembly, remove the NIC retaining screws from the back of the
NIC.
6. Remove the NIC by lifting the back of the NIC (as close as possible to the connector
locations) away from the chassis tray assembly and pulling the NIC gently away from the
front panel.
7. Insert the new NIC or blank bezel.
If you are removing a NIC without installing another NIC:
a. Insert a blank bezel into the front panel slot formerly occupied by the NIC and push it
gently into place.
Make sure that the bezel is completely seated into the front panel and that the screw holes
on the bottom of the bezel align with those in the front panel.
Note
To reduce electromagnetic interference (EMI), a blank bezel needs to be installed in the
place of any NIC you have removed.
b. Proceed to step 9.
00530
00533a