Replacing the Battery
IP390 Security Platform Installation Guide 73
6. Remove the old battery. Use a small nonconductive device, such as a plastic probe, to slide
the battery out of the battery holder through the cutout in the holder.
Caution
Replace the battery only with the same or equivalent type battery recommended by the
manufacturer. Dispose of used batteries according to the manufacturer's instructions.
7. With the positive side facing up, slide the new battery through the cutout in the battery
holder.
Caution
You must place the new battery into the battery holder observing the correct polarity.
The positive terminal of the battery must be facing up.
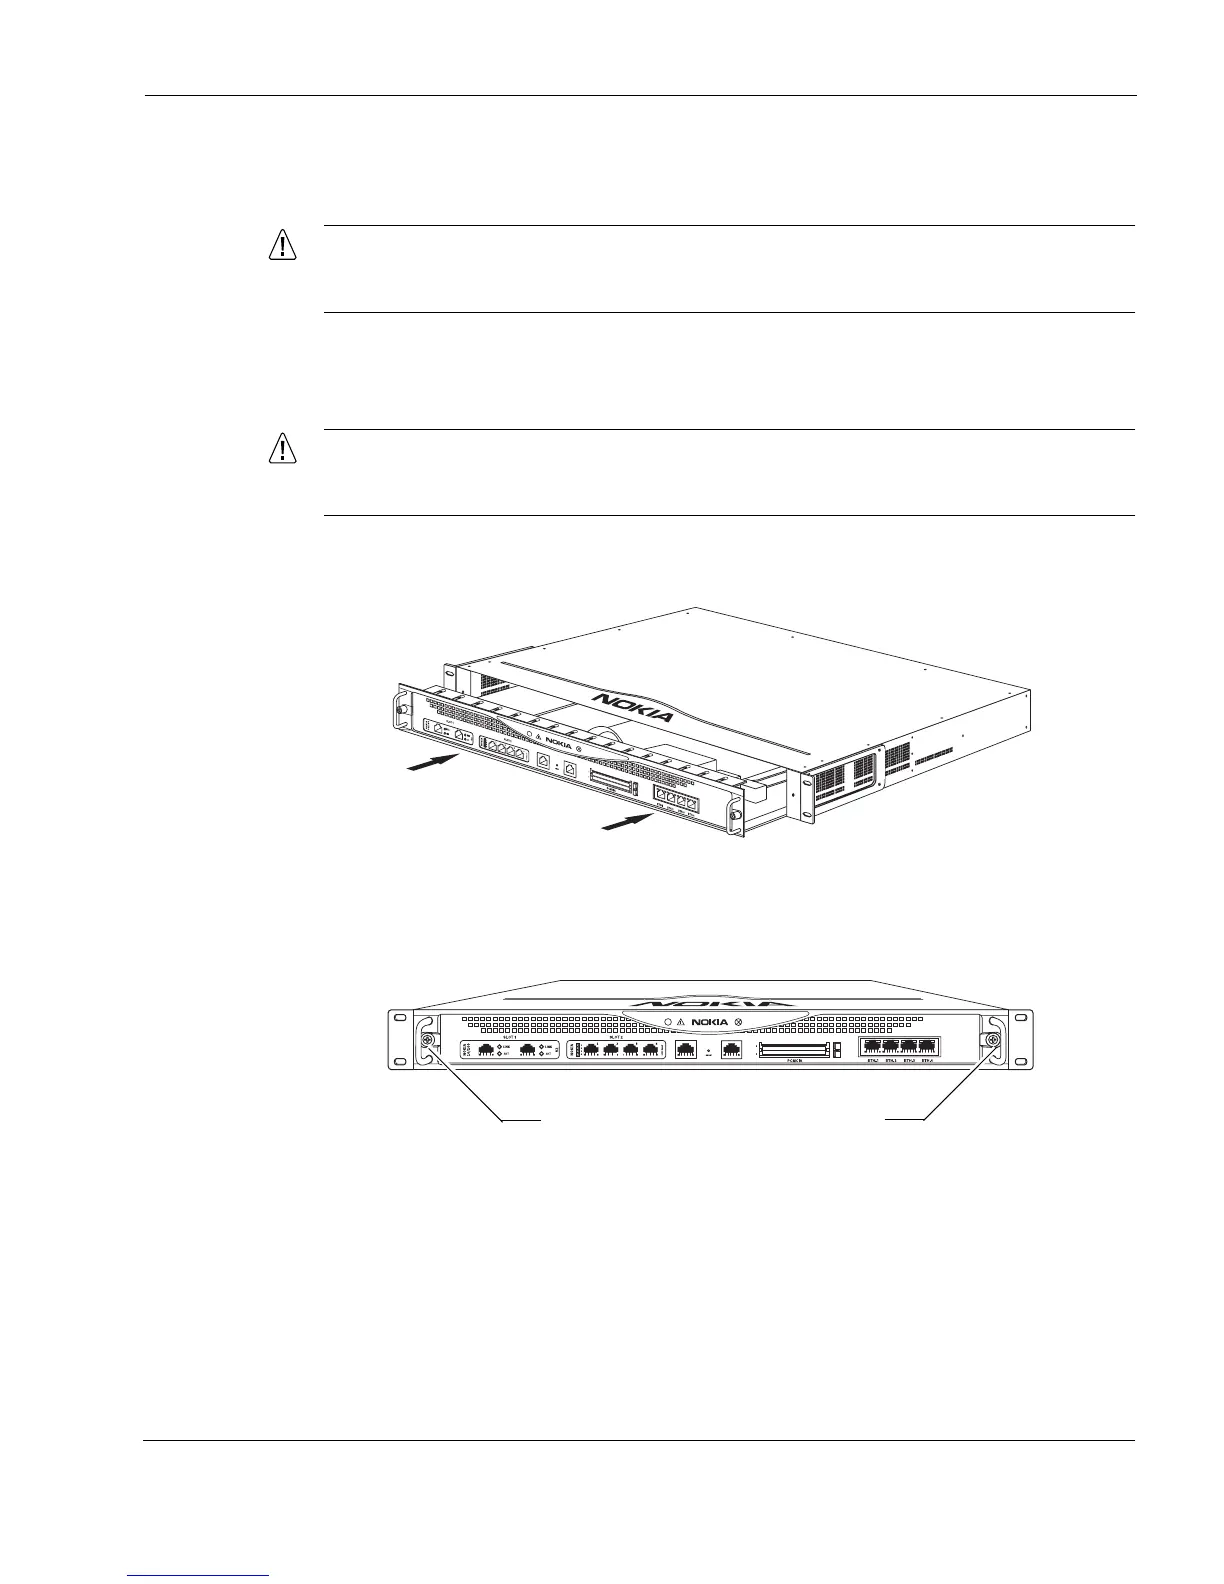
8. Gently slide the chassis tray assembly back into the appliance until it clicks into place.
The appliance automatically restarts when the chassis tray assembly clicks into place.
9. Resecure the two retaining screws.
After you replace the battery, you need to reset the date and time using Network Voyager or the
CLI.
00538
IP390
00525
IP390
Chassis tray assembly retaining screws