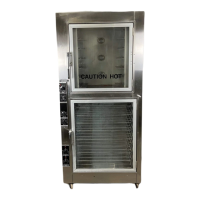
TROUBLE–SHOOTING GUIDE OP–2FM OWNER'S MANUAL
NU–VU® FOOD SERVICE SYSTEMS PO BOX 35 MENOMINEE, MICHIGAN 49858-0035
page 20 SALES FAX (906) 863-5889 • SERVICE FAX (906) 863-6322 (800) 338-9886
IV. The Oven Door is open but the Oven Motor [7] continues to run:
A. Check the Micro Switch [15] plunger in the top Oven Door Hinge [43]. The plunger must be
free to move in and out. Eliminate any binding by adjusting the Switch (refer to MICRO
SWITCH, How to Replace in the SERVICE AND REPLACEMENT GUIDE).
B. If the Micro Switch plunger is free to travel in and out but the Oven Motor continues to run,
the Micro Switch itself is bad and must be replaced.
V. The Oven Blower Wheel [51] makes unusual noise:
A. Remove the Oven Element Cover [52]. Make sure the Oven Blower Wheel is not rubbing on
the Element Cover or the ceiling of the Oven. The position of the Blower Wheel can be
adjusted by loosening the allen screws on the Blower Wheel hub and moving the Wheel up or
down on the Oven Motor shaft (refer to BLOWER WHEEL INSTALLATION AND
BALANCING in the SERVICE AND REPLACEMENT GUIDE).
B. If there is no evidence of rubbing on either the ceiling of the Oven or the Element Cover the
Blower Wheel allen set screws may only be loose. Tighten them securely. A Blower Wheel
that is only a little bit loose can make unusual noise and may damage the Oven Motor.
C. Remove the Motor Cover [72] and run the Oven Motor. If the Motor shows any vibration
while running the Blower Wheel may be out of balance (refer to BLOWER WHEEL
INSTALLATION AND BALANCING in the SERVICE AND REPLACEMENT GUIDE). An
unbalanced Blower Wheel may damage the Oven Motor.
VI. You have an uneven bake:
A. Remove the Oven Element Cover [52]. Turn the Oven ON and set the Temperature Control
[22] to 250
°
to see if the Oven Heating Elements [6] become red-hot. Replace any Heating
Elements that fail to become red-hot (refer to OVEN HEATING ELEMENTS, How to
Replace in the SERVICE AND REPLACEMENT GUIDE). NOTE: The Oven Heating
Elements will not function until the Oven Door is closed or the Door Micro Switch [15] is
depressed by hand.
B. Make sure the Oven Door Gasket [46] is intact and seals completely around the Oven Door
(refer to DOOR LATCH, How to Adjust in the SERVICE AND REPLACEMENT GUIDE).
C. Make sure the Oven Side Walls [53] and Oven Element Cover [52] are correctly installed in
the Oven. The ½" flange on the back of the Element Cover and each Sidewall must be inserted
into the guide braces welded to the sides and ceiling of the Oven. Make sure all mounting
thumbscrews are present and tight.
D. If all of the above steps have been checked and okayed, and you still have an uneven bake, we
ask that you please call our Service Department at (800) 338-9886. Be prepared to describe
exactly what is wrong with your bake so that we may be of assistance.
VII. The Oven Timer [24] does not run:
A. Check the electrical connections between the Oven Power Switch [21] and the Oven Timer.
All connections must be clean and tight.
B. Make sure that the Timer wiring is correct. The black wire from the Power Switch is
connected to terminal "4" on back of the Timer. Terminal "6" on back of the Timer is
connected to one side of the Buzzer Alarm [16].
C. Turn the Timer Knob back and forth several times to free it from any possible sticking.
D. If the Timer still does not run, or runs only after the Knob has been turned back and forth
several times, the Timer must be replaced (refer to TIMER, How to Replace in the SERVICE
AND REPLACEMENT GUIDE).