88
Moisture in the Battery Compartment
• If moisture is found, it is best to have the unit inspected
and cleaned by an Authorized Oceanic Dealer.
• If it is necessary to clean the Battery Compartment, flush
the it and all components with a solution of 50% white
vinegar and 50% fresh water. Rinse with fresh water,
and allow to dry overnight, or blow dry with a hair dryer
(set at 'no heat').
• Closely check all of the sealing surfaces for any signs of
damage that might impair proper sealing.
• Inspect the Buttons, Lens, and Housing to ensure they are
not cracked or damaged.
Battery Installation
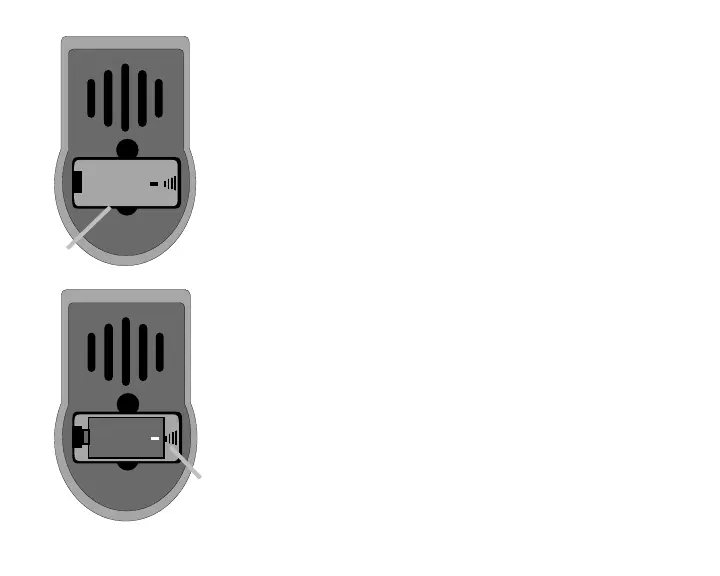
• Replace the Hatch O-ring with a new one. This O-ring
must be a genuine Oceanic part that can be purchased
from an Authorized Oceanic Dealer. Use of any other
O-ring will void the warranty.
• Lightly lubricate the new Hatch O-ring with silicone
grease and place it on the beveled outer edge of the
Battery Compartment (Fig. 97a). Ensure that it is evenly
seated.
• Place a new 3 volt, CR2, .75 AHr, Lithium Battery
(Duracell model DL-CR2 or equivalent) negative end first
into the Battery Compartment with the negative end
toward the spring (Fig. 98a).
Fig. 97 - O-ring Installation
+
a
Fig. 98 - Battery Orientation
+
a