2.6 Service Adjustments
Calibrating the Printer
Select the User Menu (See Accessing the User Menu)
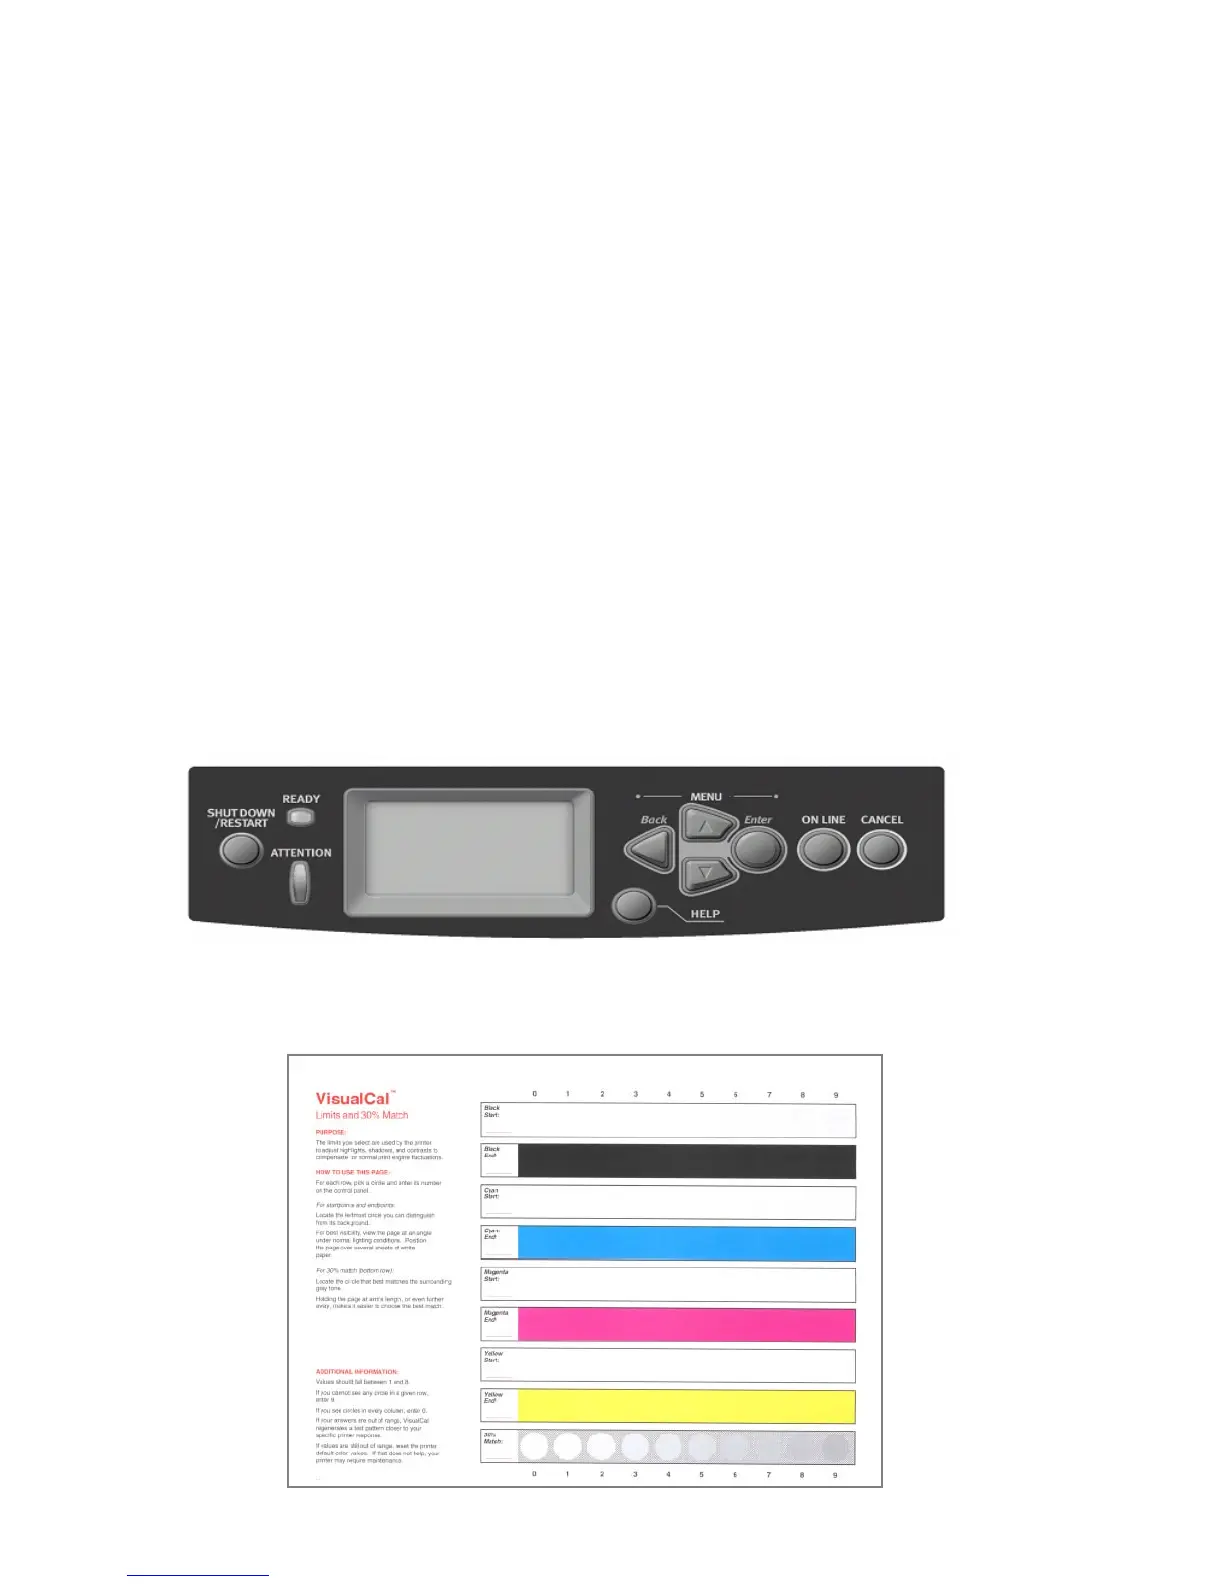
1. On the front panel of the printer press the Down Arrow button until Calibration is
highlighted, then press the Enter button
2. Press the Down Arrow until Adjust Density is highlighted, and press the Enter
button
3. Press the Enter button again on the next screen in order to execute the Adjust
Density procedure
4. Next, press the Down Arrow button down until Calibrate is highlighted and press
the Enter button
5. In the Screen Setting window press the Down Arrow button until the calibration
you wish to perform appears, and press the Enter button
*6X6 Dot Screen 12X6 Dot Screen 12X6 Line Screen 12X12 Dot Screen
6. Press the Enter button in the next window to print out the VisualCal measurement
page
7. Follow the instructions on the VisualCal measurement page to calibrate the printer.
Print limits Pg.
*Yes
No