5
Illustration Index
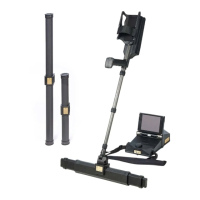
Figure 4.1: eXp 6000 with Telescopic Probe and Super Sensor ......................................................... 20
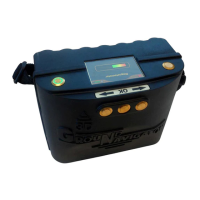
Figure 4.2: Control elements of the Power Pack ................................................................................ 21
Figure 4.3: Charging the Power Pack ................................................................................................. 21
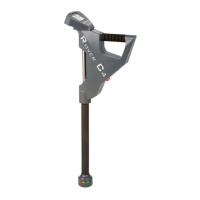
Figure 4.4: Control elements of the telescopic probe ........................................................................ 22
Figure 4.5: Control elements of telescopic rod assembly ................................................................... 23
Figure 4.6: Control unit ..................................................................................................................... 24
Figure 5.1: Placing the Power Pack into the control unit ................................................................... 28
Figure 5.2: Mounting the Telescopic Probe onto the telescopic rod assembly ................................... 29
Figure 5.3: Placing the Power Pack into the telescopic rod assembly ................................................ 29
Figure 5.4: Extending the telescopic rod assembly ............................................................................ 30
Figure 5.5: Connecting the external GPS receiver ............................................................................. 30
Figure 5.6: Bluetooth headphones with accessories .......................................................................... 31
Figure 5.7: Pairing the Bluetooth headphones ................................................................................... 32
Figure 5.8: Installation of the application via Google Play Store ....................................................... 33
Figure 5.9: Android's application menu with eXp 6000 ..................................................................... 33
Figure 5.10: Android M100 Smart Glasses ........................................................................................ 34
Figure 5.11: Layout for the video eye glasses .................................................................................... 34
Figure 6.1: Main menu (“home screen”) ............................................................................................ 36
Figure 6.2: Workflow of Ground Scan ................................................................................................ 38
Figure 6.3: Workflow of Pin Pointer ................................................................................................... 43
Figure 6.4: Signature of a ferromagnetic metal target ...................................................................... 43
Figure 6.5: Signature of a non-ferromagnetic metal target .............................................................. 44
Figure 6.6: Signature of a non-metallic target ................................................................................... 44
Figure 6.7: Workflow of Magnetometer ............................................................................................. 45
Figure 6.8: Tunnel Scan ..................................................................................................................... 46
Figure 6.9: Tunnel shown in multi-line scan ...................................................................................... 47
Figure 6.10: Customer submitted tunnel found in Turkey ................................................................. 47
Figure 6.11: Single line method used to locate tunnel ....................................................................... 48
Figure 6.12: Workflow of Mineral Scan .............................................................................................. 50
Figure 6.13: Visualizer 3D Screen shot .............................................................................................. 52
Figure 6.14: Side View of Scan Area .................................................................................................. 52
Figure 6.15: Natural Mineral Field .................................................................................................... 53
Figure 6.16: Natural Mineral Field (additional example) ................................................................... 53
Figure 6.17: Example showing the typical signal of non-ferrous metal .............................................. 54
Figure 6.18: Shows a weak signal which can be smaller or deeper. .................................................. 55
Figure 6.19: Measure value indicating a non-ferrous anomaly .......................................................... 55
Figure 6.20: Position of anomaly with distance .................................................................................. 56
Figure 6.21: Workflow of Live Scan ................................................................................................... 57
Figure 6.22: General settings ............................................................................................................. 59
OKM GmbH
www.okmmetaldetectors.com