Program transfer
This chapter describes the transfer of data from the COM_CPS application to the CPS, and vice
versa (see the COM_CPS user’s guide). After launching the software, you will see a welcome
window.
PC CPS transfer
Once the program has been created, the central controller should receive new settings..
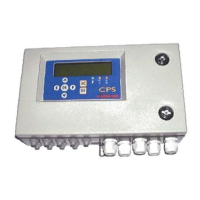
Step 1: establish a physical connection
1) Use either the USB or RS-232 adapter to connect the PC to the CPS central measuring
controller.
2) Ensure that the CPS central measuring controller is connected to a power source.
3) On the central controller: flip the programming switch to the “MEM” position. The message
“Switch open – Program…” will appear on the display screen. Communication with the central
controller is authorized during this phase..
Step 2: link configuration
1) In the menu bar, select [Communication > Port].
2) Select the port [COM x] to use on the PC.
Note: communication speed is selected automatically.
Step 3: data transfer
1) In the menu bar, select [Transfer > from PC to CPS].The message "Flip switch to MEM position
in order to reprogram the central controller” refers to the <MEM> position on the CPS central
controller commutator before starting the transfer procedClick [OK] once verification has ended.
2) During the transfer, a progress bar will indicate transfer progress.
3) Once the transfer is complete, the message “Operation complete” will appear on screen. Click
[OK]. The configuration program has been transferred from the PC to the CPS central
controller.
4) On the central controller: The message “Switch open – Complete” will appear on the display
screen. Flip the programming switch to the “Prog” position.
5) The central controller will perform a “Start-up” procedure.
CPS PC transfer
Step 1: establish a connection
1) Use either the USB or RS-232 adapter to connect the PC to the CPS central controller.
2) Ensure that the CPS central measuring controller is connected to a power source.
4) On the central controller: flip the programming switch to the “MEM” position. The message
“Switch open – Program…” will appear on the display screen. Communication with the central
controller is authorized during this phase.
Or, use the “Control” menu to set the printer to “OFF.”
Step 2: link configuration
1) In the menu bar, select [Communication > Port].
2) Select the port [COM x] to use on the PC.
Note: communication speed is selected automatically.
Step 3: data transfer
1) In the menu bar, select [Transfer > from CPS to PC].
2) The message, “Do you want to read the CPS central controller configuration?” will appear
onscreen. Click [OK]. If the message, “Check port configuration and ensure printer set to OFF
position and try again” appears, verify that the CPS printer is in the OFF position.
3) Select the folder where you want to download the file, and create a file name (a default name is
suggested).
4) During the transfer, a progress bar will indicate transfer progress.
5) Once the transfer is complete, the message “Operation complete” will appear on screen. Click
[OK]. The data has been transferred from the CPS central controller to the PC.
6) On the central controller: The message “Switch open – Complete” will appear on the display
screen. Flip the programming switch to the “Prog” position.
7) The central controller will perform a “Start-up” procedure.