6
K
18
19
13
K
13
2mm 0mm
0mm 2mm
I
J
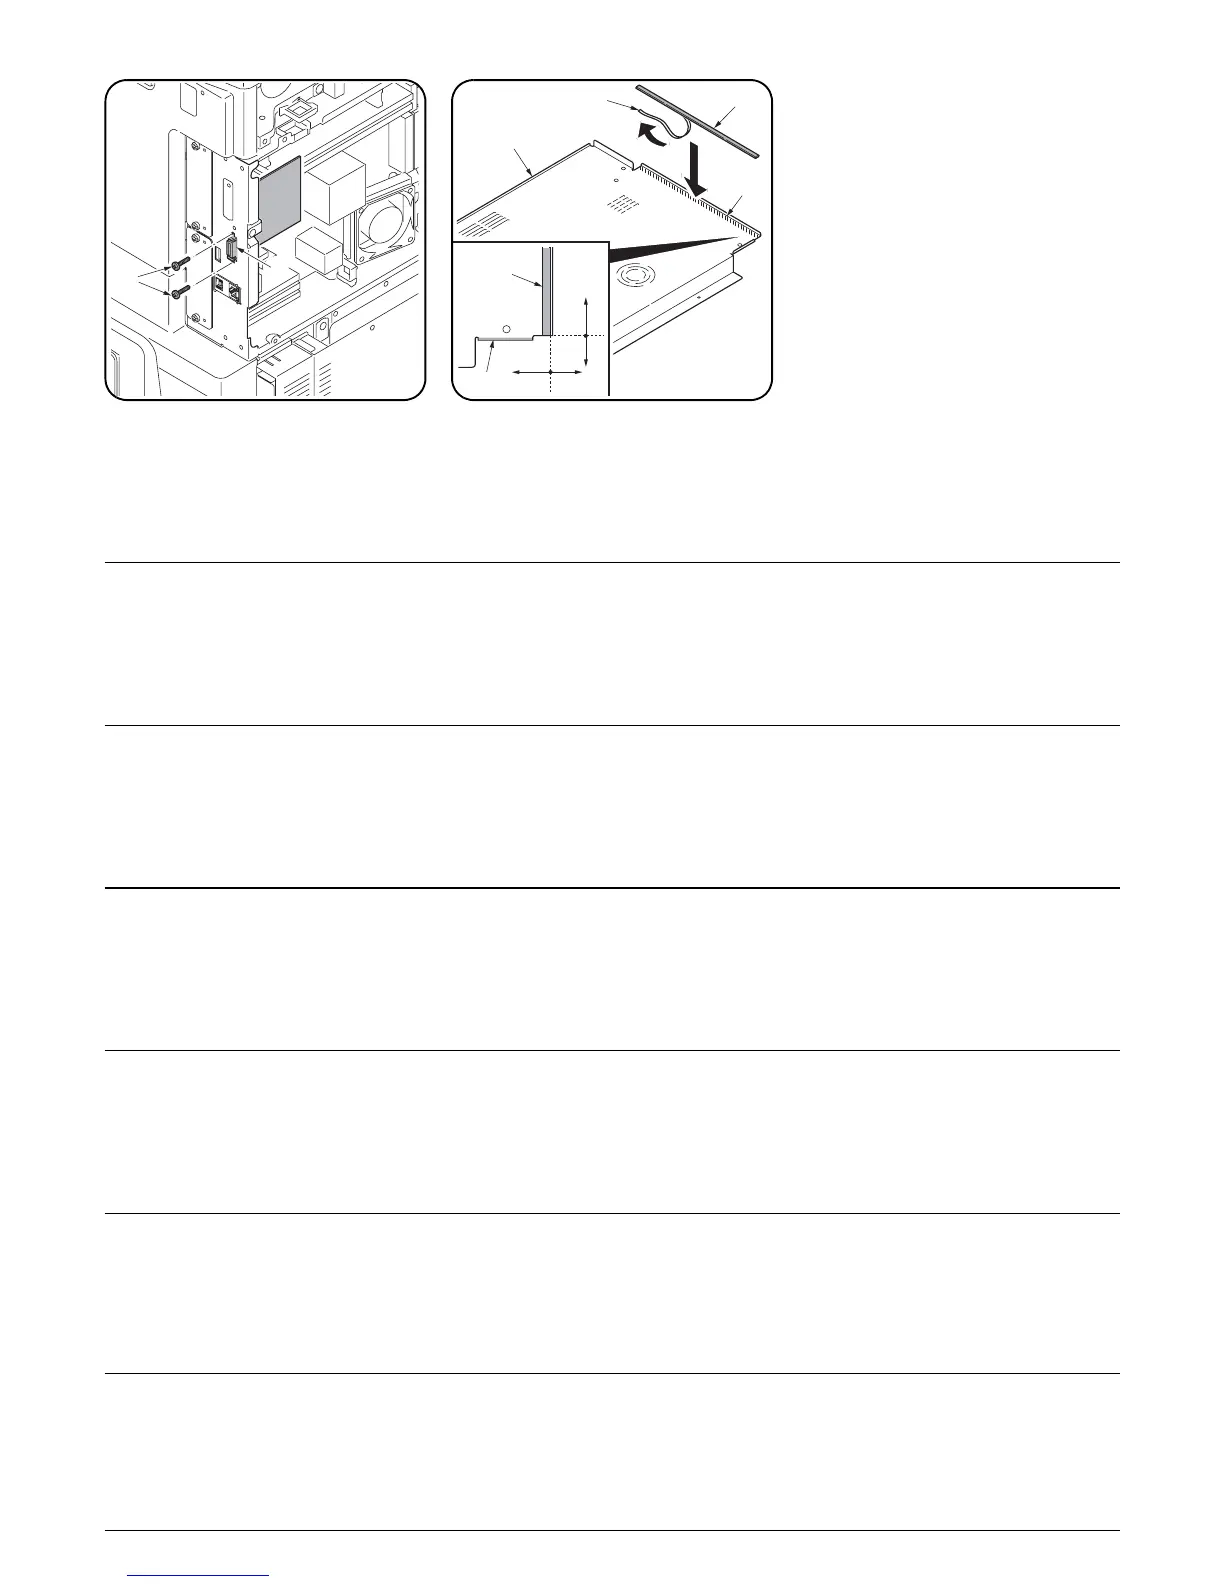
19.Secure the DP relay PWB (I) with two M2.6 x
8 screws (J).
Installing the gasket
20.Peel the release paper (18) off the gasket
(K).
21.Clean the shaded area (19) of the upper rear
cover (13) with alcohol, and then adhere the
gasket (K) as shown in the illustration.
22.Replace the upper rear cover (13) of the
MFP using nine screws (12).
23.Reinstall the filter cover (11) of the MFP.
Proceed to step 8 on page 30
19.Fixer la carte de circuit imprimé relais du DP
(I) avec deux vis M2.6 x 8 (J).
Installation de la garniture
20.Enlever le papier de protection (18) de la
garniture (K).
21.Nettoyer la partie en grisé (19) du couvercle
arrière supérieur (13) avec de l'alcool puis
coller la garniture (K) en procédant comme
illustré.
22.Reposer le couvercle arrière supérieur (13)
du MFP à l'aide des huit vis (12).
23.Reposer le couvercle du filtre (11) du MFP.
Passer à l’étape 8 de la page 30
19.Asegure el PWB del relé del DP (I) con dos
tornillos M2,6 x 8 (J).
Instalación de la junta
20.Despegue el papel (18) de la junta (K).
21.Limpie el área sombreada (19) de la cubierta
trasera superior (13) con alcohol, y,
después, adhiera la junta (K), como se
muestra en la ilustración.
22.Vuelva a colocar la cubierta trasera superior
(13) del MFP, utilizando los ocho tornillos
(12).
23.Vuelva a instalar la cubierta del filtro (11) del
MFP.
Vaya al paso 8 de la página 30
19.Die DP-Relaisleiterplatte (I) mit zwei M2.6 x
8 Schrauben (J) befestigen.
Anbringen der Dichtung
20.Das Deckpapier (18) von der Dichtung (K)
abziehen.
21.Den schraffierten Bereich (19) der oberen
hinteren Abdeckung (13) mit Alkohol
reinigen, und dann die Dichtung (K) wie
abgebildet ankleben.
22.Die obere hintere Abdeckung (13) des MFP
mittels acht Schrauben (12) wieder
anbringen.
23.Die Filterabdeckung (11) des MFP wieder
anbringen.
Gehen Sie zum Schritt 8 auf Seite 30 weiter
19.Fissare la scheda a circuiti stampati di
comunicazione DP (I) con due viti M2,6 x 8
(J).
Installazione della guarnizione
20.Staccare la carta protettiva (18) dalla
guarnizione (K).
21.Pulire l’area ombreggiata (19) del coperchio
superiore posteriore (13) con alcool, e quindi
far aderire la guarnizione (K) come mostrato
nell’illustrazione.
22.Rimettere il coperchio superiore posteriore
(13) dell’MFP utilizzando otto viti (12).
23.Reinstallare il coperchio del filtro (11)
dell’MFP.
Procedere con il punto 8 a pagina 30
19.DP 中継基板 (I) をビス M2.6 × 8(J)2 本で固
定する。
ガスケットの取り付け
20.ガスケット (K) の剥離紙 (18) を剥がす。
21.後上カバー(13) の斜線部 (19) をアルコール
清掃後、ガスケット (K) を図の通りに貼り付
ける。
22.ビス (12)9 本で、MFP 本体の後上カバー(13)
を元通り取り付ける。
23.MFP 本体のフィルタカバー(11) を元通り取
り付ける。
8ページ手順30へ進む。
19.用两颗 M2.6 × 8 螺钉(J)固定 DP 中继板
(I)。
安装衬垫
20.撕下衬垫(K)上的防粘纸(18)。
21.使用酒精清洁上部后盖板(13)上的阴影区域
(19),然后如图所示粘贴衬垫(K)。
22.使用 9 颗螺钉(12)安装 MFP 的上部后盖板
(13)。
23.重新安装 MFP 上的过滤器盖板(11)。
进行第 8 页上的第 30 步

 Loading...