5
N
N
5
4
4
4
4
4
5
5
5
4
4
4
5
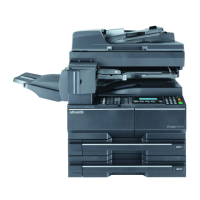
固定金具の取り外し
4. ドキュメントフィニッシャ(A)の前カバーを
開く。
5. ビス(4)13 本を外し、固定金具(5)5 個を取り
外す。
固定金具には、黄色のシールを貼っていま
す。
6. 内部トレイを引き出す。
7. 内部トレイの取手の固定テープを剥がし、バ
ネフック(N)を取り付ける。
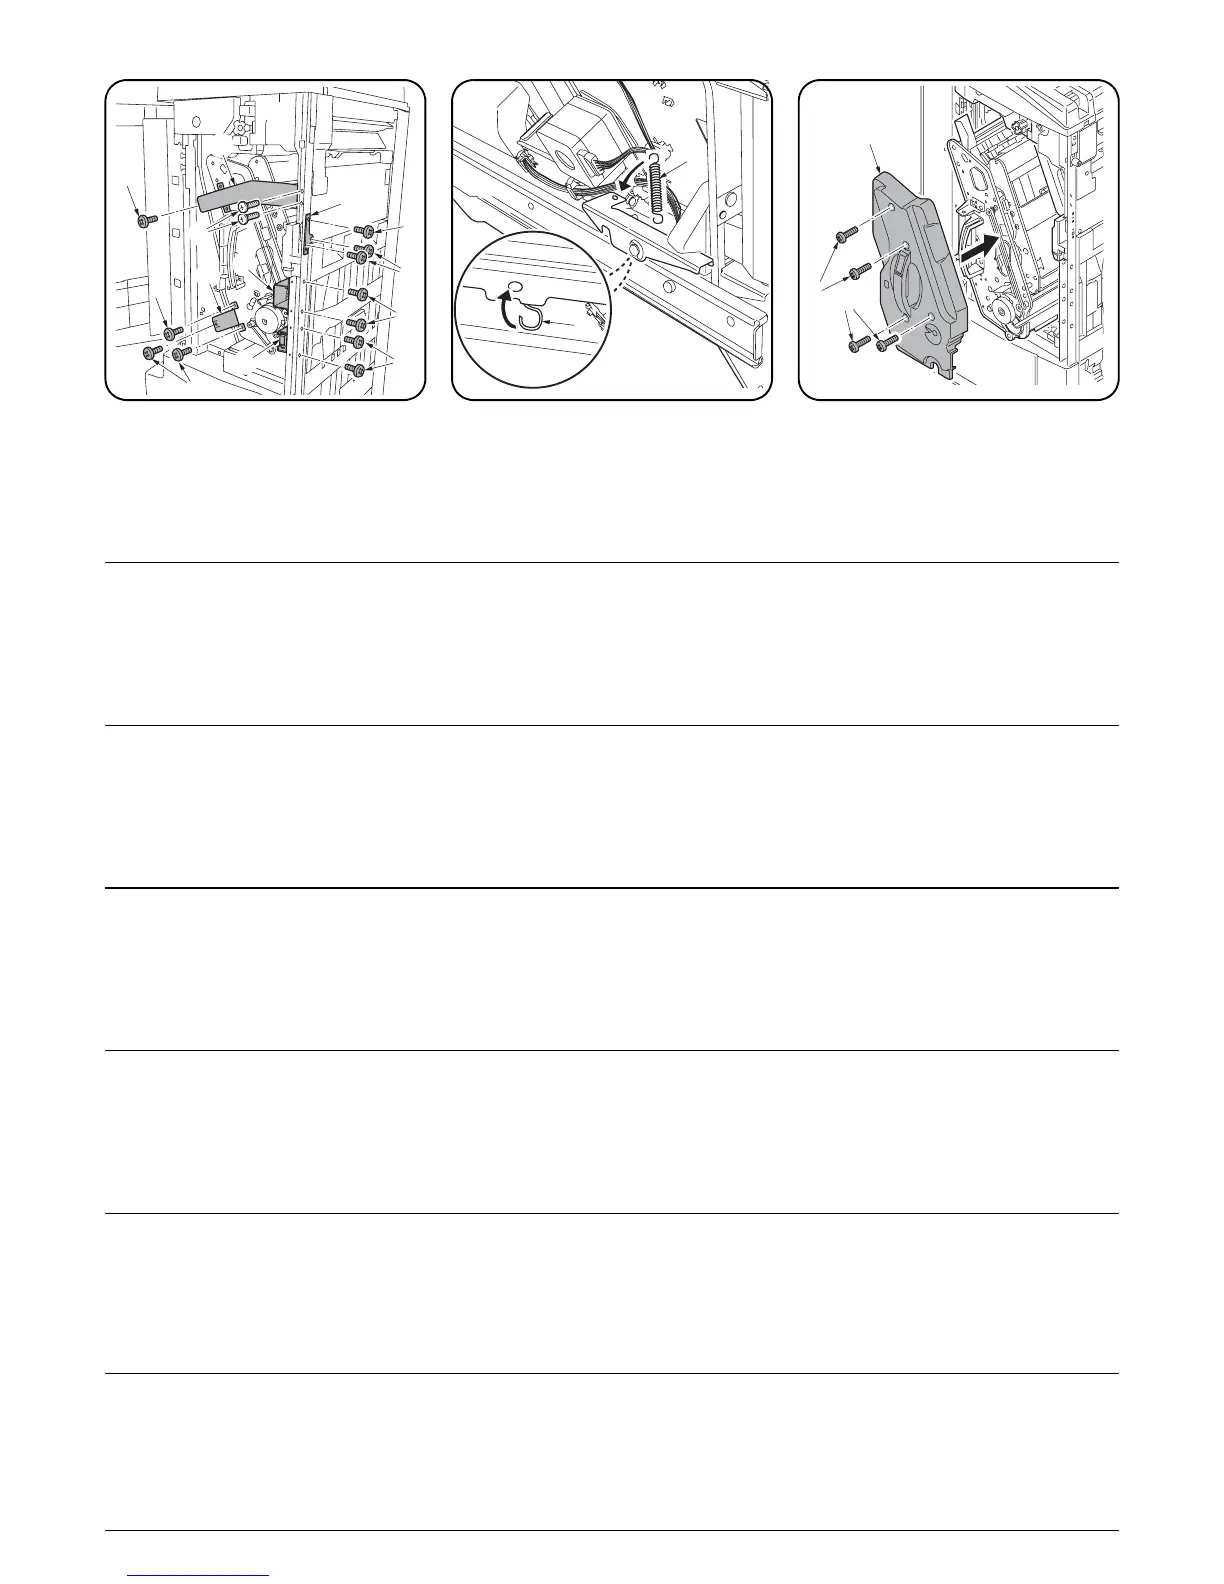
内部トレイカバーの取り付け
8. ビス M4 × 8 タップタイト S(J)4 本で、内部
トレイカバー(M) を取り付ける。
Removing the fittings
4. Open the front cover of the document
finisher (A).
5. Remove 13 screws (4) to remove five fittings
(5).
A yellow label is pasted on the fittings.
6. Pull the internal tray out.
7. Remove the fixing tape from the handle of
the internal tray and attach the spring hook
(N).
Installing the internal tray cover
8. Install the internal tray cover (M) using the
four M4 × 8 tap Tight S Screw (J).
Enlèvement des fixations
4. Ouvrir le capot avant du retoucheur de
document (A).
5. Retirer 13 vis (4) pour retirer cinq fixations
(5).
Une étiquette jaune et collée sur les
fixations.
6. Faire ressortir le bac interne.
7. Retirer la bande de fixation de la poignée du
bac interne et fixer le crochet de ressort (N).
Installation du capot du bac interne
8. Installer le capot du bac interne (M) à l’aide
des quatre vis S taraudées M4 × 8 (J).
Extracción de los accesorios
4. Abra la cubierta delantera del finalizador de
documentos (A).
5. Quite los 13 tornillos (4) para quitar los cinco
accesorios (5).
Hay una etiqueta amarilla pegada en los
accesorios.
6. Saque la bandeja interna.
7. Quite la cinta de fijación del mango de la
bandeja interior y coloque el gancho de
resorte (N).
Instalación de la cubierta de bandeja interna
8. Instale la cubierta de bandeja interna (M)
utilizando los cuatro tornillos de ajuste M4 ×
8 (J).
Entfernen der Befestigungselemente
4. Öffnen Sie die vordere Abdeckung des
Dokument-Finishers (A).
5. Entfernen Sie die 13 Schrauben (4) um die
Befestigungselemente (5) zu entfernen.
Ein gelber Aufkleber ist an den
Befestigungselementen angebracht.
6. Ziehen Sie das Innenfach heraus.
7. Ziehen Sie das Klebeband vom Griff des
Innenfachs, und den Federhaken (N)
anbringen.
Entfernen der Innenfachabdeckung
8. Bringen Sie die Innenfachabdeckung (M) mit
den vier M4 × 8 Passstift-Verbundschrauben
(J) an.
Rimozione dei pezzi di raccordo
4. Aprire il pannello anteriore della finitrice di
documenti (A).
5. Togliere 13 viti (4) per rimuovere i cinque
pezzi di raccordo (5).
Un’etichetta gialla è incollata sui pezzi di
raccordo (5).
6. Estrarre il vassoio interno.
7. Staccare il nastro adesivo dalla maniglia del
vassoio interno e fissare il gancio a molla
(N).
Installazione del pannello del vassoio
interno
8. Installare il pannello del vassoio interno (M)
utilizzando le quattro viti con testa a croce S
M4 × 8 (J).
拆下固定件
4. 打开装订器(A)的前盖板。
5. 取下 13 颗螺丝(4)以便拆下 5 个固定件
(5)。
在固定件上贴有黄色标签。
6. 拉出内部托盘。
7. 从内部托盘上拆下把手固定胶带,然后安装弹
簧挂钩(N)。
安装内部托盘盖板
8. 使用 4 颗 M4 × 8 攻丝紧固型 S 螺丝(J)安装
内部托盘盖板(M)。
M
J
J

 Loading...