101
BX53M
6
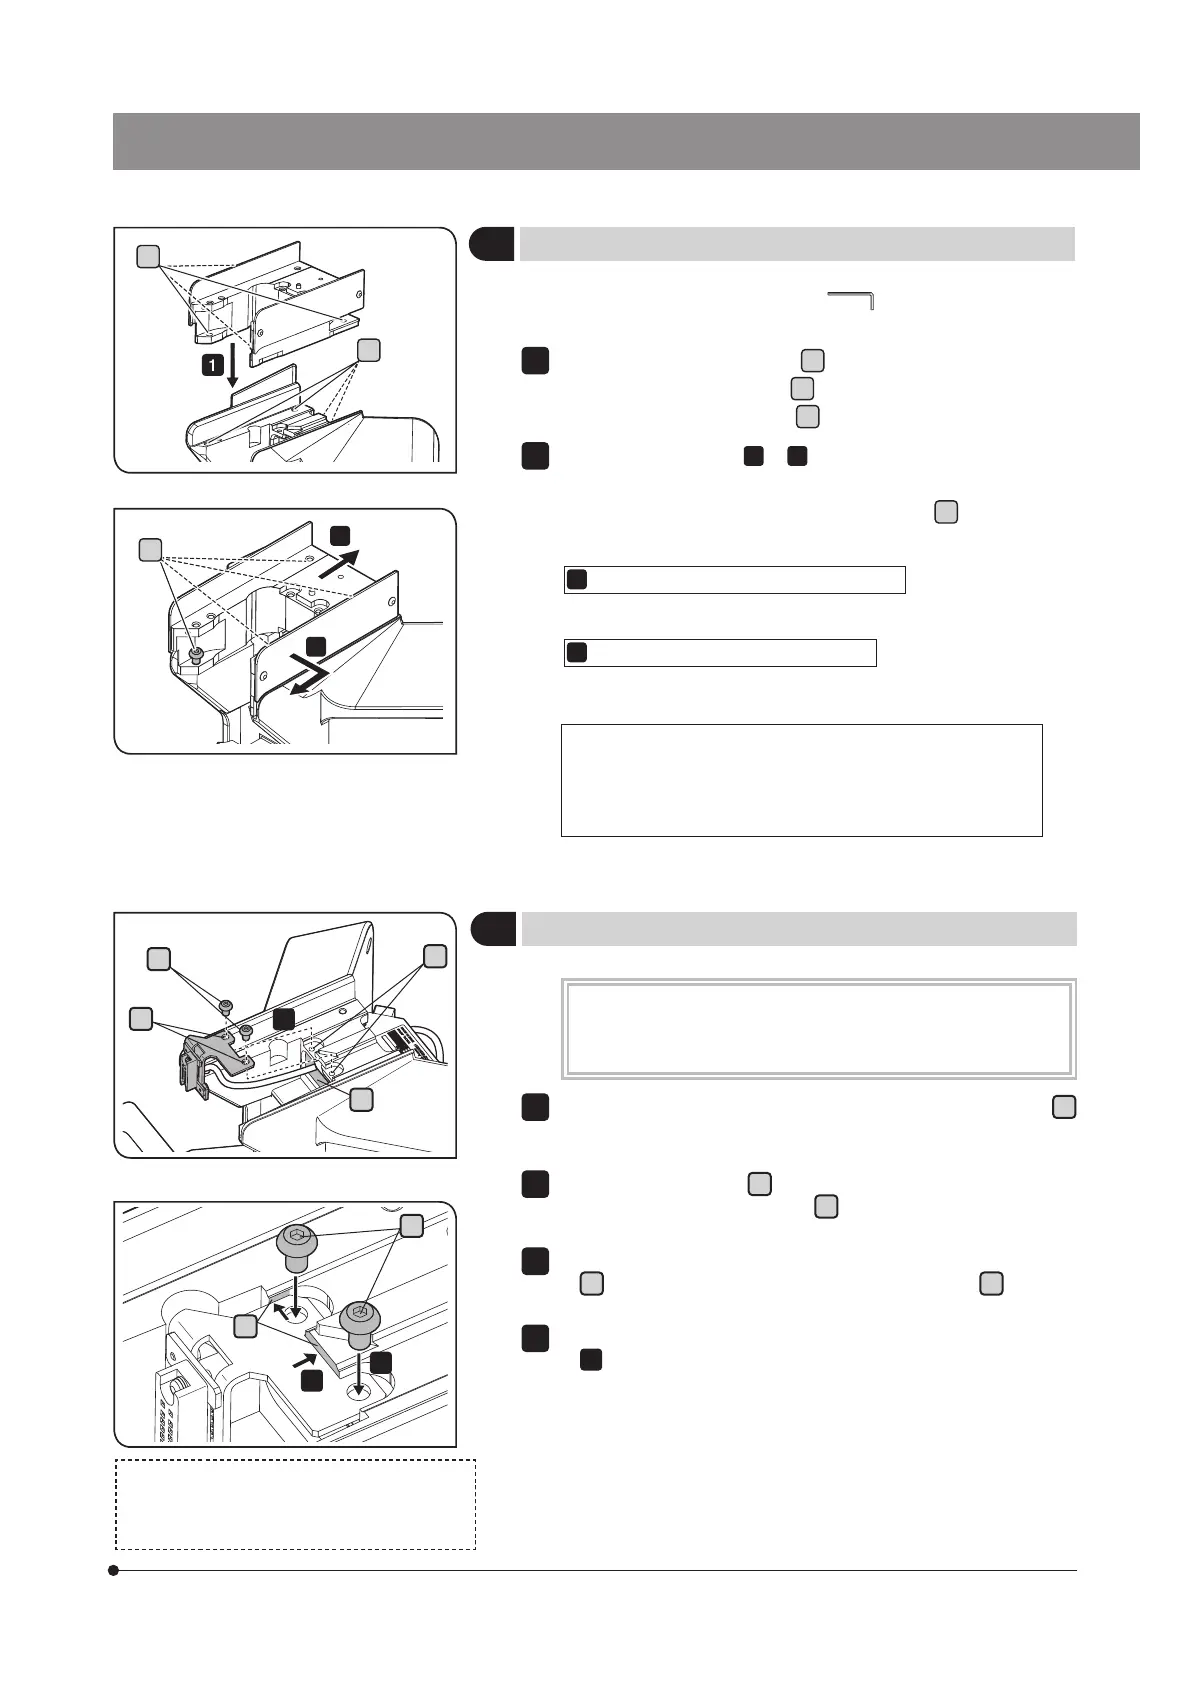
Attaching the cable for motorized nosepiece
5
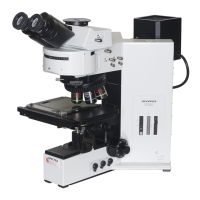
Attaching the height adapter
The cable for the motorized nosepiece (BX3M-RMCBL) must
be attached when combining the motorized nosepiece to the
microscope.
Put the cable for the motorized nosepiece through the cable hole
a
on the top of the microscope frame and put it out to the back of the
microscope frame.
Align the mounting holes
c
(2 positions) of the cable for the motorized
nosepiece with the screw holes
b
(2 positions) on the top of the
microscope frame.
While pushing the metal plate of the cable for the motorized nosepiece
to
d
positions (2 positions), tighten the provided screw
e
to secure
the metal plate.
Connect the cable that comes out to the back of the microscope frame
in
1
to the connector of the control box (BX3M-CB). For details, see
Cable connections (page 115).
1
2
3
4
c
d
e
b
e
a
4
2
B
c
a
b
Use the dedicated Allen wrench ( ) provided with the height
adapter to attach the height adapter.
Align the mounting screw holes
a
(4 positions) of the height adapter
with the mounting screw holes
b
of the microscope frame, and insert
the provided mounting screws
c
(4 positions).
Depending on the case
or
described below (differs depending
on the objective you use), while pushing the height adapter to the
microscope frame, tighten the mounting screws
c
(4 positions) to
secure the height adapter.
When the following objective is not used:
Push the height adapter to the back side.
B
When the following objective is used:
Push the height adapter to the front right side.
Applicable objectives:
MPLN50XBD, MPLN100XBD,
MPLFLN50XBD, MPLFLN100XBD, MPLFLN150XBD,
MPLFLN50XBDP, MPLFLN100XBDP
1
This picture shows the procedure to attach the
cable for motorized nosepiece to the microscope
frame. The same procedure applies when attaching
it to the height adapter.