100
b
c
a
4
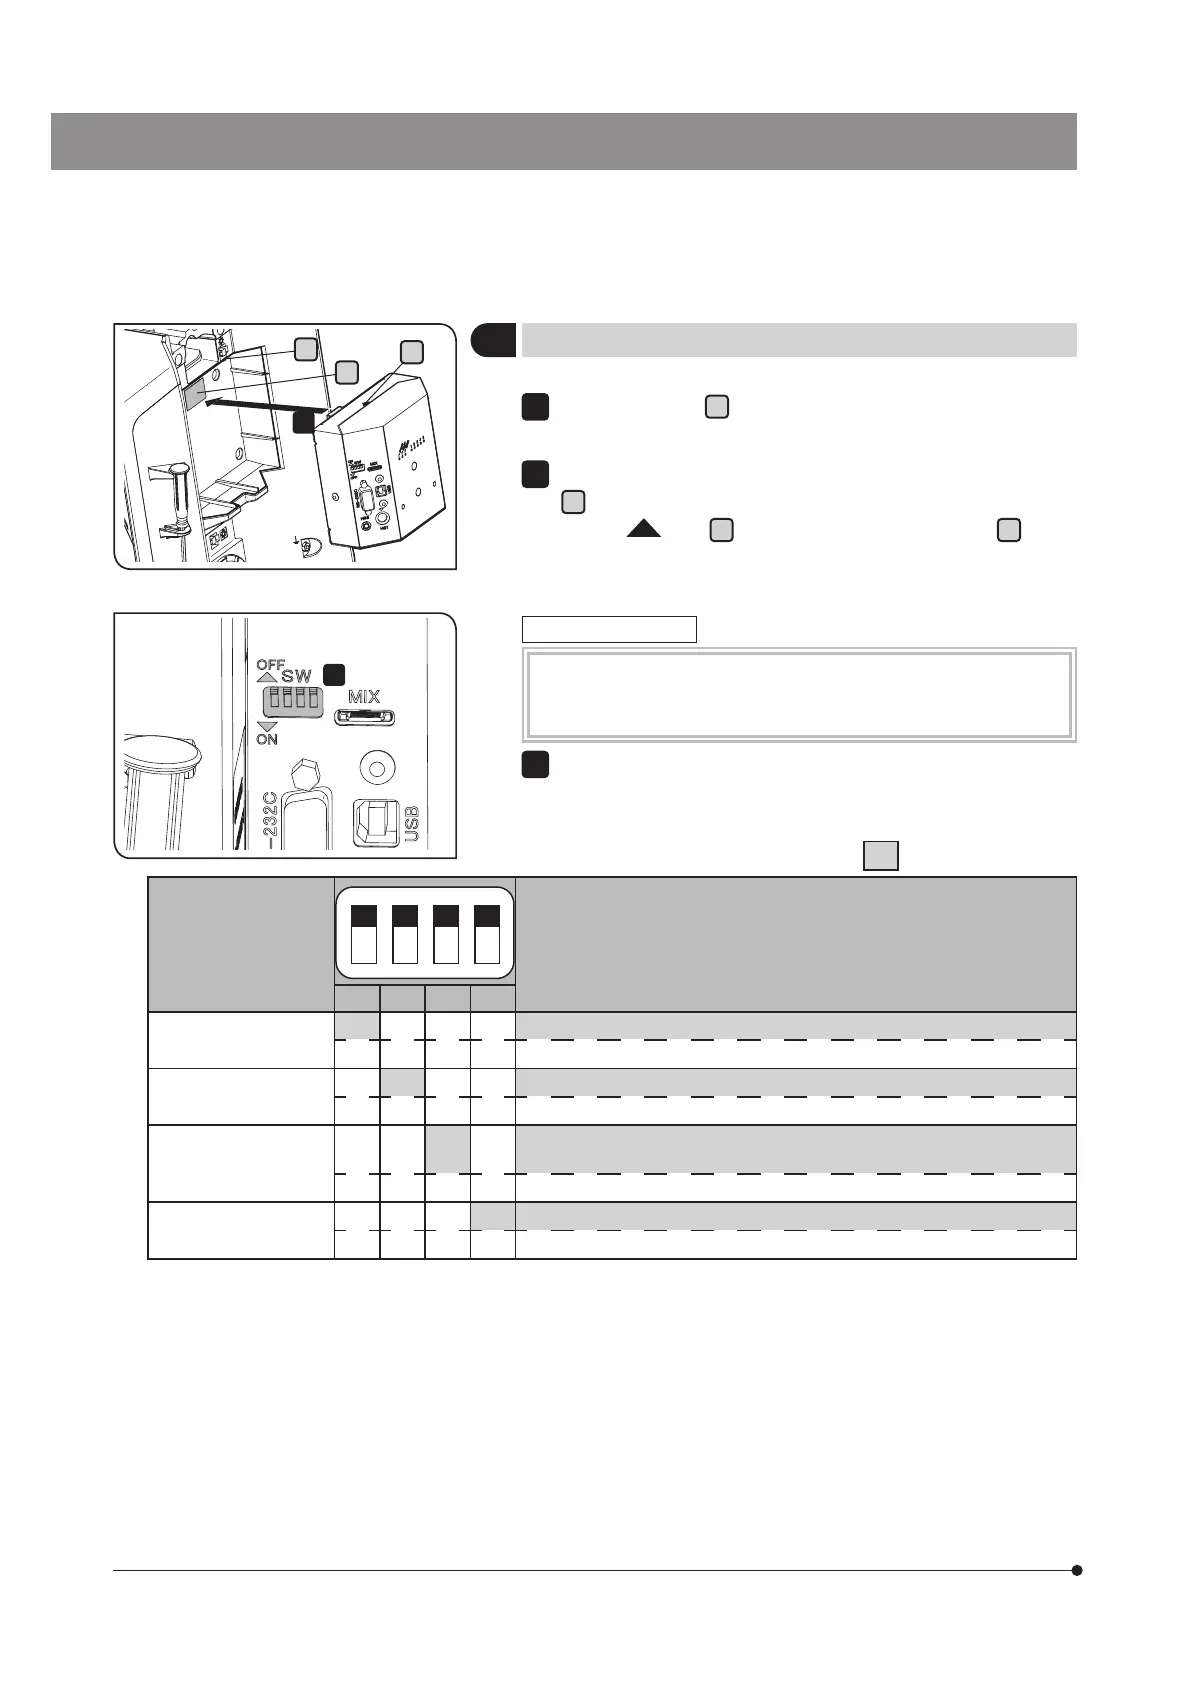
Attaching the control box
Remove the sticker
a
of the connector on the back of the microscope
frame.
Insert the control box (BX3M-CB) by aligning with the attaching section
b
on the back of the microscope frame. And push in the control box
until the
mark
c
is hidden in the attaching section
b
.
1
2
Setting the dip switch
This setting is necessary when combining the motorized nosepiece
or the hand switch for motorized nosepiece (BX3M-HSRE) to the
microscope.
Set the dip switch on the side of the control box (BX3M-CB).
1
: Factory default setting
Function/Unit Setting
1 2 3 4
Beep
OFF The beep sound is heard.
ON The beep sound is not heard.
Motorized nosepiece
OFF 5 holes
ON 6 holes
Hand switch for
motorized nosepiece
(BX3M-HSRE)
OFF
When the right button is pressed, the nosepiece rotates
counterclockwise.
ON When the right button is pressed, the nosepiece rotates clockwise.
Reserved by maker
OFF This switch should be always kept OFF.
ON