The Synchronization Window is displayed, and comparison of the user program and parameter
settings between the Sysmac Studio and the Controller is started.
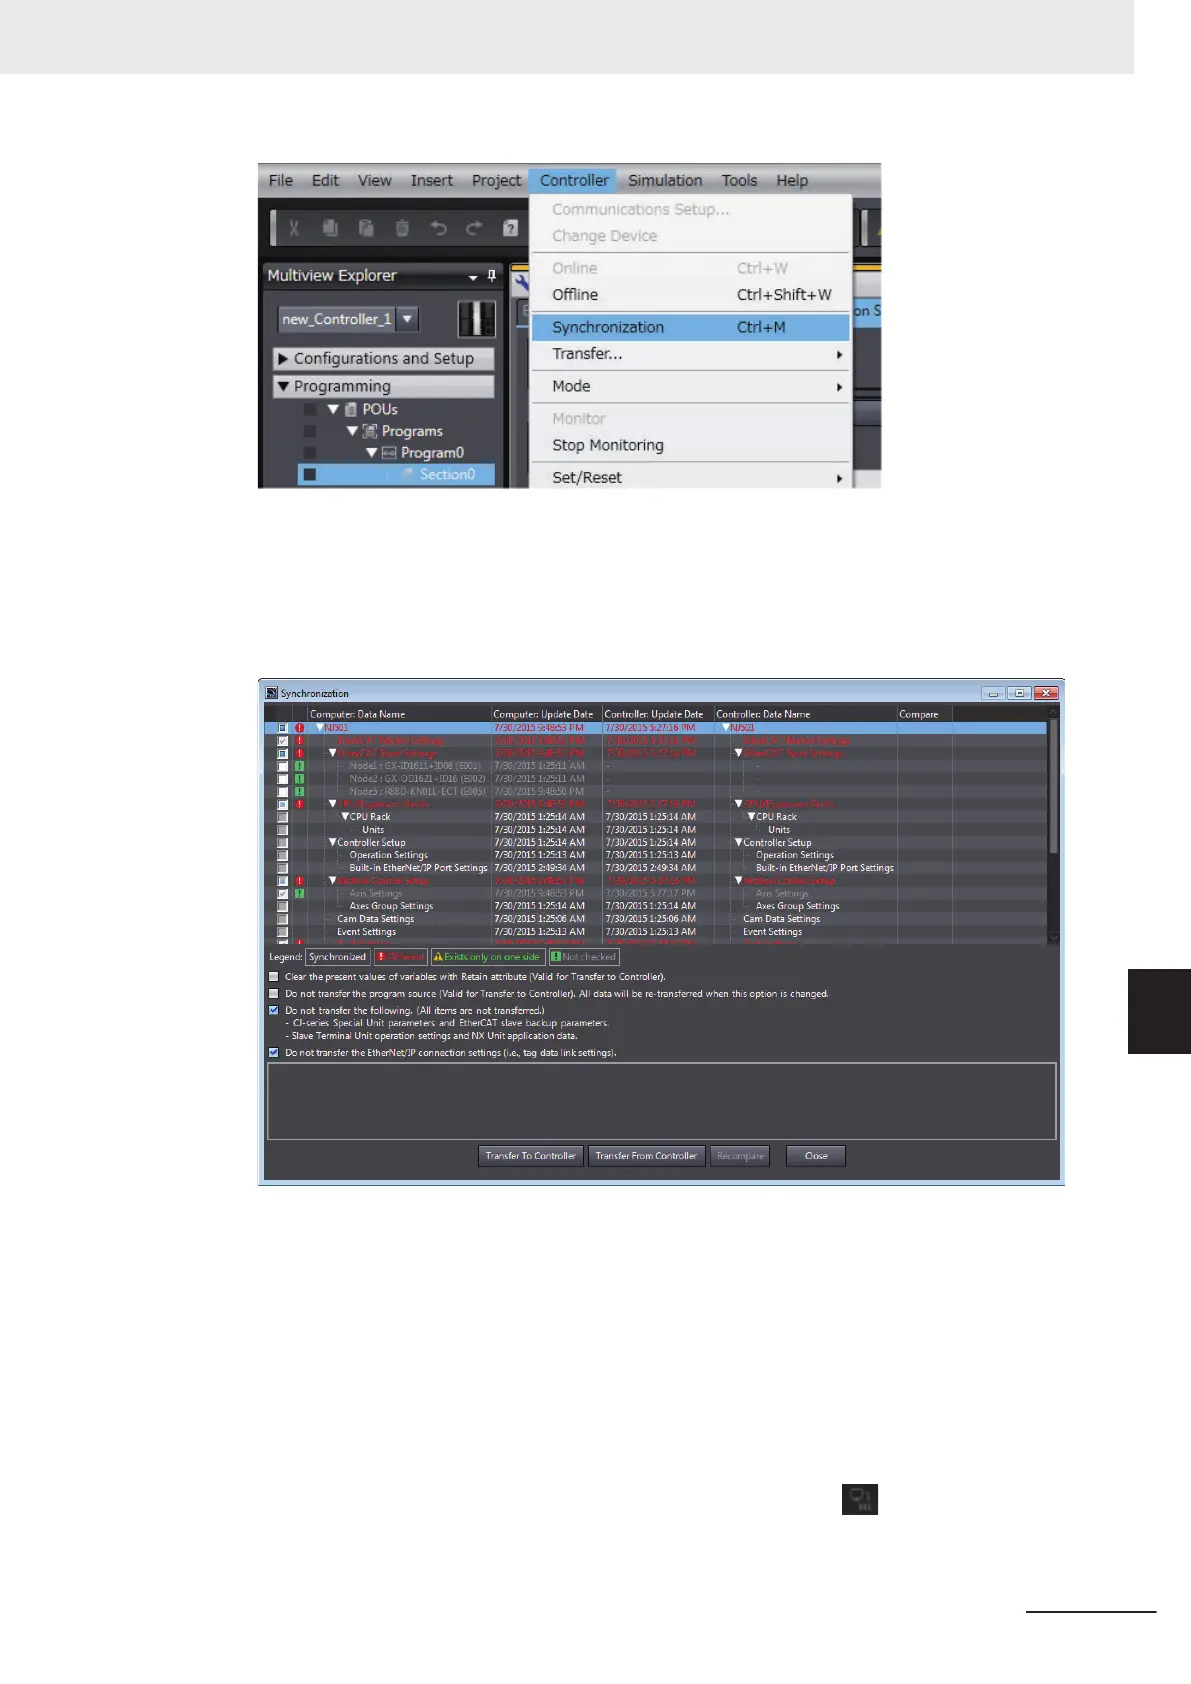
2 The following Uploading and Downloading Data Window is displayed after the automatic com-
parison.
3 Clear the Do not transfer the EtherNet/IP connection settings (i.e., tag data link settings)
Check Box and then click the T
ransfer To Controller Button.
Then the EtherNet/IP connection settings are transferred along with the not-synchronized data.
If no EtherNet/IP connection settings are set in the Sysmac Studio, no data will be sent.
Transferring all data
1 Establish an online connection between the computer and the Controller and then select
T
ransfer - To Controller from the Controller Menu. (Or, click the
Button on the Toolbar.)
2 The T
ransfer to Controller Dialog Box is displayed.
Appendices
A-27
NJ/NX-series CPU Unit Built-in EtherNet/IP Port User’s Manual (W506)
A-2 Use the Sysmac Studio to Set the Tag Data Links (EtherNet/IP Connections)
A
A-2-4 Making the EtherNet/IP Connection Settings with the Sysmac Stu-
dio
 Loading...