47
I/O Wiring Section 4-3
4-3 I/O Wiring
4-3-1 Wiring to the Screwless Clamping Terminal Block
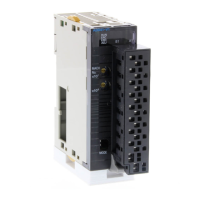
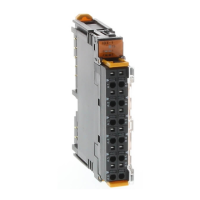
All of the GRT1-series Slice I/O Units can be wired with screwless clamp ter-
minal blocks, which do not require screws to be tightened. When connecting a
sensor or an external device, always crimp pin terminals to the cable of the
sensor or device. There are two types of pin terminals: one-pin terminals and
two-pin terminals. By using two-pin terminals, wiring can be performed with-
out using a GRT1-PC8(-1) I/O Power Connection Unit when connecting a 2-
wire sensor to a GRT1-ID8(-1). When using a GRT1-OD8(-1), wiring can also
be performed without using a GRT1-PC8(-1) I/O Power Connection Unit.
The following table shows the compatible pin terminals.
One-pin Terminals
Two-pin Terminals
Pin Terminal Length Use pin terminals with a pin (conductor) length of 9 to 11 mm.
Wiring to a Clamping Terminal Block
Insertion Fully insert the pin terminal into any terminal hole.
Removal Press the release button above the terminal hole with a slotted precision
screwdriver and pull out the wire.
Note (1) When pressing the release button, press with appropriate force (30 N
max.). If excessive force is used, the terminal block may be damaged.
Maker Model number Appropriate wire
Phoenix Contact AI-0.5-10WH
0.5 mm
2
(AWG 20)
AI-0.75-10GY
0.75 mm
2
(AWG 18)
AI-1.5-10BK
1.25 mm
2
(AWG 16)
Nihon Weidmuller H 0.5/16 D
0.5 mm
2
(AWG 20)
H 0.75/16 D
0.75 mm
2
(AWG 18)
H 1.5/16 D
1.25 mm
2
(AWG 16)
Maker Model number Appropriate wire
Phoenix Contact AI-TWIN 2 x 0.75-10 GY
0.75 mm
2
(AWG 18)
Nihon Weidmuller H 0.5/16.5 D
0.5 mm
2
(AWG 20)
H 0.75/17 D
0.75 mm
2
(AWG 18)
Pin len
th: 9 to 11 mm
3
2
1
0
5
0
4
0
3
0
2
+
V
+
V
+
V
+
V
+
V
NC
4
0
5
0
4
0
3
0
2
+
V
+
V
+
V
+
V
NC
4
2
1
Insert the pin terminal
fully into the hole.
Slotted precision screwdriver
Release button
 Loading...