6
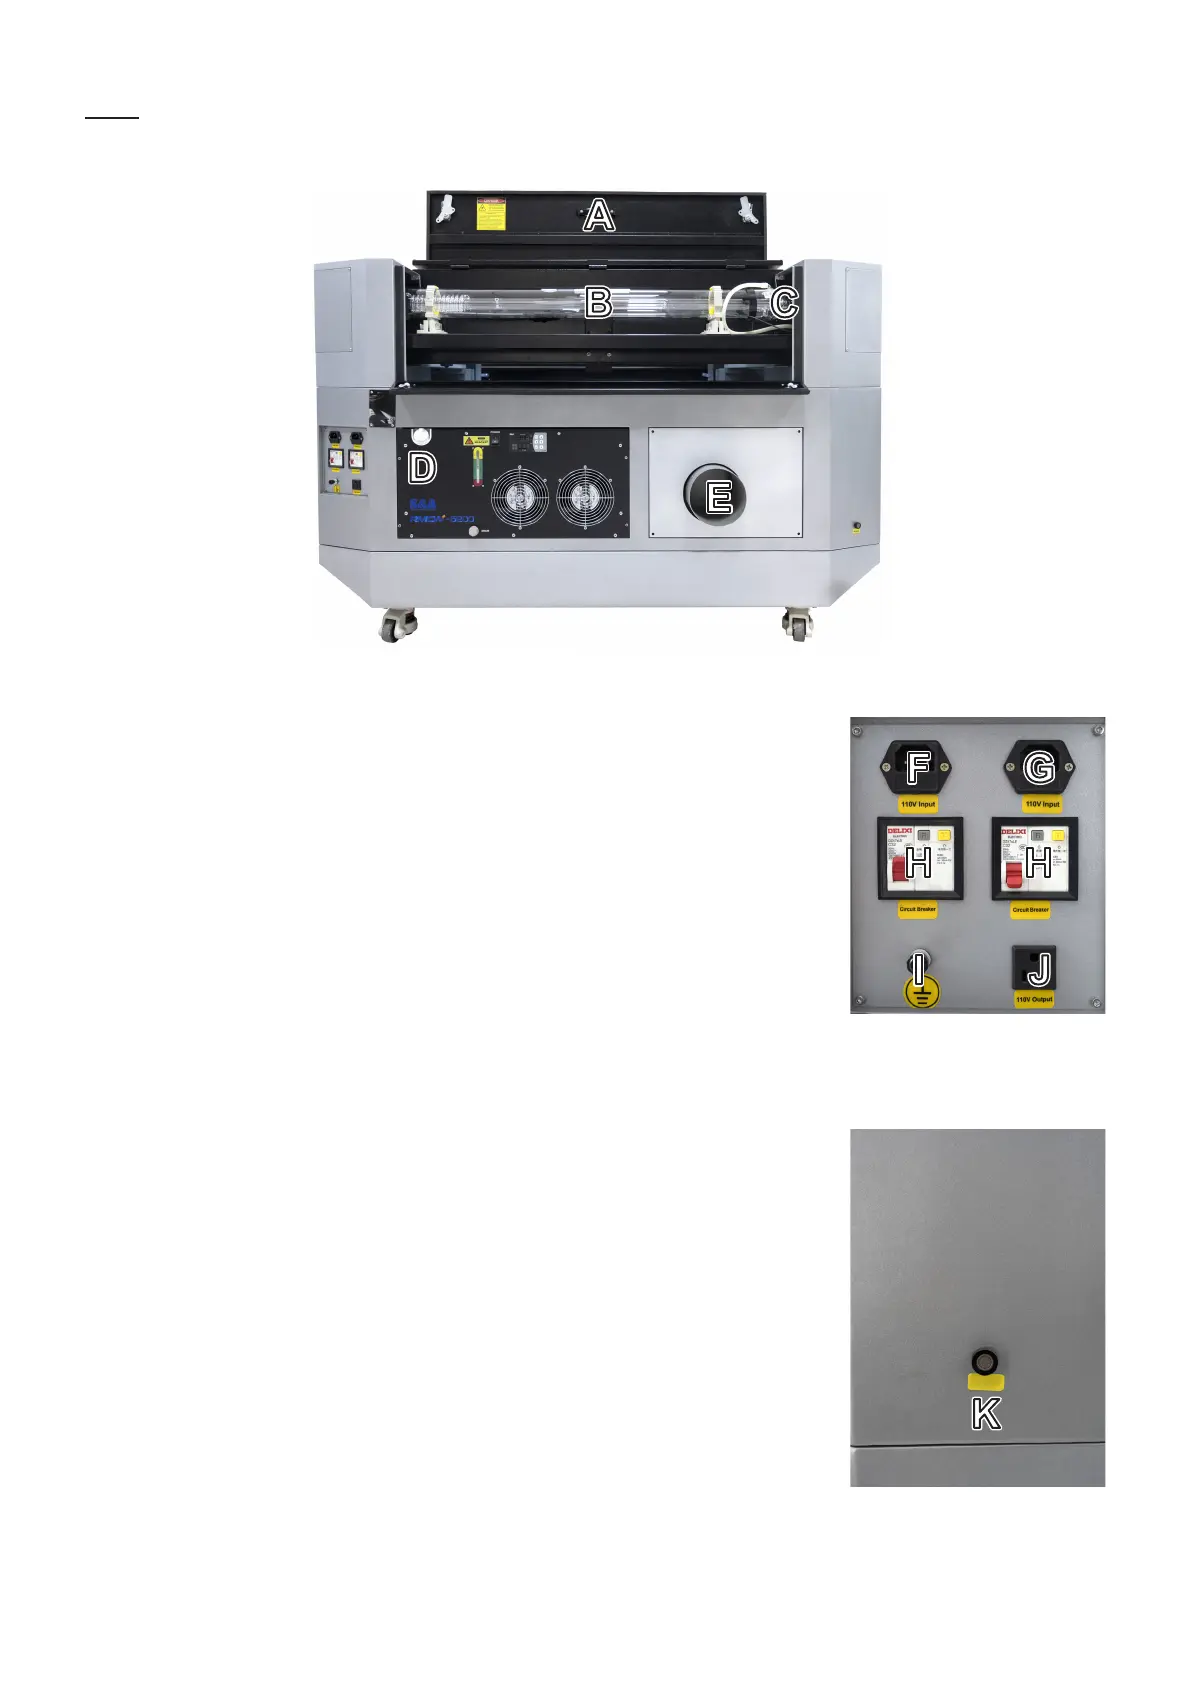
Rear
A. Rear Access Door—This door provides access to the laser bay, including the
laser tube, its brackets, its electrical and cooling water connections, and the 1st
mirror.
B. Laser Tube—During use, the gas mixture inside this long glass tube produces
a powerful laser. Although the active laser should be directed into the main
bay, its reections may remain dangerous. Wear laser glasses while the tube is
active.
C. Laser Tube Connections—These wires and tubes should come fully
preconnected.
D. Integrated Water Chiller—This water chiller cools the laser tube without the
need for other accessories.
E. Exhaust Vent—This vent should be connected to the fan to pull gases and
airborne debris from the workbed.
F. Main Power—This port powers the engraver itself.
G. Chiller Power—This port powers the integrated chiller.
H. Circuit Breakers—These are the main power switches for the engraver.
They should be ipped o between sessions, as well as during any repair or
maintenance. The left one controls the main power while the right controls the
chiller.
I. 110V Supply—This outlet can be used to power the fan, although it is best to
use a dierent circuit if possible.
J. Ground—This port can be used to electrically ground the engraver if standard
three-prong outlets are unavailable.
K. Air Intake—This port connects to your air assist to provide clean air for the
laser head, which in turn extends the service life of the air assist pump.
Air Intake