5
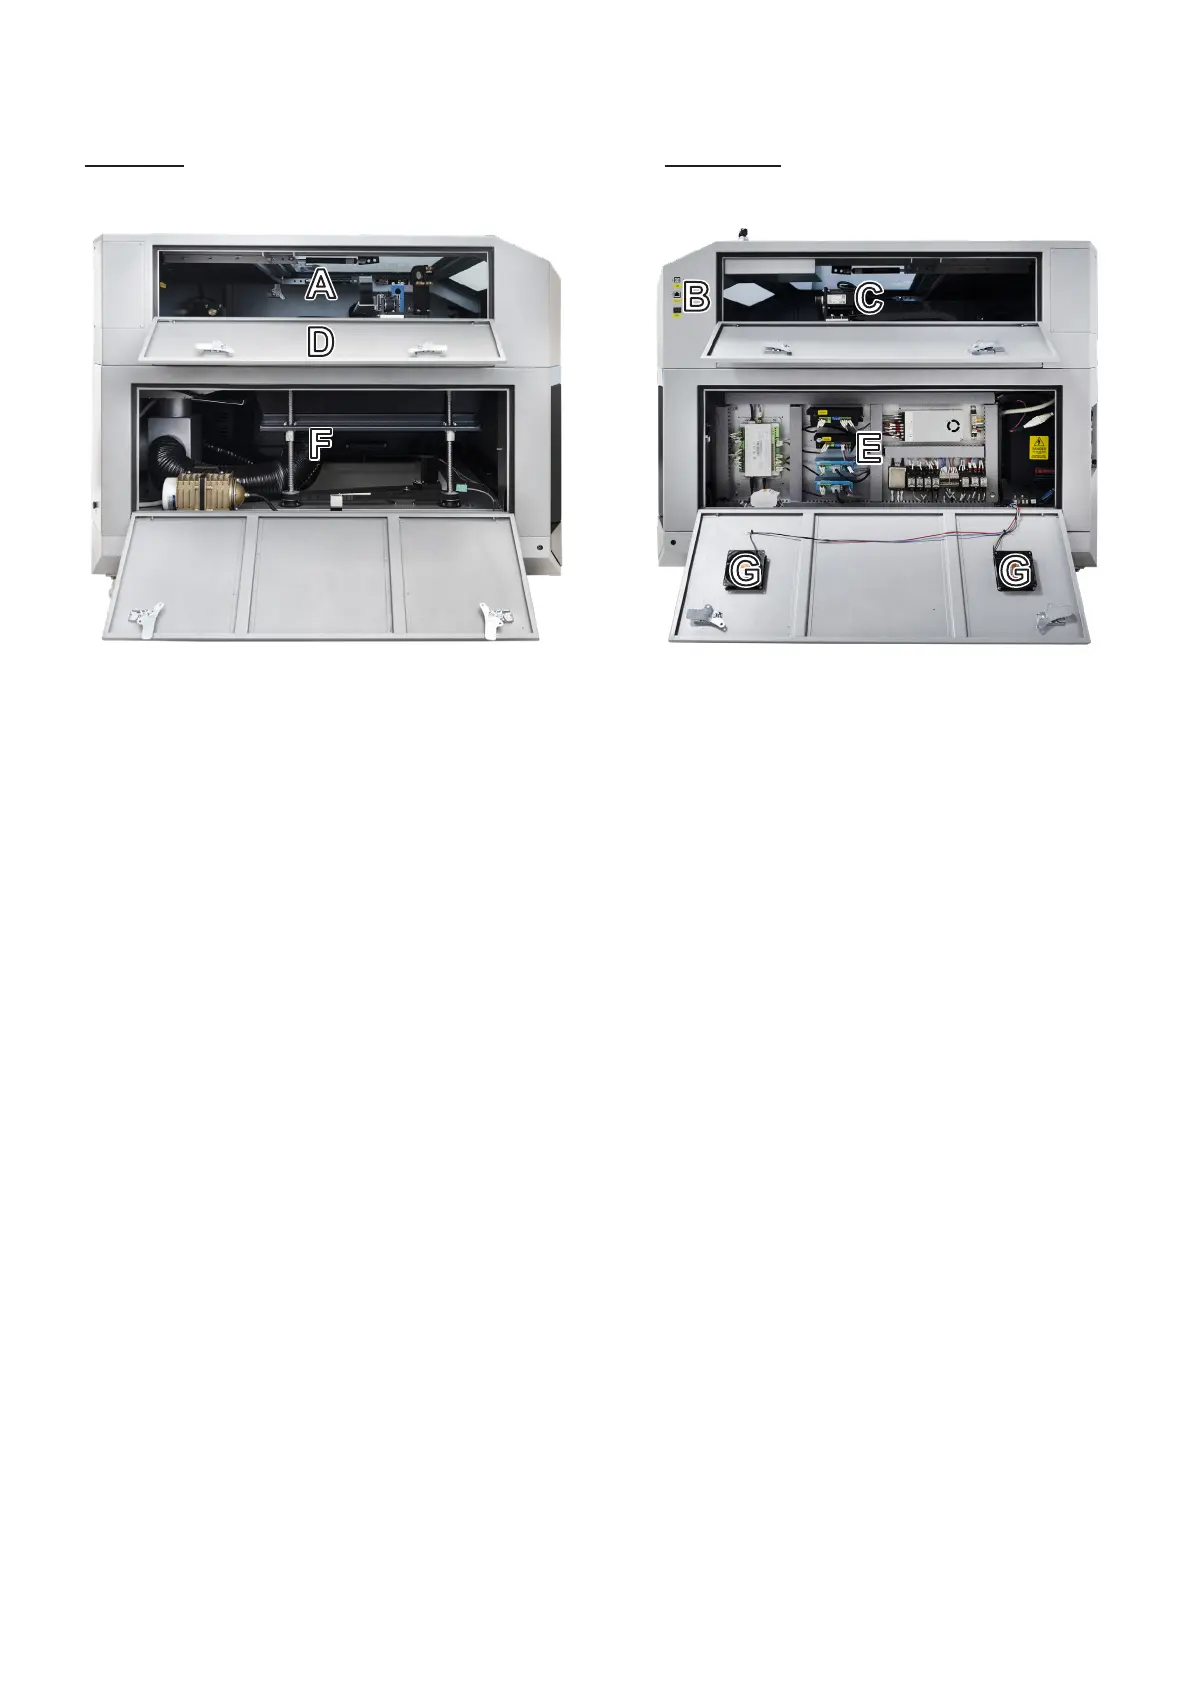
A. Top Left Access Door—This door provides access to the left Y-axis rail and the 2nd mirror. For all of the
engraver’s access doors, unlock, open, and rotate the handles found on each end together. When the latches are
freed, carefully support the door as it opens to avoid damage.
B. Connection Ports—These ports provide direct USB cable connection to the control computer and ethernet
connection to any wireless router. The power switch here turns on the engraver’s LED lighting.
C. Top Right Access Door—This door provides access to the right Y-axis rail and its motor.
D. Side Pass-Through Doors—These doors open to allow larger pieces of material to be fed through the workbed.
When open, care must be taken to avoid exposure to the laser beam or its reection.
E. Bottom Left Access Door—This door provides access to the waste bin under the workbed and the air assist
pump, regulator, and digital control. It also provides access to the Z-axis motor and the large screws that the
workbed moves up and down. These should be lubricated as needed, typically once a month or every few months.
F. Bottom Right Access Door—This door provides access to the electronics bay with the mainboard, laser power
supply, and other electrical connections. Always remember to make any adjustment to these components when
the engraver is turned o and FULLY disconnected from its power supply. The connection between the laser
power supply and the laser tube is extremely high voltage and extremely dangerous.
G. Cooling Fans—These two fans help keep the engraver’s electronic components from overheating. Be sure that
they are well ventilated and completely unobstructed during use.
Left Side Right Side