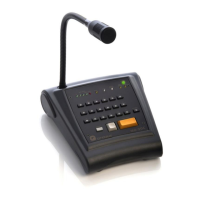
Control central and
paging desk
7.4. Connection to the installation network
1. Before connecting the desk, configure the IP address by means of the DIP switches on the underside
of the unit (see section 5).
2. Using the cables supplied with the desk, make the connections between the desk and the CC-600ETH
connection box.
3. Connect the junction box to the IP network.
4. Connect the power supply to the connection box.
7.5. Sending configurations to the desk
Before sending configurations to any equipment unit, it is advisable to save the configuration. To do this,
open the File menu and select Save.
1. On the installation tree, right click with the mouse on the DC-600ETH that has just been configured
and select the option Send configurations.
2. A progress bar appears. Upon completion, click on OK.
You can exit the installation screen by opening the File menu and selecting Exit. The P.A. Manager
software will start up automatically.
7.6. Editing the configured parameters
If required, the configurations of the desk can be edited. Proceed as follows:
1. Open the installation screen of the P.A. Manager software.
2. In the installation structure, right click with the mouse on the name of the DC-600ETH desk whose
configuration you wish to edit.
3. Select Edit Equipment.
4. The desk configuration window appears. Edit the parameters as required.
5. Once the parameters have been configured, click on the button OK.
6. Save the configuration by opening the File menu and selecting Save.
7. Send the configurations to the unit (Section 7.5).
ATTENTION: WHEN CONNECTING THE CC-600ETH BOX TO THE IP NETWORK, ENSURE THAT THE CONNECTORS MARKED “TO
SWITCH” ARE USED. IF THE CONNECTORS MARKED “TO OPTIMUS EQUIPMENT” ARE USED IN ERROR, THE SWITCH OR ROUTER IN THE
INSTALLATION MAY BE DAMAGED.