Install the Server
3.
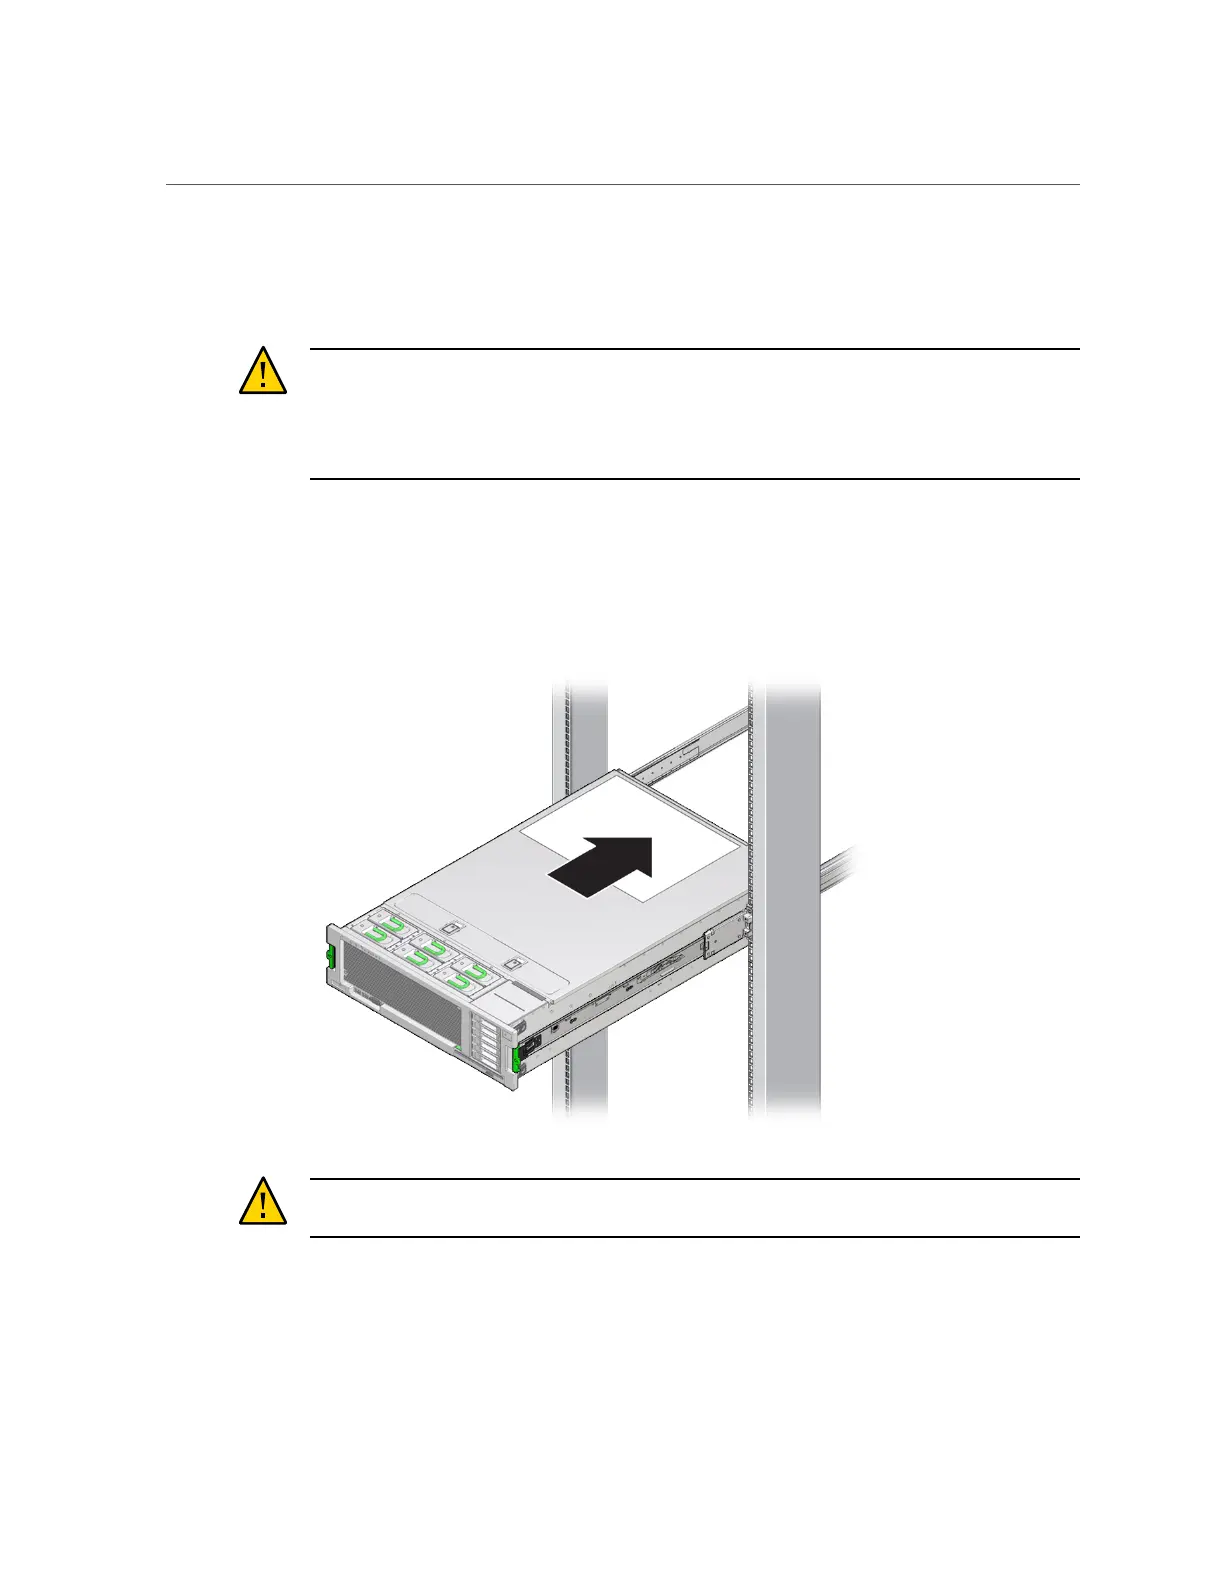
Insert the mounting brackets into the slide rails, and then push the server
into the rack until the mounting brackets encounter the slide rail stops
(approximately 12 inches, or 30 cm).
Caution - When inserting the server into the slide rail, ensure that both the top and bottom
mounting lips of the mounting brackets are inserted into the slide rail. The server should slide
forward and backward easily if correctly installed. If the unit does not slide easily, ensure that
each mounting lip is inserted properly. If the mounting brackets are not inserted properly, the
unit might fall when it is removed from the rack.
4.
Simultaneously push and hold the green slide rail release buttons on each
mounting bracket while you push the server into the rack.
Continue pushing until the slide rail locks (on the front of the mounting brackets) engage the
slide rail assemblies. You will hear an audible click.
Caution - Verify that the server is securely mounted in the rack and that the slide rail locks are
engaged with the mounting brackets before continuing.
Related Information
■
“Disassemble Slide Rails” on page 27
■
“Install the Rackmount Hardware” on page 28
34 SPARC T7-2 Server Installation Guide • March 2016

 Loading...


