59
Removing the tire from the wheel
Never use sharp object or a screwdriver to remove the tire. Use your hands or tire levers.
- Completely deate the inner tube.
- Squeeze the sides of the tire around the entire rim.
- Starting with the area opposite the valve, start removing the tire from the rim.
- Continue removing the tire around the rim until it is completely free.
- Remove the tire and the inner tube.
Installing the tire
If you are repairing a puncture, repair the punctured area with a patch or replace the inner tube.
Follow the inspection procedure in the wheels section to check the rim and inner part of the
wheel.
If you are replacing an inner tube or tire, make sure the new tire is the same size as the pre-
vious one, or ask your authorized dealer about compatible options. You will be able to nd the
size on the side of the tire.
- Slightly inate the inner tube.
- Position the inner tube in the tire.
- Insert the valve through the opening in the rim.
- Starting at the valve, insert the tire into the rim.
- Push the tire until it is completely installed with the inner tube inside the tire, and the tire
inside the rim. Be careful not to pinch the inner tube in the tire or rim.
- Inate the tire halfway and check that the tire is properly t into the rim.
- Inate the tire to the pressure indicated on the side.
Installing the wheel
Follow the instructions on how to install the wheel in the wheels chapter.
Follow the instructions for closing the brake in the braking system section.
8. REFLECTORS
Introduction
The reectors of your bicycle reect light shone on them. In conditions of low visibility, if a
vehicle comes close to you with the lights on, the reectors will help you be seen. Reectors are
an important part of the safety system. Therefore, you must not remove them.
Inspection
Every three months, make sure that all nuts and bolts holding the front, rear and pedal reec-
tors are correctly positioned and attached. Check that the front and rear reectors are properly
positioned and perpendicular to the ground. You must also check that all reective surfaces are
clean and in good condition. The rear reector must be at least 75 mm below the saddle.
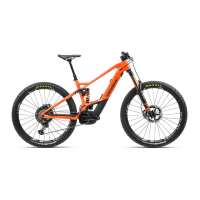
9. SUSPENSION SYSTEMS
Suspension systems: Forks
Suspension forks allow the front wheel to move in way that absorbs the shock from irregularities
in your path and reduce the vibrations you feel.
Suspension forks must be regularly lubricated so that they can work smoothly and have a
long service life. The section below is complementary to the information provided by the fork
supplier. If you have not received said information, you can download it from the supplier’s
website or contact us.
Inspection
Before every use, make sure the suspension fork is working correctly. Never use the bicycle if
there is not enough space between the fork and the wheel.
Adjustment
The suspension fork preload setting can be modied, as can the damper and coil spring speed.
Changing the characteristics of the suspension fork will have an impact on the headset and
braking system of your bicycle. After making any changes, ride in an area that is at and free of
trafc, so that you can check and familiarize yourself with your bike’s new performance.
Lubrication
Follow the lubrication and maintenance instructions in the suspension fork manual.
WARNING An improper adjustment of the suspension fork could cause you to lose control and
fall. Make sure the suspension fork bolts are properly adjusted, and that the distance between
the tire and fork is adequate.
Suspension systems: rear suspension
Rear suspension allows for a vertical movement of the rear wheel to absorb the shock from
irregularities in your path and reduce the vibrations you feel.
The section below is complementary to the information provided by the suspension supplier.
If you have not received said information, you can download it from the supplier’s website or
contact us.
For optimum performance of your rear suspension system, the maintenance and care for each
one its parts is very important:
- Frame
- Swing arm
- Bearings
- Mounting components
- Rear shock