Made in the U.S.A.
TOOLING OPTIONS AND INSTALLATION
INSTALLATION OF AIR DIFFUSER
AND AIR DIFFUSER MOUNT
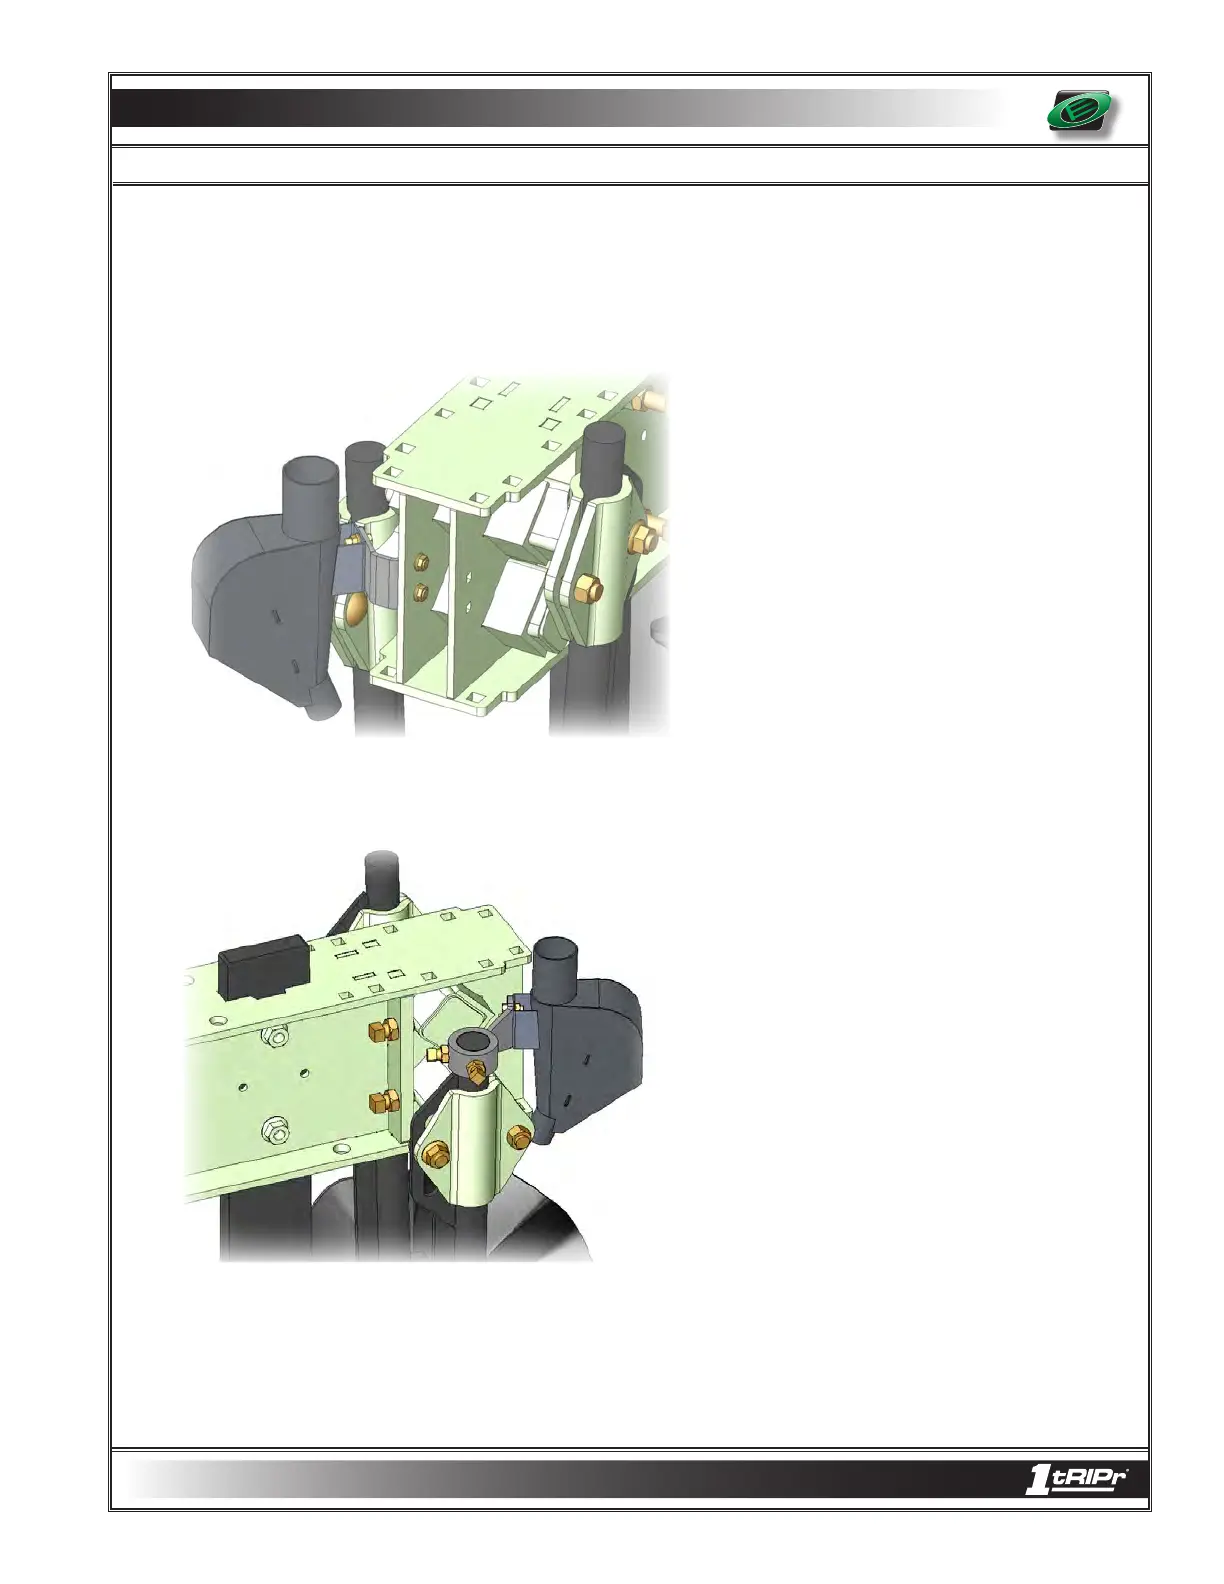
There are two different types of Orthman Air Diffuser mounts.
Mount style 1 is only for use with 1tRIPr® row units
that have been produced in 2009 or later. To install this
mount remove two 5/16” carriage bolts from the Dif-
fuser and mount package. Align two square bolt holes
on mount bracket with two square bolt holes on row unit
tail. Tighten with 1/2” end wrench. This mount can be
utilized on either side of the tail. The Air Diffuser and
mount package comes from Orthman Manufacturing
ready to install on the left side of the 1tRIPr® row unit
tail. Diffuser mount will need to be removed from the
diffuser and flipped over to be installed on the right
side.
Mount style 2 is for use with any 1tRIPr® row unit ever
produced, and will most likely be received if you have
purchased an Orthman Atlas Lifting Cart, or other ma-
chine lifting device. This is due to the fact the purchas-
ers of these lifting devices may already own 1tRIPr®
machines produced before 2009 that do not have the
mount holes in the tail for mount style 1. Contact
Orthman Manufacturing for Diffuser mount options.
To install this mount, loosen jam nuts and set screws
and slide the round part over the top of the left or right
round wavy coulter shank, set the preferred angle, and
then re-tighten the set screws and jam nuts. This Air
Diffuser and mount package may come assembled
from Orthman Manufacturing ready to install on the
left side of the 1tRIPr® row unit. Diffuser mount may
need to be removed from the diffuser and flipped over
to be installed on the right side.
4 - 7
 Loading...