Step3: Use the directional controls in steps to create a curve
inconjuction with the azimuth.
Note: The PTZ will reverse from the end of the boundary scan back to the
starting position as a completion of one tour cycle.
Figure 2.17 Boundary Scan Setup
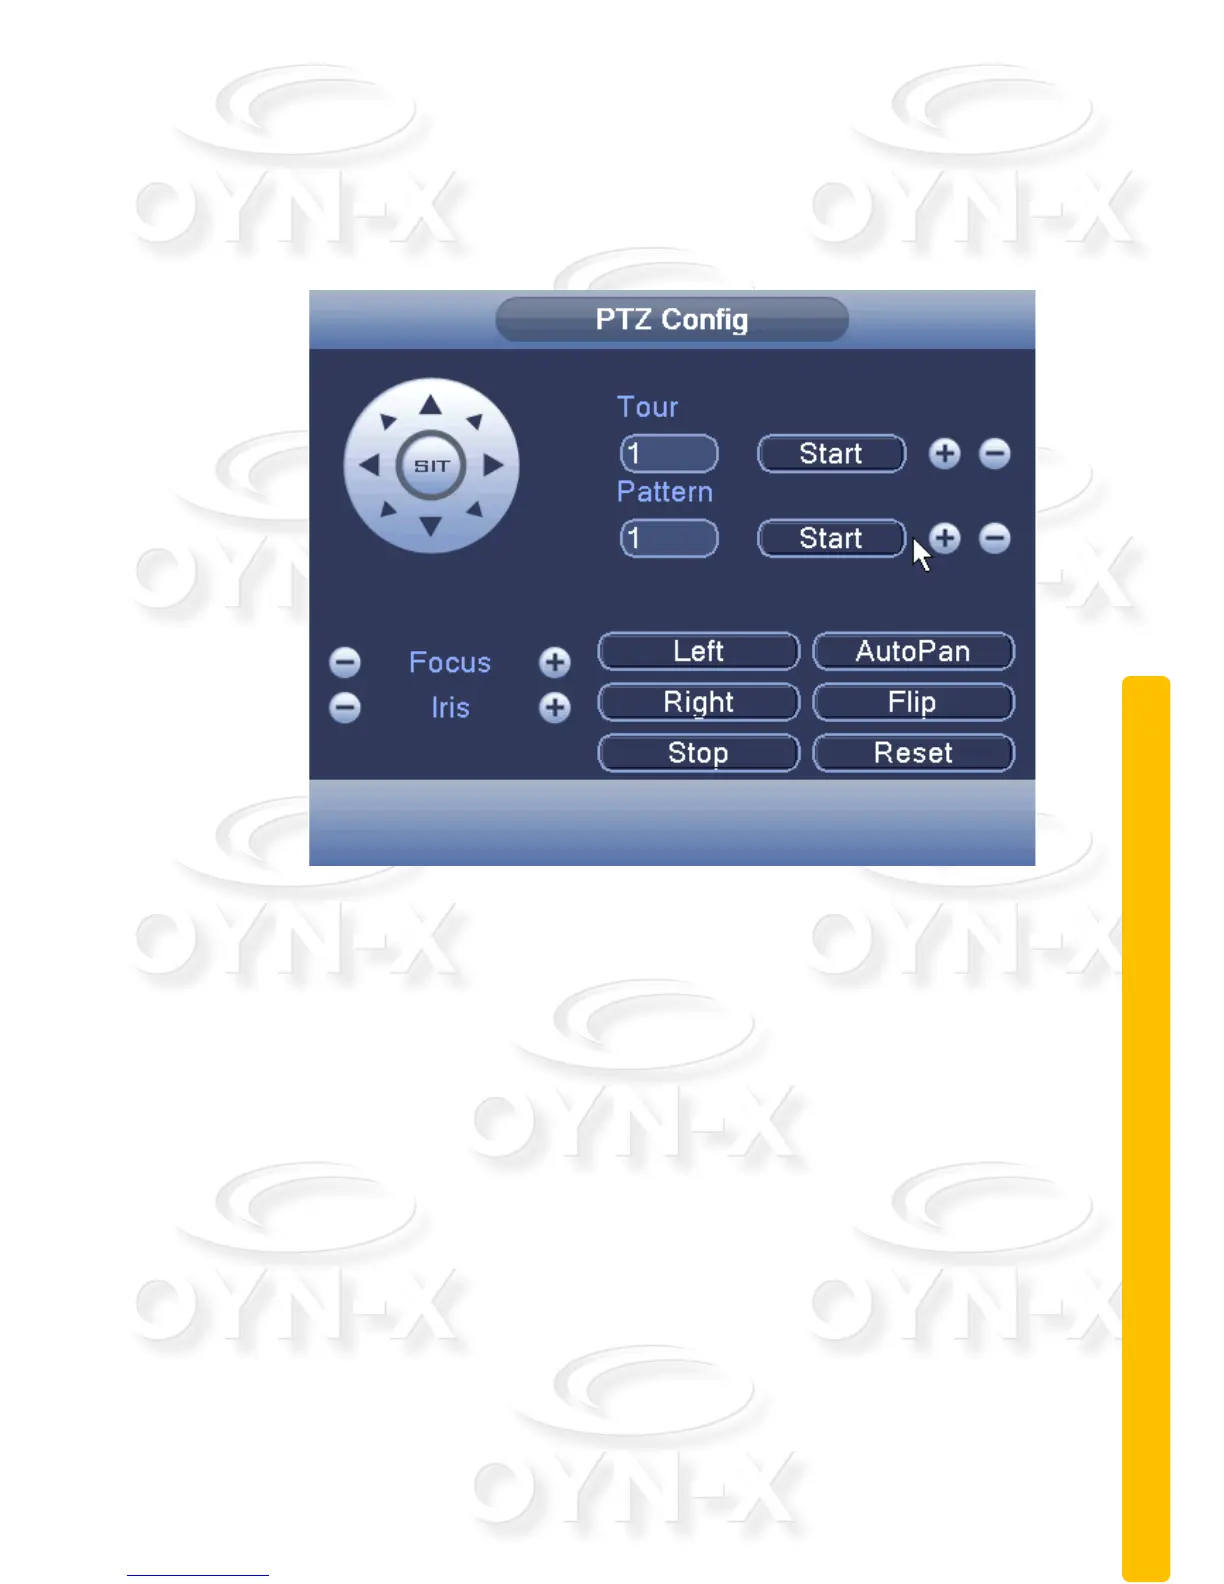
Boundary Scan Calls: In Figure 2.12, click the Page Switch button,
then enter PTZ control menu as shown in Figure 2.13. Please input the
number of the scan into the blank field, then click the Scan button, the
PTZ begins to work along the preset scan line. Click Stop button to stop
PTZ movement.
Horizontal Rotating: Click either of the left or right directional arrows to
begin horizontal rotation. The PTZ begins to rotate horizontally (relative
to the original position of the camera). Click the Stop button to stop.
Reset: The reset button will cause the PTZ to restart and all the data
clears to 0.
Page Switch: In Figure 2.12 click the Page Switch button until you get
to the menu shown in Figure 2.18, which sets the auxiliary function.