Chapter 1 Preparation — About your projector
ENGLISH - 25
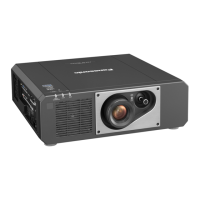
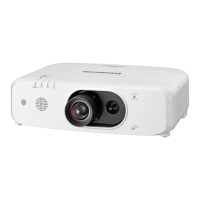
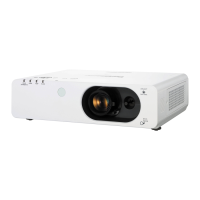
About your projector
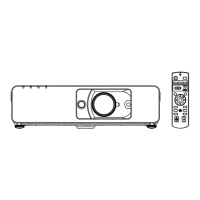
Remote control
1
2
5
4
6
7
8
16
18
17
9
10
3
12
13
4
11
14
15
22
23
19
20
21
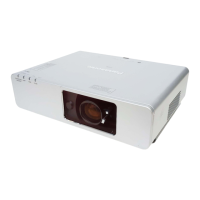
Front
Top
Bottom
1 Power <
v
/
b
> button
(
v
: Standby,
b
: Power on)
Sets the projector to the state where the projector is turned
o (standby mode) when the <MAIN POWER> switch on the
projector is set to <ON> and in projection mode.
Sets the projector to projection mode when the power is switched
o (standby mode).
2 Remote control indicator
Blinks if any button in the remote control is pressed.
3 <MENU> button/<RETURN> button/<ENTER> button/
asqw
buttons
Used to navigate through the menu screen. (
x
page 61)
asqw
buttons are also used to enter the password in
[SECURITY] or enter characters.
4 <VOL
-
> button/<VOL+> button
Adjusts the volume of audio output. (
x
page 55)
5 <DEFAULT> button
Resets the content of the sub-menu to the factory default.
(
x
page 62)
6 Input selection buttons (<HDMI 1>, <HDMI 2>, <DIGITAL
LINK>, <COMPUTER>)
Switches the input signal to project. (
x
page 50)
7 Number (<0> - <9>) buttons
Used for entering an ID number or a password in a multiple
projector environment.
8 <ON SCREEN> button
Switches the on-screen display function on (display) or o (hide).
(
x
page 55)
9 <ID ALL> button
Used to simultaneously control all the projectors with a single
remote control in a multiple projector environment. (
x
page 29)
10 <ECO> button
Displays the setting screen relating to ECO management.
(
x
pages 58, 104)
11 <AUTO SETUP> button
Automatically adjusts the image display position and signal level
while projecting the image.
[PROGRESS] is displayed while in automatic adjustment.
(
x
page 55)
12 <FUNCTION> button
Assigns a frequently used operation as a shortcut button.
(
x
page 57)
13 <CEC> button
Displays the HDMI-CEC operation screen. (
x
page 123)
14 <TEST PATTERN> button
Displays the test pattern. (
x
page 57)
15 <ID SET> button
Sets the ID number of the remote control in a multiple projector
environment. (
x
page 29)
16 <GEOMETRY> button
Used to correct the distortion of the projected image. (
x
pages
56, 76)
17 <FREEZE> button
Used when pausing the image and turning o the audio.
(
x
page 55)
18 <STATUS> button
Displays the projector information.
19 <SHUTTER> button
Used when temporarily turning o the image and audio.
(
x
page 54)
20 <MUTE> button
Used when temporarily turning o the audio. (
x
page 54)
21 <ASPECT> button
Switches the aspect ratio of the image. (
x
page 57)
22 Remote control signal transmitter
23 (Not available with this projector)

 Loading...