Chapter 3 Basic Operations — Projecting
ENGLISH - 51
Switching the input by displaying the input selection screen
The input for projection can be selected by displaying the input selection screen using the <INPUT SELECT>
button on the control panel.
1) Press the <INPUT SELECT> button on the control panel.
f
The input selection screen is displayed.
INPUT SELECT
COMPUTER
HDMI1
HDMI2
DIGITAL LINK
SELECT
SET
ENTER
2) Press
as
to select the input for projection, and press the <ENTER> button.
Note
f
The input can also be switched by pressing the <INPUT SELECT> button while the input selection screen is displayed.
The input will switch each time you press the <INPUT SELECT> button.
f
If the optional DIGITAL LINK output supported device (Model No.: ET-YFB100G, ET-YFB200G) is connected to the projector, the input
selection menu for the DIGITAL LINK output supported device is displayed when the <ENTER> button is pressed while the DIGITAL LINK
input is selected in the input selection screen.
f
If the optional DIGITAL LINK output supported device (Model No.: ET-YFB100G, ET-YFB200G) is connected to the projector, the DIGITAL
LINK logo and the input name selected in the DIGITAL LINK output supported device are displayed in the display section of the [DIGITAL
LINK] in the input selection screen.
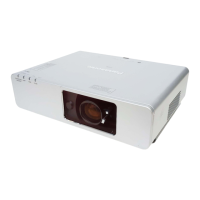
Adjusting the image
Adjust the position, size, and focus of the projected image.
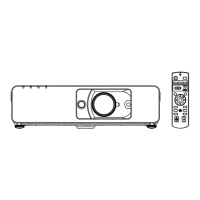
Lens shift lever
Zoom ring
Focus ring
Fig. 1 Fig. 2
1) Adjust the projection angle.
f
Install the projector on a at surface so that the front of the projector is parallel to the screen surface,
making the projected image rectangular.
f
If the projector is tilted downward than the screen, extend the adjustable feet so that the projected image
becomes rectangular.
f
Refer to “Adjusting adjustable feet” (
x
page 52) for details.
2) Turn the lens shift lever counterclockwise and release the fixing of the lens shift lever.
3) Adjust the lens shift. (Fig. 1)
f
Adjust the position of the projected image by operating the lens shift lever.
f
Refer to “Lens shift range” (
x
page 52) for details.
4) Turn the lens shift lever clockwise to fix.
5) Adjust the zoom and the focus. (Fig. 2)
f
Adjust the size of the projected image by turning the zoom ring.
f
Adjust the focus by turning the focus ring.

 Loading...