48
9.22. Disassembly of PCB Block
• Refer to “Disassembly of Stand Unit”.
• Refer to “Disassembly of CD Door Assembly”.
• Refer to “Disassembly of Net Frame Assembly”.
• Refer to “Disassembly of Front Panel Block”.
• Refer to “Disassembly of Top Ornament Unit”.
• Refer to "Disassembly of Traverse Unit”
• Refer to "Disassembly of USB P.C.B.”
• Refer to "Disassembly of Headphone/AUX P.C.B.”
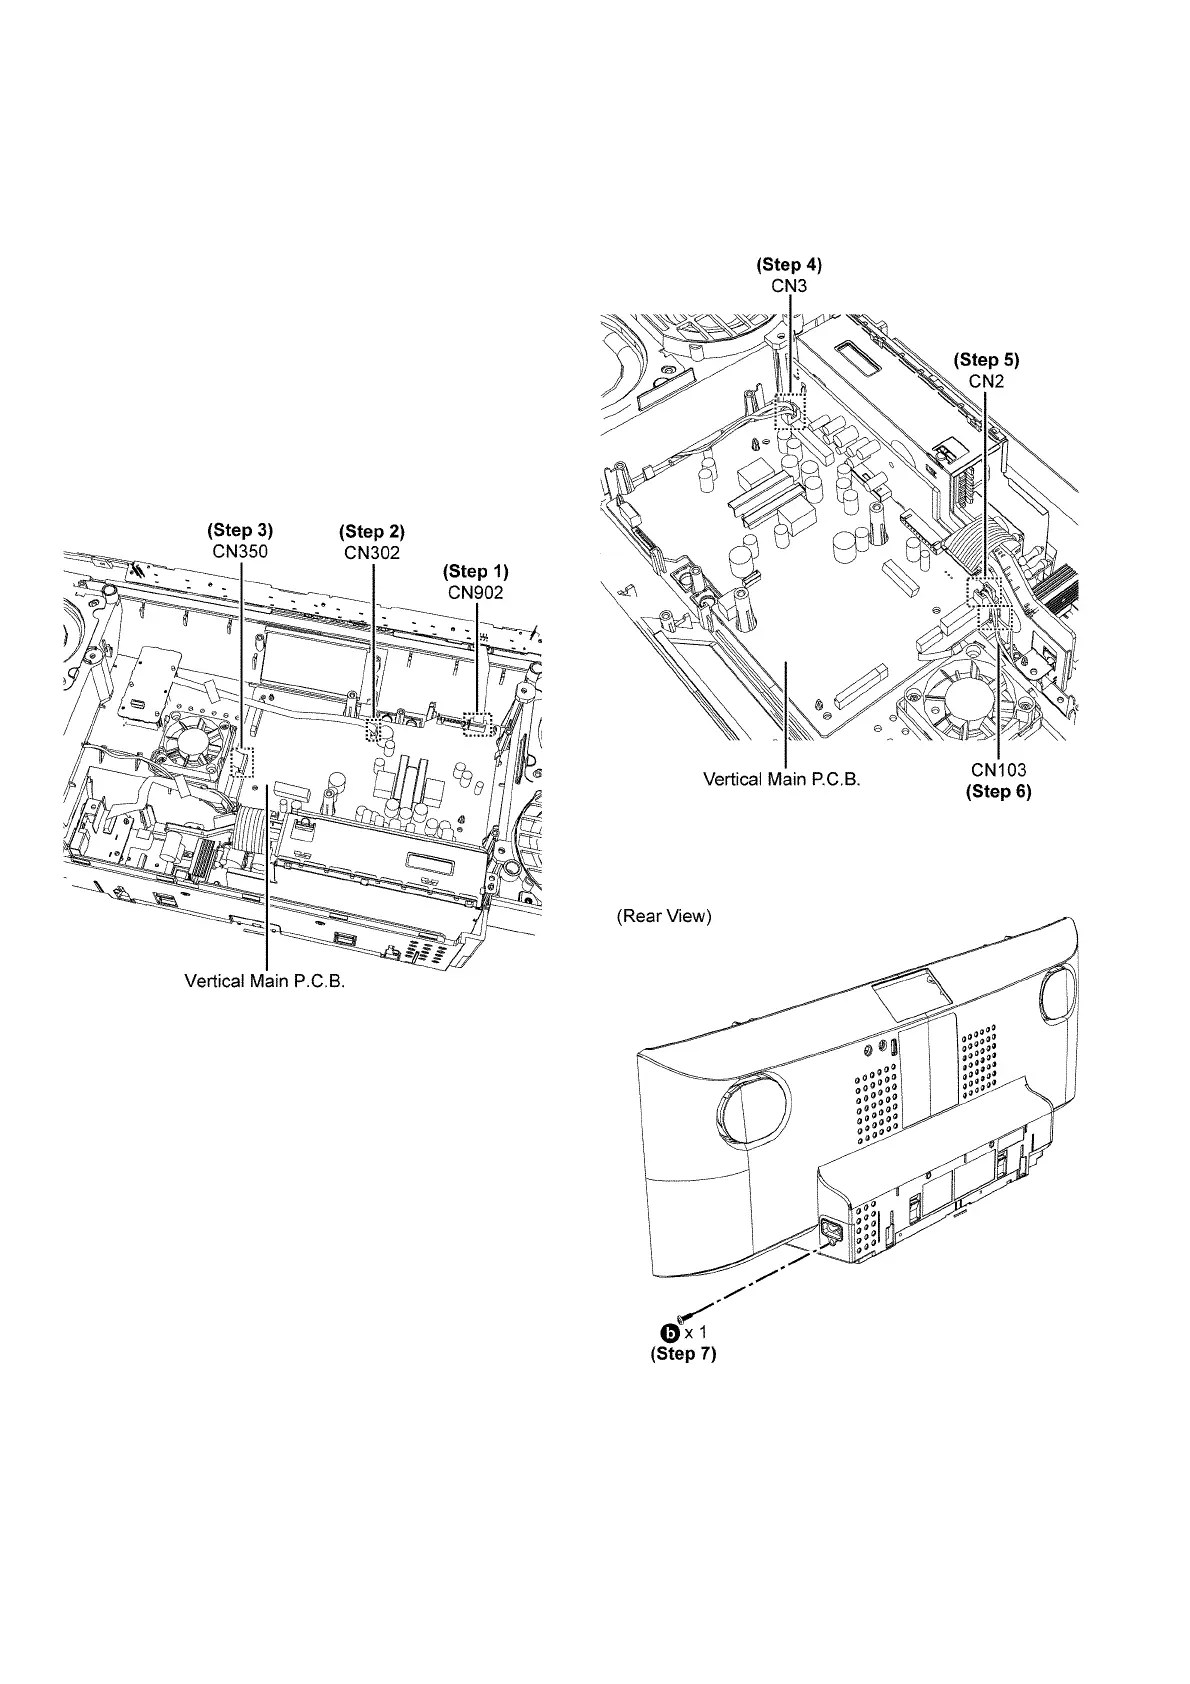
Step 1 : Detach 7P FFC at the connector (CN902) on the Verti-
cal Main P.C.B..
Step 2 : Detach 12P FFC at the connector (CN302) on the Ver-
tical Main P.C.B..
Step 3 : Detach 9P FFC at the connector (CN350) on the Verti-
cal Main P.C.B..
Step 4 : Detach 2P wires at the connector (CN3) on the Vertical
Main P.C.B..
Step 5 : Detach 2P wires at the connector (CN2) on the Vertical
Main P.C.B..
Step 6 : Detach 2P wires at the connector (CN103) on the Hor-
izontal Main P.C.B..
Step 7 : Remove 1 screw.