53
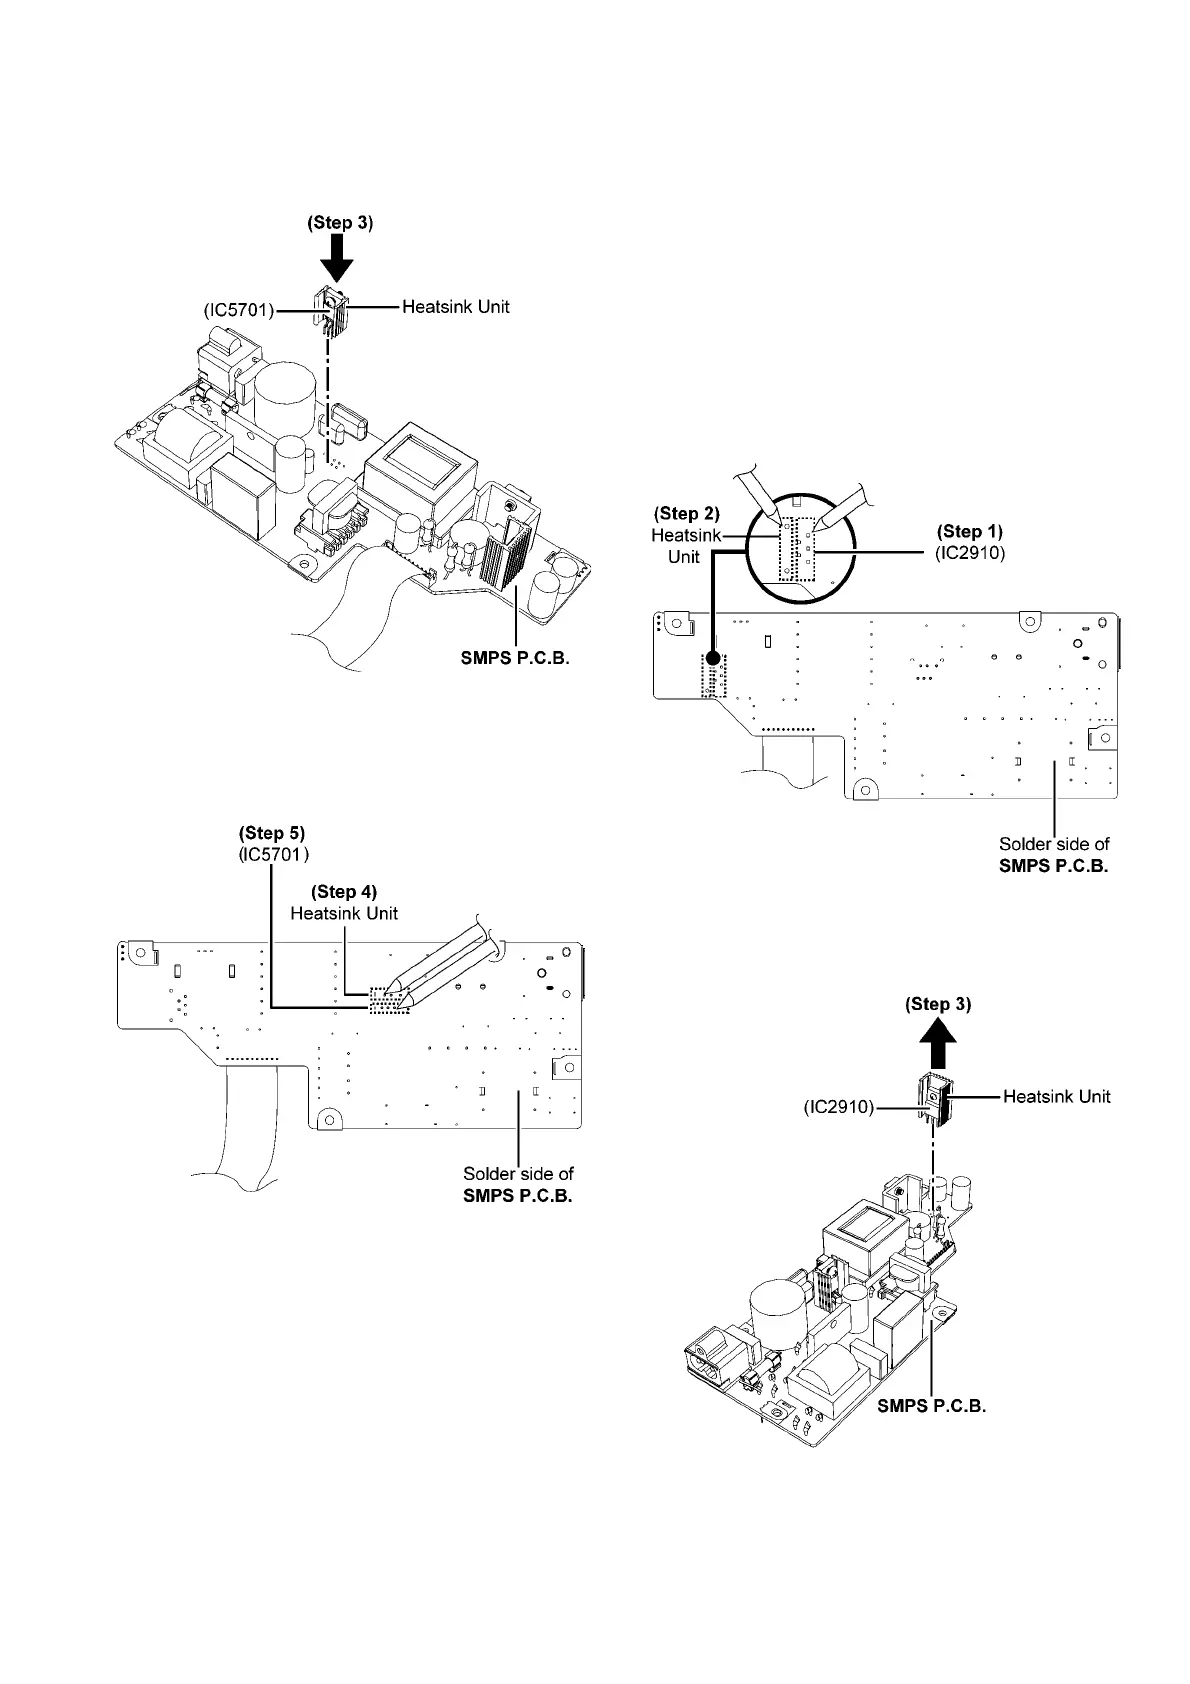
Step 3 : Mount the Switching Regulator IC (IC5701) onto
SMPS P.C.B.
Caution : Ensure the Switching Regulator IC (IC5701) is
seated properly on the SMPS P.C.B..
Step 4 : Solder pins of the Heatsink Unit.
Step 5 : Solder pins of the Switching Regulator IC (IC5701).
Caution : Ensure the Switching Regulator IC (IC5701) is
seated properly onto the SMPS P.C.B. before soldering.
9.25. Replacement of Voltage Regu-
lator IC (IC2910)
• Refer to "Disassembly of SMPS P.C.B.".
9.25.1. Disassembly of Voltage Regulator
IC (IC2910)
Caution : Handle the heatsink unit and P.C.B. with caution
due to its high temperature after prolonged use. Touching
it may lead to injuries.
Step 1 : Desolder pins of Voltage Regulator IC (IC2910) on the
solder side of SMPS P.C.B..
Step 2 : Desolder pins of Heatsink Unit on the solder side of
SMPS P.C.B..
Step 3 : Remove the Heatsink Unit with the Voltage Regulator
IC (IC2910).