Install Drivers for 9000 Boards
24
Start Copying Files screen appears. Select "Next" to copy files to the
system.
Setup Complete screen appears. Select "Finish". “Restarting Windows”
screen appears, choose “Yes, I want to restart my computer now,” and
“OK”.
3.4.2. Configure PenMount Windows 98/ME Driver
Upon restarting, the computer finds the new 9000 control board
automatically. The touch screen is connected but not calibrated. Follow the
procedures below to run the calibration.
1. After installation, click PenMount Monitor icon “PM” in the notification
area.
2. When PenMount Control Panel appears, click “Calibrate”.
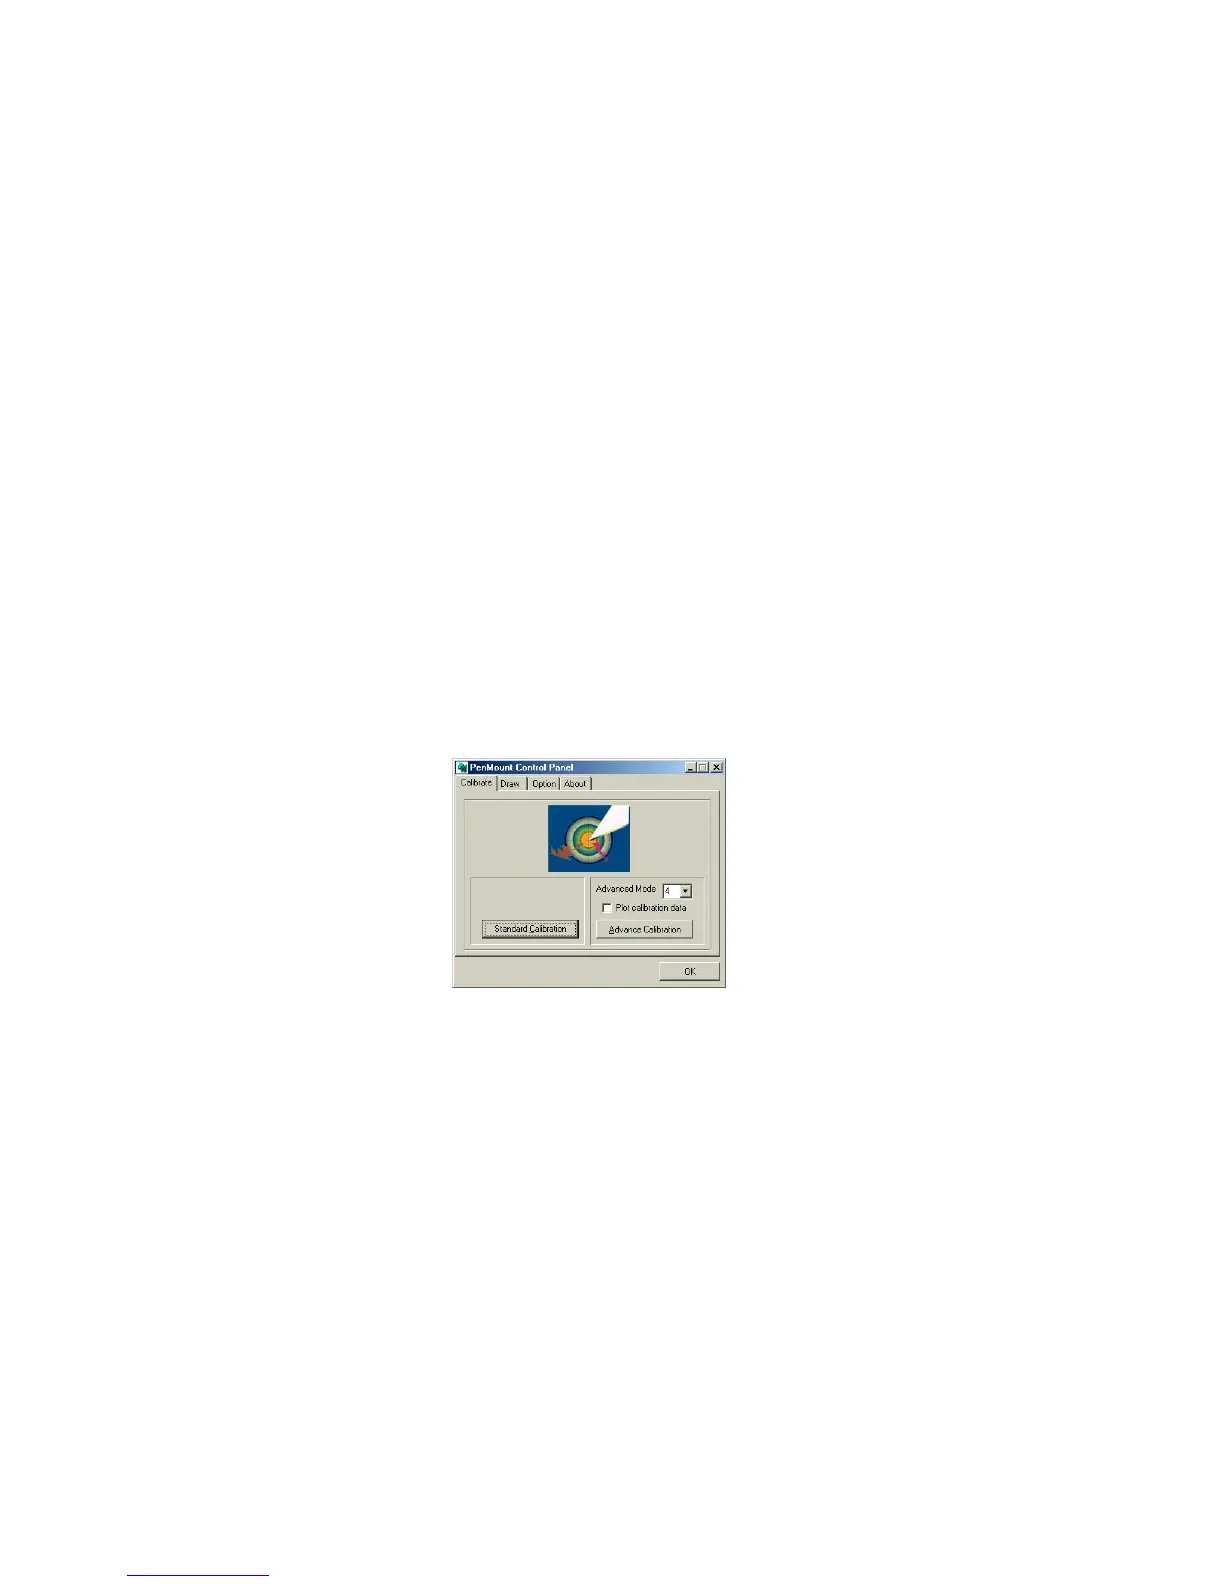
3.4.2.1. PenMount Control Panel
The functions of PenMount Control Panel are explained in the
following sections.
Calibrate
This function offers two ways to calibrate your touch screen.
‘Standard Calibration’ adjusts most touch screens. ‘Advanced
Calibration’ adjusts aging touch screens.
Standard Calibration
Click this button and arrows appear
pointing to red squares. Use your finger
or stylus to touch the red squares in
sequence. After the fifth red dot of
calibration is complete. To skip, press
‘ESC’.
Advanced Calibration
Advanced Calibration uses 4, 9, 16 or
25 points to effectively calibrate touch
panel linearity of aged touch screens.
Click this button and touch the red
squares in sequence with a stylus. To
skip, press ‘ESC’.
NOTE: The older a touch screen is, the more Advanced Mode
calibration points it needs. Use a stylus to make the
Advanced Calibration for the best accuracy.