155
Shooting Settings
6
2
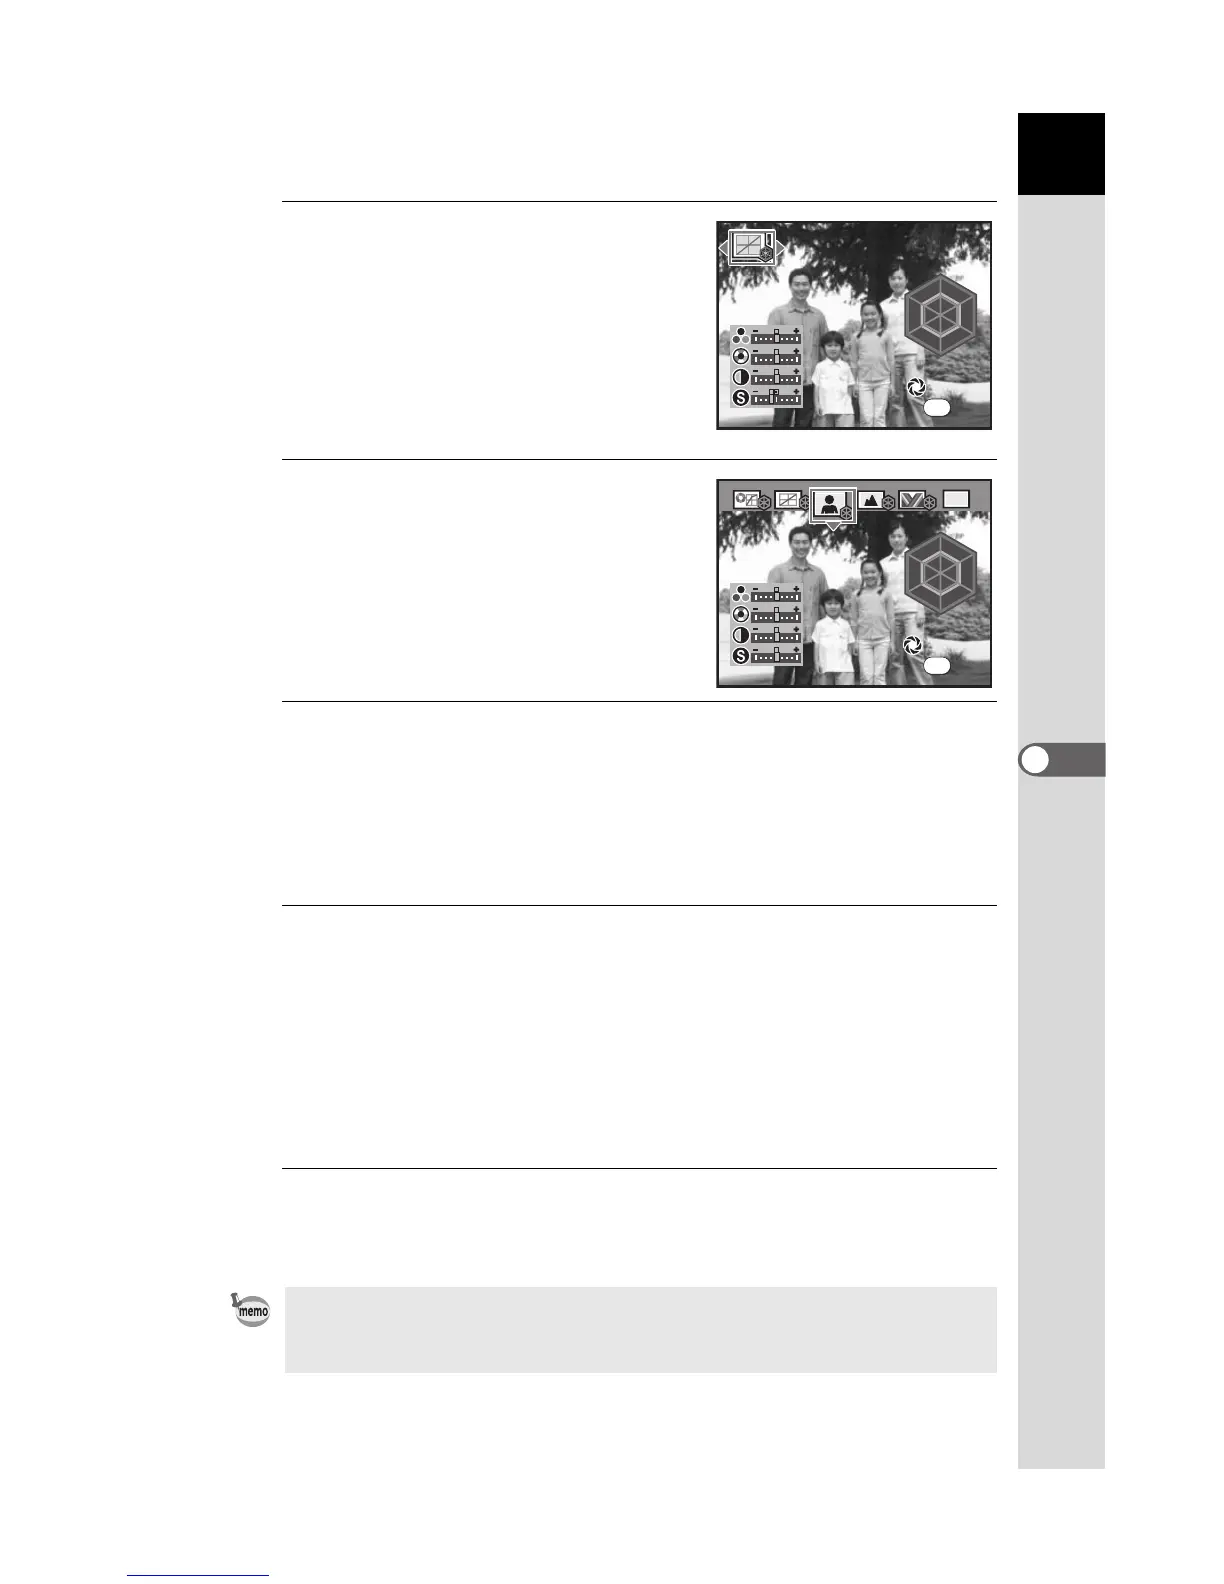
Press the 4 button.
The Custom Image screen appears.
After the power is turned on, the last
image taken is displayed in the
background. Set the main switch to
|
to
change the background image to the
Digital Preview image.
3
Use the four-way controller
(45) to choose the Image Tone.
4
Use the four-way controller (23) to choose the item you
want to change ([Saturation], [Hue], [Contrast],
[Sharpness]).
When Image Tone is set to [Monochrome], you can change the settings
for [Filter Effect], [Toning], [Contrast], and [Sharpness].
5
Use the four-way controller (45) to change the setting.
The background image changes according to the setting.
You can visually check the saturation and hue with the radar chart.
For [Sharpness], turn the rear e-dial toward y to change the setting to
[Fine Sharpness]. The image outlines are even thinner and sharper with
[Fine Sharpness], making it suited for capturing fine subjects such as
hair.
6
Press the 4 button.
The camera returns to the Capture mode.
You can save the background image with the current settings as a JPEG
image. Press the { button to display the image save confirmation screen, and
then select [Save as] and press the 4 button.
R
Y
G
C
B
M
OK

 Loading...